Slate How To Do It
Slate is a versatile and durable material that has been used for centuries in various applications, from roofing and flooring to writing and artistic expression. With its unique texture and natural beauty, slate has become a popular choice for many DIY projects and home renovations. However, working with slate can be intimidating, especially for those who are new to the material. To get started, it's essential to understand the basics of slate, including its composition, types, and characteristics. Once you have a solid foundation, you can move on to preparing the slate for use, which involves cleaning, cutting, and shaping the material to suit your needs. Finally, with the right techniques and tips, you can unlock the full potential of slate and create stunning pieces that showcase its natural beauty. In this article, we'll delve into the world of slate, starting with the fundamentals, so let's begin by understanding the basics of slate.
Understanding the Basics of Slate
Slate is a versatile and durable natural stone that has been used for centuries in various applications, from roofing and flooring to writing and artistic purposes. To understand the basics of slate, it's essential to delve into its composition, properties, and uses. In this article, we will explore the fundamentals of slate, including its types and characteristics, the tools and materials needed for working with slate, and its various uses. By understanding these aspects, individuals can appreciate the value and potential of slate in different contexts. From its metamorphic origins to its modern applications, slate is a fascinating material that deserves attention. So, let's start by examining what slate is and its uses, which will provide a solid foundation for further exploration.
What is Slate and Its Uses
Slate is a type of metamorphic rock that is formed when shale or mudstone is subjected to high pressure and temperature over millions of years. It is a dense, fine-grained, and foliated rock that is often gray or black in color. Slate has been used for centuries in various applications, including construction, architecture, and art. One of the most common uses of slate is as a roofing material, where it is valued for its durability, water resistance, and attractive appearance. Slate roofs can last for hundreds of years with minimal maintenance, making them a popular choice for historic buildings and homes. In addition to roofing, slate is also used as a flooring material, where it is prized for its slip-resistance and ease of maintenance. Slate is also used in the production of billiard tables, where its smooth surface and consistent density make it an ideal material for the game. Furthermore, slate is used in the manufacture of electrical components, such as switches and circuit breakers, due to its high electrical resistance and durability. In the world of art, slate is used as a medium for sculpture and engraving, where its fine grain and smooth surface make it an ideal material for creating intricate designs and patterns. Overall, slate is a versatile and highly valued material that has a wide range of uses in various industries and applications.
Types of Slate and Their Characteristics
Slate is a versatile and durable natural stone that has been used for centuries in various applications, from roofing and flooring to billiards and writing surfaces. There are several types of slate, each with its unique characteristics, advantages, and uses. The most common types of slate include Brazilian slate, Chinese slate, Indian slate, and Vermont slate. Brazilian slate is known for its high density and fine grain, making it ideal for flooring and wall cladding. Chinese slate, on the other hand, is often used for roofing due to its affordability and durability. Indian slate is prized for its vibrant colors and patterns, making it a popular choice for decorative applications. Vermont slate, quarried in the United States, is renowned for its exceptional quality and is often used for high-end architectural projects. Other types of slate include Spanish slate, Italian slate, and Welsh slate, each with its distinct characteristics and uses. Understanding the different types of slate and their characteristics is essential for selecting the right material for a specific project, ensuring a successful and long-lasting installation.
Tools and Materials Needed for Slate Work
To work with slate, you'll need a variety of specialized tools and materials. For cutting and shaping slate, a slate cutter or a diamond blade saw is essential. A slate cutter is a handheld tool with a tungsten carbide blade that scores the slate, allowing you to break it cleanly along the scored line. A diamond blade saw, on the other hand, is a power tool that uses a diamond-coated blade to cut through the slate quickly and accurately. You'll also need a slate hammer and chisels for shaping and trimming the slate to fit your design. A slate hammer is a specialized hammer with a flat, broad head that is designed specifically for working with slate, while slate chisels come in a variety of shapes and sizes for removing small amounts of material and creating detailed designs. In addition to these tools, you'll also need a slate pencil or marker for marking the slate, a straightedge or ruler for drawing straight lines, and a level for ensuring that your slate is properly aligned. For installing slate, you'll need a notched trowel for applying adhesive, a level for ensuring that the slate is properly aligned, and a rubber mallet for tapping the slate into place. You may also need a slate sealant or oil to protect the slate from the elements and enhance its appearance. Depending on the specific project, you may also need additional materials such as roofing nails, flashing, and underlayment.
Preparing the Slate for Use
Preparing the slate for use is a crucial step in any project that involves this versatile material. Whether you're working on a roofing project, creating a decorative feature, or crafting a functional item, it's essential to ensure that the slate is properly prepared to achieve the desired results. This process involves several key steps, including cleaning and deburring the slate to remove any dirt, grime, or rough edges, measuring and cutting the slate to size to fit your specific needs, and drilling holes and creating edges to add functionality and visual appeal. By following these steps, you can transform a raw piece of slate into a beautiful and functional component that enhances your project. In this article, we'll take a closer look at each of these steps, starting with the importance of cleaning and deburring the slate.
Cleaning and Deburring the Slate
Cleaning and deburring the slate is a crucial step in preparing it for use. This process involves removing any dirt, grime, or debris that may have accumulated on the slate's surface during the manufacturing or transportation process. To clean the slate, start by gently sweeping away any loose debris using a soft-bristled brush or a clean cloth. Next, mix a solution of mild soap and warm water, and use a soft sponge or cloth to wipe down the entire surface of the slate. Be sure to remove any soap residue by rinsing the slate thoroughly with clean water. For more stubborn stains or grime buildup, a gentle scrubbing pad or a slate-specific cleaning solution can be used. However, be cautious not to scratch the slate's surface. Once the slate is clean, use a deburring tool or a fine-grit sandpaper to remove any rough edges or burrs that may have formed during the manufacturing process. This will help prevent injuries and ensure a smooth writing or drawing experience. Regular cleaning and deburring will also help maintain the slate's appearance and extend its lifespan.
Measuring and Cutting the Slate to Size
Measuring and cutting the slate to size is a crucial step in preparing it for use. To ensure accuracy, start by measuring the area where the slate will be installed, taking into account any obstructions or irregularities. Use a tape measure or a laser level to get precise measurements. Next, transfer these measurements to the slate, using a pencil or a marker to mark the cutting lines. It's essential to double-check the measurements to avoid errors. When cutting the slate, use a diamond blade saw or a slate cutter, as these tools are specifically designed for cutting slate. Apply gentle pressure and make slow, steady cuts to avoid chipping or cracking the slate. If necessary, use a sanding block or a file to smooth out any rough edges. For more intricate cuts or curved lines, consider using a jigsaw or a coping saw. Always wear protective gear, including gloves and safety glasses, when cutting slate to prevent injury. By carefully measuring and cutting the slate to size, you'll be able to achieve a precise fit and ensure a professional-looking finish.
Drilling Holes and Creating Edges
Drilling holes and creating edges are crucial steps in preparing slate for use. To drill holes, start by marking the desired location with a pencil or marker. Use a drill press or a handheld drill with a carbide-tipped drill bit, which is specifically designed for drilling through slate. Apply gentle to moderate pressure, depending on the thickness of the slate, and maintain a steady speed to avoid damaging the material. For creating edges, use a combination of techniques such as cutting, grinding, and polishing. Cutting can be done using a wet saw or a diamond blade saw, while grinding and polishing can be achieved with a series of progressively finer grit sanding blocks or a polishing wheel. To create a smooth edge, start with a coarse grit and gradually move to finer grits, applying gentle pressure and maintaining a consistent motion. It's essential to work in a well-ventilated area and wear protective gear, including safety glasses and a dust mask, when drilling and creating edges to avoid inhaling slate dust and debris. Additionally, use a dust collection system or a vacuum cleaner to minimize the amount of dust and debris generated during the process. By following these steps and taking necessary precautions, you can successfully drill holes and create edges on your slate, preparing it for use in various applications, such as flooring, countertops, or decorative features.
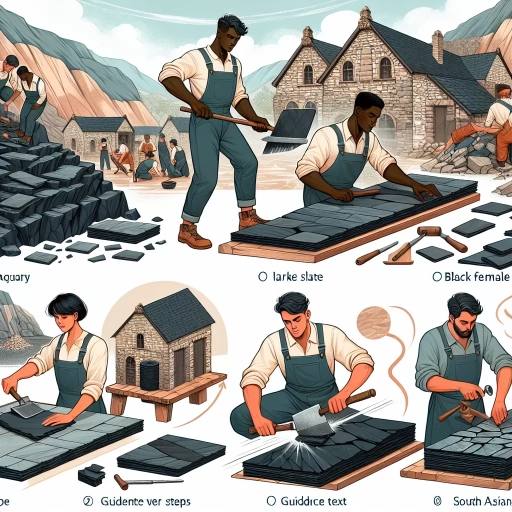
Working with Slate: Techniques and Tips
Working with slate can be a rewarding experience, especially when you're aware of the techniques and tips that can help you achieve professional-looking results. Whether you're a seasoned craftsman or a DIY enthusiast, understanding how to work with slate is essential for creating beautiful and durable pieces. In this article, we'll explore the key techniques and tips for working with slate, including splitting and shaping the slate, polishing and finishing the slate surface, and assembling and installing slate pieces. By mastering these skills, you'll be able to create stunning slate pieces that will last for years to come. To get started, let's take a closer look at the first step in working with slate: splitting and shaping the slate.
Splitting and Shaping the Slate
Splitting and shaping the slate is a crucial step in working with this versatile material. To split the slate, you'll need a hammer and chisel or a slate splitter, which is a specialized tool designed specifically for this purpose. Start by scoring the slate along the desired break line, using a sharp chisel or a diamond blade saw. Apply gentle to moderate pressure, depending on the thickness of the slate, and strike the chisel with a hammer to create a clean break. For more precise cuts, use a wet saw or a diamond blade saw, which will help prevent the slate from shattering. Once the slate is split, use a combination of chiseling, grinding, and sanding to shape it to the desired form. For curved cuts, use a jigsaw or a bandsaw, taking care to wear protective gear and work in a well-ventilated area. To achieve a smooth finish, use progressively finer grits of sandpaper, starting with coarse grit and working up to fine grit. For a high-gloss finish, apply a slate sealant and polish the surface with a buffing wheel. By following these steps and using the right tools, you can successfully split and shape the slate to create beautiful and functional pieces for your home or garden.
Polishing and Finishing the Slate Surface
Polishing and finishing the slate surface is a crucial step in bringing out the natural beauty of the stone. To achieve a high-gloss finish, start by cleaning the slate thoroughly with a mild detergent and water to remove any dirt, grime, or old wax. Next, use a series of progressively finer grits of sandpaper, starting with 120-grit and moving up to 220-grit, to smooth out the surface and remove any scratches or imperfections. Once the slate is smooth, apply a slate polish or sealant specifically designed for slate, following the manufacturer's instructions. Use a clean, lint-free cloth to apply the polish, working in small circular motions to cover the entire surface. Allow the polish to dry according to the manufacturer's instructions, then buff the slate with a clean, dry cloth to remove any excess polish and create a high-gloss finish. For a more subtle, matte finish, skip the polish and instead use a slate sealant, applying it according to the manufacturer's instructions and buffing the slate with a clean, dry cloth to create a soft sheen. Regular maintenance, such as cleaning and reapplying polish or sealant as needed, will help keep the slate surface looking its best.
Assembling and Installing Slate Pieces
Assembling and installing slate pieces requires attention to detail, patience, and the right techniques. To begin, sort and categorize the slate pieces by color, texture, and size to ensure a cohesive and visually appealing installation. Next, prepare the surface by cleaning and leveling it to prevent any unevenness or imperfections. Apply a layer of adhesive, such as thinset or mastic, to the surface, holding the slate piece in place for a few seconds to ensure it adheres properly. Use a level and a straightedge to ensure the piece is aligned correctly, and then use a rubber mallet to tap it gently into place. For more intricate designs, use a combination of full and partial pieces, cutting them to fit using a wet saw or a slate cutter. To add a decorative touch, use a pointing trowel to fill the gaps between the pieces with a mixture of sand and cement, and then seal the installation with a slate sealant to protect it from the elements. Finally, inspect the installation for any imperfections or gaps, and make any necessary adjustments to ensure a professional-looking finish.