How To Pair Airpods With Iphone
 AirPods have revolutionized the way we listen to music, interact with our devices, and manage our daily lives, adding convenience with their wireless capabilities. This device becomes a powerful audio tool when connected to your iPhone. That's why we've crafted this article to help you understand how to easily pair your AirPods with your iPhone. Get ready to delve into the exact process, with our guide divided into three easy-to-follow steps: Preparation of your AirPods and iPhone, Putting your AirPods in Discovery Mode, and finally, Connecting your AirPods to your iPhone. This guide will ensure a hassle-free setup experience, providing you with an understanding of how your iPhone communicates with your AirPods. With this knowledge, you'll be able to enjoy your audio experiences seamlessly. So, let's begin with the first and foremost part, preparing your AirPods and iPhone for engagement.
Step 1: Prepare Your AirPods and iPhone
The initial step for an optimal experience with your AirPods and iPhone encompasses several sub-stages. Ensuring your AirPods are fully charged, verifying your iPhone's compatibility, and updating your iPhone's software are the pillars that support this crucial procedural base. Together, they ensure that your devices can communicate smoothly, providing the high-quality sound and usability AirPods are known for. Begin by charging your AirPods to provide them with the necessary power to function. This is not only a preventive measure against sudden power loss, but it will also prevent any interruptions, allowing you to enjoy an uninterrupted experience. Additionally, checking your iPhone’s compatibility is essential as not all models facilitate AirPods connections. Lastly, updating your iOS to the latest version guarantees the availability of the most recent features, updates and bug fixes. Without it, your AirPods may not work as intended. By adhering to these standards, you are setting a solid foundation that poses a successful and efficient operation of your AirPods. Let's delve into the importance of charging your AirPods first, a seemingly simple task that plays a critical role in the grand scheme of your AirPods and iPhone ecology.
1.1 Ensure Your AirPods Are Charged
Before you proceed with any troubleshooting steps intended to pair your AirPods with your iPhone, you must first ensure that your AirPods are adequately charged. This step is essential as connecting these devices requires power. Whether you are setting up the sync for the first time or trying to fix a connection issue, having charged AirPods is crucial. Typically, Christmas comes early for all users trying to pair their AirPods for the first time with their iPhone as your AirPods come fully charged out of the box. However, for consequent pairings, you would need to charge these power-efficient mini speakers. Depending on your usage, you may get five hours of listening time and up to 2 hours of talk time in a single charge. Not just that, you can juice up your AirPods from 0% to 100% in the charging case within an hour. So, how do you ascertain that your AirPods are charged? It's pretty simple. You just insert your AirPods into the charging case, close the lid, and dock the case to a power source using a lightning to USB cable. Now, the status light on the case should glow solid green, indicating fully charged AirPods. If it’s amber, your AirPods are still juicing up. For users with a Wireless Charging Case, this status light is located on the front. But, if you possess the standard case, the light is located between the spaces for your AirPods. While there are different ways to charge your AirPods, the most common method is to plug the case into a power source using a lightning cable. Remember, the case itself can hold multiple charges for your AirPods, meaning you can charge the case (with the AirPods inside it) at night and then carry it with you during the day. This way, you can recharge your AirPods for up to 24 hours of total listening time or up to 18 hours of total talk time, even when you’re on the go. You may also opt for a Qi-compatible charging pad for charging a Wireless Charging Case. And if you're unsure about your AirPods charge status, you can always check it on your iPhone or ask Siri. The key to a seamless AirPods experience begins with a full charge. And once your AirPods are charged, you are one step closer to pairing them with your iPhone successfully.
1.2 Check Your iPhone's Compatibility
Before proceeding with the process of pairing your AirPods with your iPhone, you should verify whether your iPhone is compatible with the headset. Remember, to take the full advantage of all features offered by AirPods, particularly if you're using the 2nd generation AirPods or the Pro model, you would require an iPhone, iPod Touch, or iPad having iOS 12.2 or later. For AirPods 3rd generation, the device needs to run iOS 15.1 or later. To check the version of your iOS software is quite straightforward. Go to 'Settings' on your iPhone. Then, tap on 'General' and hit 'About'. Scroll down until you locate 'Version'. The number next to this is the iOS version that's currently installed on your iPhone. If your iOS version is older than required, you might not be able to pair and use the AirPods seamlessly. In such a case, the intuitive step would be to update your iPhone to the software version that's compatible with your AirPods model. For updating your iPhone, navigate to 'Settings', click on 'General', and then tap 'Software Update'. If there is an update available, you would see an option to download and install it. It's advisable to connect your device to a Wi-Fi network before starting the update as it can be larger in size and might use up a significant amount of your cellular data. Moreover, your iPhone also needs to have iCloud installed and must be signed in with the same Apple ID that you use with your AirPods. This ensures a seamless connection and functionality between the two. So, before you proceed further with pairing your AirPods, make sure your iPhone meets these compatibility requirements. This preliminary check is an extremely important step in ensuring a smooth and error-free pairing process between your iPhone and AirPods, enhancing the overall user experience. The advanced features, superior sound quality, and increased range of AirPods can be unlocked only on compatible devices running iOS 12.2 or later for most AirPods, and devices running iOS 15.1 or later, for the 3rd generation model.
1.3 Update Your iPhone's Software
of hassle-free usage of your AirPods undoubtedly lies in the seamless communication between your iPhone and AirPods. This mystery soup of fluent interaction may be tasting a bit flat if you're working with outdated iPhone software. New systems often bring improvised and smart capabilities, break new grounds of efficient execution, help harness optimization, and put an end to existing bugs; they act as a catalyst making your experience smoother and richer. Hence, the oft-ignored advice of regularly updating your iPhone's software forms a substantial part of rehearsing for the AirPods pairing process. It's about time you heed this enlightening maxim to foster compatibility and award your AirPods their desired functionality. As of 2021, Apple requires iOS 10.2 or later for the basic AirPods and iOS 13.2 or later for the AirPods Pro and AirPods Max. Overlooked software updates might come in the way of your iPhone recognizing and syncing with the AirPods, thus complicating the pairing process. You can check your software version by navigating to Settings > General > About > Software Version. If your software is backdated, head over to Settings > General > Software Update. If an update is available, tap "Download and Install." Following these steps will enable your iPhone to be up-to-date with the latest software version, paving the way to pair your AirPods efficiently. Consider this step as prepping the canvas before you embark on your painting journey, laying a vibrant blueprint for your masterpiece. Label it as setting up the kitchen before the chef swings into action, preparing a delicious meal. It's like adjusting the strings before playing a guitar, ensuring a harmonious symphony. This process is all about ensuring your equipment is in the best possible condition before deploying it. Upgrading your iPhone's software is a crucial inning in this enthralling match of maintaining the tech ecology around you harmoniously. To recap, it is vital to keep your iPhone's software updated to ensure that the AirPods pairing process runs smoothly. When pairing becomes a challenge, check first your phone's software status before assuming that your AirPods are the problem. It's important to make sure all your gadgets are compatible and working in sync with the latest advancements to enjoy their full benefits. Safety, performance, stability, and security are intertwined with these updates, making your devices reliable and efficient. Don't wait for glitches to nudge you; be proactive and make the software update part of your routine iPhone care. After all, an updated iPhone is the key to unlock the magical experience of using AirPods. In the grand scheme of things, this step may seem trifling, but its importance can't be overstated. So wash away the old and gear up for the new by updating your iPhone's software. Your AirPods will thank you!
Step 2: Put Your AirPods in Discovery Mode
Nailing down the basics of AirPods utilization is fundamental, and this article will assist you in discovering the indispensable Step 2: Putting Your AirPods in Discovery Mode. Gaining an understanding of this step is what galvanizes optimal AirPod connectivity, enhancing your experience. Three integral actions why this is paramount are: Locating the small button on the back of your AirPods, pressing and holding the button until the status light flashes, and waiting for the Discovery Mode to activate. We commence with the first supporting task, locating the small button on the back of your AirPods. Unearthing this tiny yet significant button, usually situated at the flip lid's rear, may seem trivial. However, it is crucial in ensuring a seamless syncing process, marking the first step towards a successful connection of your AirPods to your desired device. By focusing on these relevant aspects, we can enhance our knowledge, retrofit AirPod usage, and streamline the entire process for a seamless audio experience.
2.1 Locate the Small Button on the Back of Your AirPods
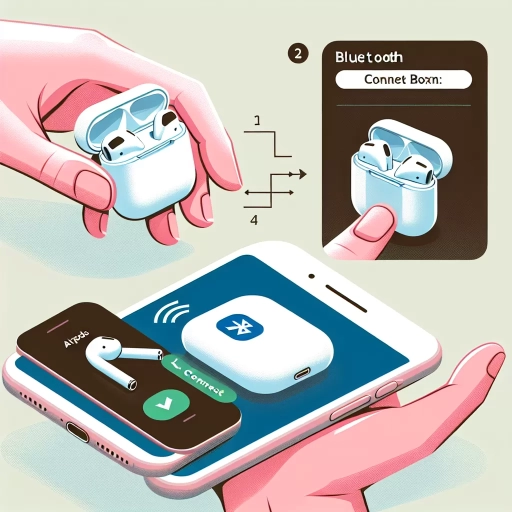
In the process of pairing your AirPods with your iPhone, after ensuring your iPhone's Bluetooth is turned on, the next significant step would be to put your AirPods in discovery mode. It is crucial due to establishing a connection between these two devices, and this is achieved by locating and using the small button at the back of your AirPods. This button, often referred to as the "setup" or "pairing" button, is strategically positioned on the back of the charging case of the AirPods and is central to initiating the discovery mode. Despite its small size, its role is quite significant and it's essentially what sets the entire pairing process in motion. Upon finding the button, you will have to press and hold it down for a few seconds. Around 15 seconds should be sufficient. What this does is, it causes the AirPods to reset their Bluetooth connections and make themselves visible to new devices, effectively putting them into discovery mode. It is worth noting that your AirPods must be within their charging case for this to work, with the lid open. If done correctly, you will notice the status light between the spaces for the AirPods in the charging case will start to flash white. This is an indicator that your AirPods are now in discovery mode, ready to be paired with your iPhone. However, if the status light does not flash white or continues to flash amber, it means the AirPods have not yet entered discovery mode. Should this happen, close the lid of the charging case, wait around 15 seconds, then try again by opening the lid and holding down the button on the back of the case. You should note, for the first generation AirPods, the light is located inside the case, whereas, for the second generation and AirPods Pro, the light is positioned on the front of the case. Remember, the small button at the back of your AirPods does more than just initiate discovery mode or pair with your iPhone. It can also be used to reconnect your already paired AirPods if they ever get disconnected, or to connect your AirPods to a different device. Interestingly, when you press and hold this small button, your AirPods not only disconnect from other devices but also immediately attempt to reconnect with your iPhone. Thus, the functionality of this small button is not narrow and is significant in the general use of your AirPods. Therefore, in the journey of mastering the use of your AirPods, an understanding of the small button at the back and its functions cannot be downplayed. It is invaluable, especially when experiencing connection hitches or trying to pair your AirPods with a new device. Thus, with this knowledge, you should have no problem putting your AirPods into discovery mode and pairing them with your iPhone successfully, hence enhancing your user experience and allowing for seamless audio convenience with your Apple devices.
2.2 Press and Hold the Button Until the Status Light Flashes
The 2.2 sub-step called "Press and Hold the Button Until the Status Light Flashes" plays an instrumental role in putting your AirPods in discovery mode, which is the second major step in pairing AirPods with your iPhone. The process is as simple as it sounds – pressing and holding the setup button located on the back of the AirPods charging case until you see the status light flash white. After you've opened the AirPods case, locate this tiny, round button on the back of the case. Notably, it's designed not to impact the sleekness of the packaging, which might make it slightly hard for a first-time user to find it. Once you do, gently press and hold this button. You need to keep pressing it until the status light on the front of the case starts flashing. This light is typically located between the spaces meant for the left and right AirPods. What does the flashing light infer? It indicates that your AirPods are now in the discovery or pairing mode, ready to connect with your iPhone. The flashing white light essentially signals that the AirPods are broadcasting their presence to nearby devices, much like a lighthouse signals its location to ships. This step is pivotal because, without putting them in discovery mode, your iPhone won't be able to find and connect with the AirPods. Besides, holding the button till the light flashes also works as a fundamental troubleshooting procedure when you face trouble connecting your AirPods to your iPhone. If the AirPods don't show up in your iPhone's Bluetooth device list, or if they refuse to connect, resetting them by following this process often resolves the issue. To sum it up, this part of the AirPods setup process is straightforward and user-friendly. Pressing and holding the setup button until the light flashes is an easy yet powerful action that puts the earbuds in discovery mode. It not only promotes smooth pairing with your iPhone but also serves as the first line of self-help when you encounter connection problems. It's a crucial tie connecting the user, the AirPods, and the iPhone in the symphony of seamless connectivity.
2.3 Wait for the Discovery Mode to Activate
Before we journey ahead, it is essential to make sure that your AirPods are not merely turned on, but they are also in the Discovery Mode to pair with your iPhone. The Discovery Mode, as the name suggests, is a specific state that allows other Bluetooth devices to recognize the AirPods for a seamless connection. It is almost like raising a flag, signaling other devices within the range that the AirPods are open for connection. Now, to maneuver your AirPods into the 'Discovery Mode,' you need to follow a few intuitive steps. Look for the lid on the back of the charging case that holds your AirPods. When that case is open, press and hold the setup button. It's a small, round button that lives on the rear of the case. Continue pressing until the status light flashes white. This white light is your signal that Discovery Mode is now active. Post this, the AirPods will become discoverable to other devices within a certain range. Be it an iPhone, iPad, iPod touch, or Apple Watch, with Discovery Mode activated, your AirPods are prepared for the dance of connection. As long as your devices are within the Bluetooth range which is typically around 10 meters (33 feet), they'll be able to discover and then connect to the AirPods. It's important to remember that the Discovery Mode isn't a permanent state. Once the AirPods are paired with a device, they automatically exit this mode to conserve the battery life. But it's an absolute essential step while you're setting up a new iPhone or connecting your AirPods to a new device. It's like opening the doors for your device to welcome the AirPods. This tactic assures robust connectivity and ensures that your AirPods are unveiled and ready to be connected to your chosen Bluetooth device. The Discovery Mode sure sounds like an expedition, and it indeed is. It is a discovery expedition for your electronic devices to find each other and create a streamlined, seamless, and strong connection. Understanding how to navigate your AirPods into the Discovery Mode is an essential skill for all Apple users. Remember, patience as they say, is a virtue. Hold on for a while after you have put your AirPods into Discovery Mode, since it may take a few seconds for your devices to detect each other. It is just a part of the ordinary, but crucial process that leads to a beautifully paired world of iPhone and AirPods – where your music, podcasts or phone calls flow like a smoothly orchestrated symphony.
Step 3: Connect Your AirPods to Your iPhone
After unboxing your precious AirPods, understandably, the next pressing matter on your mind would be how to connect them to your iPhone so that you can start enjoying the unbeatable sound quality. Fortunately, the process to pair your AirPods to your iPhone is not as complex as it may seem at the first glance. Indeed, this comprehensive guide has broken down the connection process into three simple steps that anyone, including those not tech-savvy, can follow seamlessly: firstly, opening the settings app on your iPhone; secondly, tapping on the Bluetooth option, and finally, selecting your AirPods from the list of available devices. Following these three procedures will ensure your AirPods are successful synchronized. Let's dive into the first step- opening the settings app on your iPhone - and gradually unfold this exciting journey to connecting your AirPods to your iPhone. Buckle up, as we guarantee, it's going to be an intuitive ride.
3.1 Open the Settings App on Your iPhone
To navigate through the pairing process, first, you'll need to open the Settings app on your iPhone. This application functions as the control room for all of your iPhone's primary mechanisms. It's represented by a gray gear icon and is generally situated on your home screen or in your App Library on more updated operating systems. By launching the Settings app, you gain access to a broad range of tweakable options designed to enhance, personalize, or troubleshoot your iPhone experience. These options range from Wi-Fi and Bluetooth capabilities (which are particularly important when pairing your AirPods with your iPhone) to details associated with your Apple ID, iCloud, iTunes, and the App Store account. The AirPods pairing process revolves around the Bluetooth feature available within the settings. Bluetooth is a wireless technology enabling the exchange of data between devices over short distances. It forms the backbone of many modern tech conveniences, including wireless headphones like Apple's AirPods. Conveniently, every iPhone has Bluetooth capability built-in, which is navigable and controllable through the Settings app. Ensure that your Bluetooth is turned on as it's the primary communication channel between your iPhone and AirPods. After setting your device in Bluetooth's discovering mode, the iPhone can then detect your AirPods. This process forms the core of the simplification that Apple products are renowned for. By opening the lid on your AirPods' charging case, with your AirPods seated inside, it signifies that your earbuds are ready to be paired. However, if challenges arise during this process, the Settings app is the key to identifying and surmounting such obstacles. It allows you to control paired devices, connections, and troubleshooting. For instance, it lets you 'Forget This Device' if there's a need to reset the connection with your AirPods, or you can switch off and on your Bluetooth if it malfunctions. Thus, familiarizing yourself with the Settings app is crucial to seamlessly linking your AirPods with your iPhone. While navigating through the Settings app may seem overwhelming at first, it offers a clear and intuitive user interface that helps users with or without technical backgrounds. By following the modest directional prompts, you can smoothly link your AirPods to your iPhone, allowing you to begin enjoying wireless audio in no time. The relationship between your iPhone's Settings app and your AirPods is integral, making the app a crucial tool when learning how to pair your AirPods with your iPhone.
3.2 Tap on Bluetooth
Step 3.2 instructs us to activate Bluetooth on our iPhone. This is a crucial step in being able to connect your AirPods to your iPhone effectively. To do this, you first need to open the settings application which looks like a silver gear icon, located on the home screen of your iPhone. Scroll down until you see 'Bluetooth' and tap on it. Tapping into the Bluetooth menu will reveal a toggle switch at the very top. This button controls the activation and deactivation of Bluetooth. It's important to note that Bluetooth must be switched on in order for your iPhone to communicate with other Bluetooth-affiliated devices including the AirPods. If the switch is grey, that signifies that Bluetooth is currently turned off. To switch it back on, tap the toggle switch. When successfully activated, the button will light up in a vibrant green color. Following this step, ensure that your iPhone is visible to other devices to promote the smooth pairing of your AirPods. This is done by maintaining the 'My Devices' and 'Other Devices' headings which will become clearly visible once the Bluetooth is activated. You should be able to identify your AirPods under the 'Other Devices' section if you are connecting them for the first time. It's important to make sure your AirPods are in close proximity with your iPhone at this point, to ensure successful connection. After activating Bluetooth, place your AirPods inside their charging case and open the lid. This action will turn them on and set them into pairing mode, making them discoverable by your iPhone. A white light on the AirPods Case indicates that they are ready to connect. When you see your AirPods appear onscreen under 'Other Devices', tap on it to initiate the connection. Please note that if you cannot see your AirPods in the list of other devices, you may need to reset your AirPods and repeat the process. Activating Bluetooth and putting your AirPods into pairing mode allows your iPhone to discover the availability of your AirPods quickly and efficiently, ensuring an effortless and hassle-free connection. It is essential to remember this step every time you want to use your AirPods with your iPhone. Following simple instructions like these will help you to enjoy the outstanding sound quality that AirPods provide as swiftly as possible. This easy, one-time setup process enhances your experience with your iPhone and AirPods, making listening to your favorite music or attending calls a pleasure at all times.
3.3 Select Your AirPods from the List of Available Devices
Once you've successfully placed your AirPods in discovery mode, you will need to proceed to the next critical step - 3.3 Select Your AirPods from the List of Available Devices. Your iPhone displays a list of all Bluetooth devices nearby that are in pairing mode. Tap on the name of your AirPods shown in the list. This action will trigger an attempted connection between your iPhone and the AirPods. This step is an essential part of the pairing process as it allows your iPhone to identify and establish a secure connection with your AirPods. It should be noted that your AirPods name in the list usually begins with the word "AirPods" followed by your custom name if you've set one up. If you're yet to rename your AirPods or the list displays more than one set of AirPods, you may need to cross-check the unique model number or serial number with the one inscribed on your AirPods' charging case. In the event that your AirPods do not appear in the list of available devices, you may need to ensure that they are in pairing mode properly, charged, and within the proper range from your iPhone. Failing these, you might need to reset your AirPods and try again. Once you detect and select your AirPods from the list, a connection request will be sent from your iPhone. This connection acts as a bridge, enabling real-time exchange of digital audio signals between your device and the AirPods. Connective technologies integrated in AirPods like the W1 or H1 chip (depending on your AirPods model) play key roles in ensuring seamless, stable, and quick pairing with nearby devices. In summary, successfully selecting your AirPods from the list of available devices on your iPhone is crucial for the successful pairing of your AirPods. This step ensures that your iPhone and AirPods establish a secure and readily identifiable connection, which consequently paves way for a high-quality audio experience. The overall process is user-friendly and straightforward, even for beginners. Therefore, it's accurate to posit that Step 3.3 – Select Your AirPods from the List of Available Devices— is an essential and necessary part of connecting your AirPods to your iPhone. It sets the stage for a smooth and enjoyable wireless audio experience that Apple AirPods are renowned for around the world.