How To Create A Folder On Mac
Here is the introduction paragraph: Creating a folder on a Mac is a fundamental task that can help you stay organized and productive. Whether you're a student, professional, or simply a Mac user, knowing how to create and manage folders is essential for keeping your files and documents in order. In this article, we'll explore the basics of creating a folder on Mac, including the different methods you can use to create a folder, and how to customize and manage your folders to suit your needs. We'll start by understanding the basics of creating a folder on Mac, including the different types of folders you can create and the benefits of using folders to organize your files. By the end of this article, you'll be able to create and manage folders like a pro, and take your Mac productivity to the next level. So, let's get started by understanding the basics of creating a folder on Mac.
Understanding the Basics of Creating a Folder on Mac
Creating a folder on a Mac is a fundamental skill that every user should master. To effectively organize and manage your files, you need to understand the basics of creating a folder. This process involves several key steps, starting with understanding what a folder is and why you need one. You'll also need to know how to locate the Finder app on your Mac, as this is where you'll be creating your folders. Once you've accessed the Finder app, you'll need to navigate through it to find the right location for your new folder. By following these steps, you'll be able to create a folder on your Mac with ease. So, let's start by exploring what a folder is and why you need one.
What is a Folder and Why Do You Need One?
A folder is a digital container used to store and organize files, documents, and other digital content on your computer. It's a way to categorize and keep related files together, making it easier to find and access them when needed. Think of a folder as a physical file cabinet or a drawer where you can store papers and documents. Just like how you would label a physical folder or file cabinet, you can name and label digital folders to help you quickly identify what's inside. Having a folder helps you keep your computer organized, reduces clutter, and saves time searching for specific files. It's an essential tool for anyone who uses a computer, whether for work, school, or personal projects. By creating folders, you can group similar files together, such as documents, images, or videos, and even create subfolders to further categorize your content. This helps maintain a clean and organized digital workspace, making it easier to focus on your tasks and be more productive.
Locating the Finder App on Your Mac
The Finder app is the default file manager on Mac, and it's essential to know where to find it to create a new folder. To locate the Finder app, you can follow these simple steps. First, click on the Dock, which is usually located at the bottom of your screen. The Dock is a row of icons that represents frequently used applications, and the Finder app is typically the first icon on the left. If you can't find the Finder app in the Dock, you can also use Spotlight to search for it. To do this, press Command (⌘) + Spacebar to open Spotlight, and then type "Finder" in the search bar. The Finder app should appear in the search results, and you can click on it to open it. Alternatively, you can also find the Finder app in the Applications folder. To do this, click on the Go menu in the top menu bar, and then select "Applications" from the drop-down menu. The Finder app should be listed in the Applications folder, and you can click on it to open it. Once you've located the Finder app, you can use it to create a new folder on your Mac. Simply click on the "File" menu, select "New Folder," and then give your folder a name. You can also use the keyboard shortcut Command (⌘) + Shift + N to create a new folder quickly. By following these steps, you should be able to locate the Finder app and create a new folder on your Mac with ease.
Basic Navigation Through the Finder App
The Finder app is the central hub for navigating and managing files on your Mac. To get started, you can find the Finder app in the Dock, which is usually located at the bottom of your screen. Clicking on the Finder icon will open the app, and you'll be presented with a window that displays the contents of your computer. The Finder window is divided into several sections, including the sidebar, toolbar, and file list. The sidebar provides quick access to frequently used locations, such as your desktop, documents, and downloads. The toolbar offers various options for customizing the view and performing actions on files. The file list displays the contents of the current folder, allowing you to browse and manage your files. You can navigate through the Finder by clicking on folders and files, using the back and forward buttons, or by using the keyboard shortcuts Command + [ and Command + ] to move up and down the folder hierarchy. Additionally, you can use the search bar at the top of the window to quickly find specific files or folders. By mastering the basics of navigation through the Finder app, you'll be able to efficiently manage your files and folders, and create new ones with ease.
Methods to Create a Folder on Mac
Creating a folder on a Mac is a straightforward process that can be accomplished in several ways. Whether you're organizing your documents, images, or other files, creating a folder is an essential task that helps keep your digital life tidy. In this article, we'll explore three methods to create a folder on a Mac: using the Finder app, using a keyboard shortcut, and using the context menu. Each of these methods offers a unique approach to creating a folder, and by the end of this article, you'll be able to choose the one that suits your workflow best. Let's start by exploring the most traditional method: creating a folder using the Finder app.
Creating a Folder Using the Finder App
To create a folder using the Finder app on a Mac, start by opening the Finder app, which is usually located on the dock at the bottom of the screen. Once the Finder app is open, navigate to the location where you want to create the new folder. This could be on the desktop, in the documents folder, or in any other location on your Mac. Next, click on the "File" menu at the top of the screen and select "New Folder" from the drop-down menu. Alternatively, you can also use the keyboard shortcut "Command + Shift + N" to create a new folder. When you select "New Folder," a new folder will be created in the current location, and it will be named "untitled folder." You can then rename the folder by clicking on the name and typing in the new name. You can also add a tag to the folder by clicking on the "Tags" button at the top of the Finder window and selecting a tag from the list. Once you have created and named your new folder, you can start adding files and other folders to it by dragging and dropping them into the folder. You can also use the "Move to" command in the "File" menu to move files and folders into the new folder. By following these steps, you can easily create a new folder using the Finder app on your Mac.
Creating a Folder Using the Keyboard Shortcut
To create a folder using the keyboard shortcut on a Mac, you can use the Command (⌘) + Shift + N keys. This shortcut allows you to quickly create a new folder without having to navigate through menus or use the mouse. To use this shortcut, simply press the Command key, the Shift key, and the N key simultaneously. A new folder will be created in the current location, and you can then rename it as desired. This shortcut is a convenient way to create folders, especially when you need to create multiple folders in a short amount of time. Additionally, you can also use this shortcut to create a new folder in the Finder, on the desktop, or in any other location where you can create folders. By using the Command + Shift + N keys, you can streamline your workflow and save time when creating new folders on your Mac.
Creating a Folder Using the Context Menu
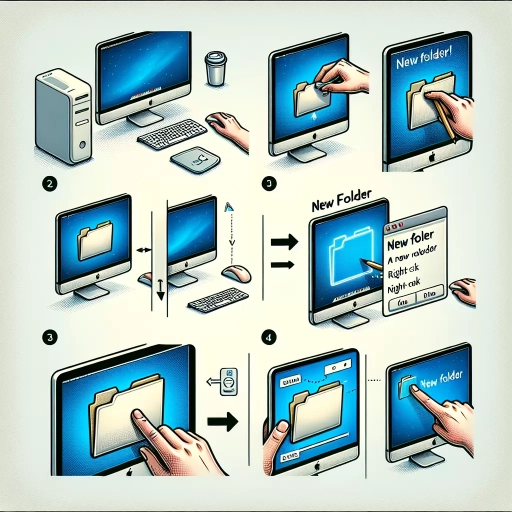
To create a folder using the context menu on a Mac, start by navigating to the location where you want to create the new folder. This could be on your desktop, in your documents folder, or anywhere else you prefer. Once you're in the right location, right-click (or control-click if you're using a trackpad or a mouse without a right-click button) on an empty area of the screen. This action will open the context menu, which is a list of options relevant to the location you clicked on. From this menu, select "New Folder." Alternatively, you can also use the keyboard shortcut Command + Shift + N to create a new folder without needing to open the context menu. After selecting "New Folder," a new, untitled folder will appear in the location you clicked on. You can then rename this folder by clicking on its name and typing in your desired name. This method is quick and straightforward, making it a convenient way to organize your files and folders on your Mac.
Customizing and Managing Your Folders on Mac
Customizing and managing your folders on Mac is an essential skill to master, especially if you're dealing with a large number of files and documents. By customizing your folders, you can improve your productivity, reduce clutter, and make it easier to find the files you need. In this article, we'll explore three key aspects of customizing and managing your folders on Mac: renaming and labeling your folders for easy identification, organizing your folders into subfolders and categories, and deleting and recovering folders on your Mac. By the end of this article, you'll be able to create a well-organized and efficient folder system that suits your needs. Let's start by looking at how to rename and label your folders for easy identification, a simple yet effective way to get your folders in order.
Renaming and Labeling Your Folders for Easy Identification
Renaming and labeling your folders is a crucial step in maintaining a well-organized digital filing system on your Mac. By giving your folders clear and descriptive names, you can quickly identify their contents and locate specific files with ease. To rename a folder, simply select it and click on the name, then type in the new name. You can also use the "Rename" option from the contextual menu by right-clicking on the folder. Additionally, you can use labels to categorize your folders and make them stand out. To label a folder, select it and click on the "File" menu, then choose "Labels" and select a color. You can also use the keyboard shortcut "Command + L" to quickly label a folder. By using a combination of descriptive names and labels, you can create a visually organized system that makes it easy to find what you need. For example, you can label your work folders with a red label, your personal folders with a blue label, and your archived folders with a green label. This way, you can quickly scan your folder list and identify the type of files contained within each folder. By taking the time to rename and label your folders, you can save time and reduce stress in the long run, and make the most out of your Mac's organizational capabilities.
Organizing Your Folders into Subfolders and Categories
Organizing your folders into subfolders and categories is a crucial step in maintaining a clutter-free and efficient file system on your Mac. By creating subfolders, you can break down large folders into smaller, more manageable sections, making it easier to locate specific files and documents. Start by identifying the main categories that your files fall into, such as work, personal, or projects. Then, create subfolders within these categories to further narrow down the types of files they contain. For example, within a work folder, you might create subfolders for different projects, clients, or departments. This hierarchical structure allows you to quickly drill down to the specific files you need, saving you time and reducing frustration. Additionally, organizing your folders into categories and subfolders also helps with searching and filtering files, as you can use keywords and tags to find specific files within a particular folder or category. By implementing a clear and consistent folder structure, you can streamline your workflow, improve productivity, and make the most of your Mac's file management capabilities.
Deleting and Recovering Folders on Your Mac
Deleting and recovering folders on your Mac is a straightforward process. To delete a folder, simply select it and press the "Delete" key or drag it to the Trash. If you want to delete a folder and all its contents, you can also right-click on it and select "Move to Trash." If you accidentally delete a folder, you can recover it from the Trash by opening the Trash, selecting the folder, and clicking "Put Back." If you've emptied the Trash, you can use the "Undo Move to Trash" feature by pressing Command + Z. Alternatively, you can use Time Machine to recover deleted folders by selecting the folder's location, clicking "Enter Time Machine," and navigating to a previous backup. You can also use third-party data recovery software to recover deleted folders. To permanently delete a folder and its contents, you can right-click on it and select "Secure Empty Trash," which will overwrite the data and make it unrecoverable.