How To Put Coolant In Car
Here is the introduction paragraph: Adding coolant to your car is a relatively simple process that can help keep your engine running smoothly and prevent overheating. However, it's essential to do it correctly to avoid any damage to your vehicle. In this article, we will guide you through the steps of adding coolant to your car, from preparation to maintenance. Before you start, it's crucial to prepare your car and gather the necessary materials. This includes checking the coolant level, type, and condition, as well as ensuring you have the correct coolant mixture and equipment. In the following sections, we will discuss the preparation process, the step-by-step process of adding coolant, and the necessary maintenance checks to ensure your car runs smoothly after adding coolant. First, let's start with the preparation process, which is a critical step in adding coolant to your car.
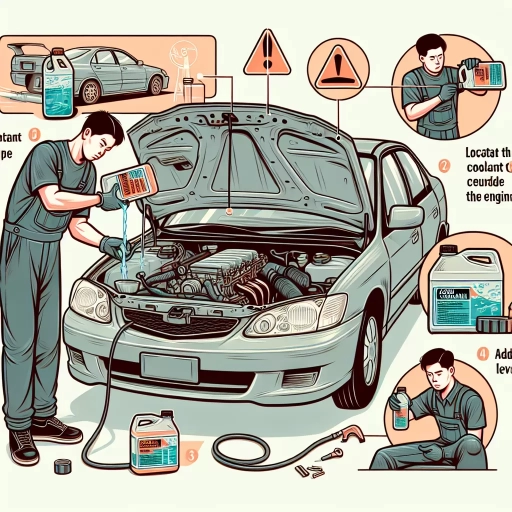
Preparation Before Adding Coolant
Before adding coolant to your vehicle, it's essential to take a few crucial steps to ensure the process is done safely and effectively. First, you need to check the coolant level and condition to determine if a top-up is necessary. This involves locating the coolant reservoir and cap, which can usually be found under the hood of your car. Additionally, it's vital to choose the correct type of coolant for your vehicle, as using the wrong type can cause damage to your engine. By following these steps, you can ensure that your vehicle's cooling system is functioning properly and prevent any potential problems. So, let's start by checking the coolant level and condition to see if a top-up is required.
Check the Coolant Level and Condition
When checking the coolant level and condition, it's essential to ensure the engine is cold or has been turned off for at least a few hours. This is because the coolant system is pressurized, and checking it when hot can lead to serious injury or damage. Locate the coolant reservoir, usually a transparent plastic tank with a cap on top, and check the level against the minimum and maximum marks on the side. If the level is below the minimum mark, you'll need to add a 50/50 mix of coolant and water. Next, inspect the condition of the coolant by looking for any signs of contamination, such as rust, dirt, or oil. Check the color and consistency, which should be a bright green or yellow, depending on the type of coolant used. If the coolant is dirty or contaminated, it's recommended to flush and replace it to prevent damage to the engine and cooling system. Additionally, check the condition of the hoses and connections for any signs of leaks, cracks, or damage. If you find any issues, it's best to address them before adding new coolant to the system. By checking the coolant level and condition, you can ensure the longevity and health of your car's engine and cooling system.
Locate the Coolant Reservoir and Cap
The coolant reservoir is a transparent plastic tank with a cap on top, usually located on the driver's side of the engine compartment. It's connected to the radiator by a hose and serves as a overflow tank for the cooling system. To locate the coolant reservoir, start by opening the hood of your car and looking for a plastic tank with a cap on top. It may be labeled as the "coolant reservoir" or have a picture of a radiator on it. If you're still having trouble finding it, consult your car's repair manual or look for a diagram of the engine compartment. Once you've located the reservoir, make sure to check the level of the coolant against the minimum and maximum marks on the side of the tank. If the level is below the minimum mark, you'll need to add coolant. Before you do, make sure to check the cap for any signs of damage or wear. If the cap is damaged, replace it with a new one to ensure the cooling system is sealed properly.
Choose the Correct Type of Coolant
When it comes to choosing the correct type of coolant for your vehicle, it's essential to consider the type of engine, climate, and manufacturer's recommendations. There are several types of coolants available, including conventional green coolant, organic acid technology (OAT) coolant, and hybrid organic acid technology (HOAT) coolant. Conventional green coolant is suitable for older vehicles and is generally less expensive, but it may not provide the same level of protection as newer coolants. OAT coolant is designed for newer vehicles and provides better corrosion protection, but it may not be compatible with all engine materials. HOAT coolant is a blend of conventional and OAT coolants and offers a balance of price and performance. It's also important to consider the concentration of the coolant, as some vehicles require a 50/50 mix of coolant and water, while others may require a different ratio. Always check your vehicle's owner's manual or consult with a mechanic to ensure you're using the correct type and concentration of coolant for your vehicle. Additionally, some coolants are designed for specific climates, such as winter or summer formulas, so be sure to choose a coolant that's suitable for your region. By selecting the correct type of coolant, you can help ensure your engine runs smoothly, efficiently, and safely.
The Process of Adding Coolant
The process of adding coolant to a vehicle is a relatively simple task that can help to prevent overheating and damage to the engine. To add coolant, one must first open the coolant reservoir and add the recommended type and amount of coolant. This is a crucial step, as using the wrong type or amount of coolant can lead to serious problems. Once the coolant has been added, the cap must be replaced and the engine started to circulate the new coolant. It is also important to check for leaks and monitor the temperature gauge to ensure that the coolant is working properly. By following these steps, drivers can help to keep their engines running smoothly and prevent costly repairs. In the next section, we will take a closer look at the first step in the process: opening the coolant reservoir and adding coolant.
Open the Coolant Reservoir and Add Coolant
Open the Coolant Reservoir and Add Coolant. Locate the coolant reservoir under the hood of your car. It's usually a transparent plastic tank with a cap on top, labeled as the coolant reservoir. Open the cap by twisting it counterclockwise. Be prepared for the possibility of the reservoir being pressurized, and take necessary precautions to avoid any spills. Once the cap is removed, you'll see the coolant level inside the reservoir. If the level is below the minimum mark, you'll need to add coolant. Check your car's manual to find out the recommended type of coolant to use. You can also find this information on the reservoir cap or on the side of the reservoir. Pour the recommended type and amount of coolant into the reservoir slowly, making sure not to overfill it. The recommended amount is usually indicated on the reservoir or in the car's manual. Replace the cap and twist it clockwise to secure it. Start the engine and let it run for a few minutes to circulate the new coolant. Turn off the engine and check the coolant level again to ensure it's at the recommended level. If it's still low, you may need to add more coolant.
Replace the Cap and Start the Engine
Replace the cap and start the engine. This is the final step in the process of adding coolant to your car. Once you have added the recommended amount of coolant, replace the cap on the radiator or reservoir to prevent any spills or leaks. Next, start the engine and let it run for a few minutes to circulate the new coolant through the system. This will help to distribute the coolant evenly and ensure that it reaches all parts of the engine. As the engine runs, keep an eye on the temperature gauge to make sure it doesn't exceed the normal operating range. If the temperature starts to rise, turn off the engine and let it cool down before checking the coolant level again. By following these steps, you can ensure that your car's cooling system is functioning properly and that your engine is running at a safe temperature.
Check for Leaks and Monitor the Temperature
When adding coolant to your car, it's essential to check for leaks and monitor the temperature to ensure the system is functioning correctly. Start by inspecting the radiator, hoses, and water pump for any signs of damage or wear. Look for cracks, rust, or corrosion that could be causing leaks. If you find any issues, replace the damaged components before proceeding. Next, check the coolant level and top it off as needed. Then, start the engine and let it run for a few minutes to circulate the coolant. Monitor the temperature gauge on your dashboard to ensure it's within the normal range. If the temperature rises above the recommended level, turn off the engine and let it cool down before checking the system again. You can also use a thermometer to check the temperature of the coolant itself. Compare it to the recommended temperature range specified in your car's manual. If the temperature is too high, it may indicate a problem with the cooling system, such as a faulty thermostat or a blockage in the radiator. In this case, you may need to seek the help of a professional mechanic to diagnose and repair the issue. By checking for leaks and monitoring the temperature, you can ensure that your car's cooling system is working efficiently and effectively, which can help prevent overheating and damage to your engine.
After Adding Coolant and Maintenance
After adding coolant to your vehicle, it's essential to perform routine maintenance to ensure the longevity and health of your engine. Proper disposal of used coolant is crucial to prevent environmental contamination and harm to wildlife. Regular checks of the coolant level can help identify potential leaks or issues before they become major problems. Additionally, considering a flush of the cooling system can help remove any debris or contaminants that may have accumulated over time. By taking these steps, you can help maintain your vehicle's engine and prevent costly repairs down the road. In this article, we will explore the importance of proper coolant disposal, regular level checks, and cooling system flushes. First, let's take a closer look at the importance of disposing of used coolant properly.
Dispose of Used Coolant Properly
Dispose of used coolant properly to prevent environmental contamination and health risks. Used coolant contains toxic chemicals like ethylene glycol, which can harm humans, animals, and the environment if not disposed of correctly. Check with local authorities or service stations to find designated collection facilities for used coolant. Do not dispose of used coolant in the trash, down the drain, or on the ground, as it can contaminate soil and water sources. Instead, take it to a recycling center or an auto parts store that accepts used coolant. Some service stations and repair shops also offer used coolant collection and recycling programs. Always check the label on the coolant container for specific disposal instructions, and follow the recommended guidelines to ensure safe and responsible disposal. Proper disposal of used coolant is crucial to protect the environment and public health, so make sure to handle it responsibly.
Check the Coolant Level Regularly
Regularly checking the coolant level is crucial to ensure the longevity and health of your car's engine. The coolant level should be checked at least once a month, and before long trips. To check the coolant level, locate the coolant reservoir under the hood of your car. It's usually a transparent plastic tank with a cap on top. Remove the cap and look at the side of the reservoir to see the minimum and maximum level marks. The coolant level should be between these two marks. If the level is below the minimum mark, you need to add more coolant. It's also important to check the color of the coolant. If it's dirty or contaminated, it may be a sign that the coolant needs to be changed. Additionally, check the hoses and connections for any signs of leaks or damage. If you notice any issues, have them repaired or replaced as soon as possible. By regularly checking the coolant level, you can help prevent overheating, corrosion, and damage to your car's engine.
Consider Flushing the Cooling System
When it comes to maintaining your car's cooling system, one crucial step to consider is flushing the cooling system. Over time, the coolant in your car can become contaminated with debris, rust, and other substances that can reduce its effectiveness and potentially cause damage to your engine. Flushing the cooling system involves draining the old coolant and replacing it with new, clean coolant. This process can help to remove any built-up debris and contaminants, ensuring that your engine is properly cooled and reducing the risk of overheating. Additionally, flushing the cooling system can also help to prevent corrosion and damage to other components, such as the radiator and water pump. It's generally recommended to flush the cooling system every 30,000 to 50,000 miles, or as specified in your car's owner's manual. By doing so, you can help to keep your car's cooling system running smoothly and prevent costly repairs down the road.