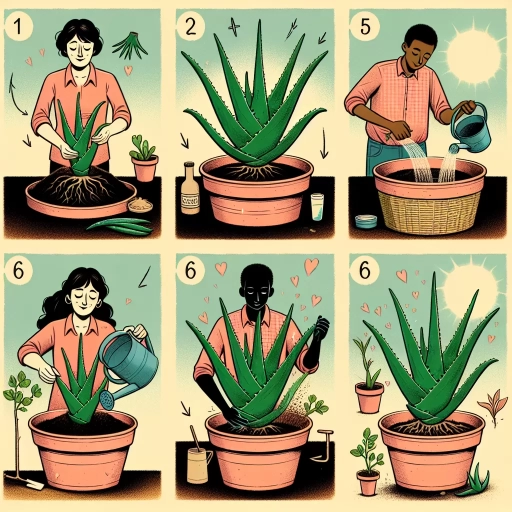
How To Repot Aloe Vera
Aloe vera is a low-maintenance and versatile plant that has been used for centuries for its medicinal and cosmetic benefits. However, like all plants, it requires regular care to thrive. One essential aspect of aloe vera care is repotting, which involves transferring the plant to a new pot with fresh soil to provide it with the necessary nutrients and space to grow. But when is the right time to repot your aloe vera, and what materials do you need to do it successfully? In this article, we will explore the best practices for repotting aloe vera, starting with the crucial question of when to repot aloe vera. We will also cover the materials needed for repotting aloe vera and provide a step-by-step guide to help you do it like a pro. By the end of this article, you will be equipped with the knowledge and skills to give your aloe vera the care it needs to flourish. So, let's start by answering the question: when to repot aloe vera?
When to Repot Aloe Vera
Aloe vera is a low-maintenance and adaptable plant that can thrive in a variety of environments. However, like all plants, it requires regular care to ensure optimal growth and health. One crucial aspect of aloe vera care is repotting, which involves transferring the plant to a new container to provide fresh soil and a larger space to grow. But when is the best time to repot aloe vera? The answer depends on several factors, including the time of year, the plant's growth cycle, and its physical condition. In this article, we will explore three key scenarios that indicate when to repot aloe vera: repotting in spring and summer, repotting when the plant becomes pot-bound, and repotting after propagation. By understanding these scenarios, you can provide your aloe vera with the best possible care and help it thrive. For example, repotting aloe vera in spring and summer can give the plant a boost of energy and promote healthy growth, making it an ideal time to transfer your plant to a new container.
Repotting Aloe Vera in Spring and Summer
Repotting Aloe Vera in Spring and Summer is an ideal time to give your plant a fresh start. During these seasons, Aloe Vera plants are actively growing, and repotting them can help to provide the necessary room for expansion. Spring and Summer are the best times to repot Aloe Vera because the plant is producing new growth, and the warmer temperatures stimulate root development. When repotting in Spring and Summer, choose a pot that is only slightly larger than the previous one, as Aloe Vera prefers to be slightly root-bound. Use a well-draining potting mix and a pot with good drainage holes to prevent waterlogged soil. Water sparingly after repotting, as the plant may be sensitive to overwatering during this time. It's also essential to provide bright, indirect light and maintain temperatures between 65-80°F (18-27°C) to promote healthy growth. By repotting your Aloe Vera in Spring and Summer, you can help to encourage a robust and thriving plant that will continue to provide you with its numerous benefits.
Repotting Aloe Vera When the Plant Becomes Pot-Bound
Repotting Aloe Vera When the Plant Becomes Pot-Bound. Aloe vera plants typically require repotting every 2-3 years, but this frequency may vary depending on the plant's growth rate and the size of the pot. When the plant becomes pot-bound, it's essential to repot it to provide a larger pot and fresh soil to accommodate its growing roots. A pot-bound aloe vera plant will exhibit signs such as slow growth, yellowing leaves, and a decrease in gel production. To repot a pot-bound aloe vera, start by gently removing the plant from its pot, taking care not to damage the roots. Inspect the roots and trim any dead or damaged roots to prevent the spread of disease. Next, choose a pot that is only slightly larger than the previous one, as aloe vera plants prefer to be slightly root-bound. Add a layer of well-draining soil, such as a cactus mix, and gently place the plant in the new pot. Water sparingly after repotting, as the plant may be sensitive to overwatering. With proper care, the aloe vera plant should recover quickly and continue to thrive in its new pot.
Repotting Aloe Vera After Propagation
Repotting Aloe Vera after propagation is a crucial step to ensure the newly rooted plant establishes itself and thrives. After successfully propagating an Aloe Vera plant, it's essential to wait until the new roots have developed and the plant has outgrown its container. This is usually indicated by the plant becoming top-heavy, the soil drying out too quickly, or the roots growing out of the drainage holes. When repotting, choose a well-draining potting mix specifically designed for cacti and succulents, and a pot that is only slightly larger than the previous one. This will prevent the soil from becoming too wet and reduce the risk of root rot. Gently remove the plant from its container, taking care not to damage the roots, and trim any dead or damaged roots. Place the plant in its new pot, adding fresh potting mix around the roots, and water sparingly. It's also a good idea to provide the plant with bright, indirect light and maintain a consistent temperature between 65-80°F (18-27°C) to promote healthy growth. By repotting your Aloe Vera plant after propagation, you'll be giving it the best chance to establish a strong root system and thrive in its new environment.
Materials Needed for Repotting Aloe Vera
Repotting an aloe vera plant is a relatively simple process that requires some essential materials to ensure the plant thrives in its new environment. To start, you'll need a well-draining potting mix that will prevent waterlogged soil and root rot. A slightly larger pot with good drainage is also necessary to provide the roots with enough room to grow. Additionally, it's a good idea to have some protective gear, such as gloves and a sharp, clean knife or pruning tool, to handle the plant safely. With these materials, you'll be well on your way to giving your aloe vera plant the best chance to succeed. A well-draining potting mix is the first and most critical material you'll need, as it will determine the overall health of your plant.
A Well-Draining Potting Mix
A well-draining potting mix is essential for repotting aloe vera, as it helps prevent waterlogged soil and root rot. A good potting mix should contain a combination of ingredients that provide excellent drainage, aeration, and moisture retention. Some key components of a well-draining potting mix include perlite, vermiculite, or sand, which help to break up the soil and prevent water from accumulating. Additionally, ingredients like peat moss or coconut coir can help retain moisture in the soil, while also providing a slightly acidic pH that aloe vera prefers. A well-draining potting mix can be purchased at most gardening stores, or you can create your own mix by combining these ingredients in the right proportions. When selecting a potting mix, look for one that is specifically designed for cacti and succulents, as these plants have similar soil requirements to aloe vera. By using a well-draining potting mix, you can help ensure that your aloe vera plant thrives in its new pot and remains healthy for years to come.
A Slightly Larger Pot with Good Drainage
When it comes to repotting your aloe vera, choosing the right pot is crucial. A slightly larger pot with good drainage is essential to provide your aloe vera with the best conditions for growth. The pot should be only one to two sizes larger than the original one, as aloe vera prefers to be slightly root-bound. This means that the pot should not be too big, as this can cause the soil to become too wet and lead to root rot. On the other hand, a pot that is too small can cause the soil to dry out too quickly, which can also be detrimental to the plant's health. A pot with good drainage is also vital, as it will prevent water from accumulating in the soil and causing root rot. Look for a pot with drainage holes in the bottom or sides to ensure that excess water can escape. By choosing a pot that is the right size and has good drainage, you can help your aloe vera thrive and prevent common problems associated with repotting.
Gloves and a Sharp, Clean Knife or Pruning Tool
Gloves and a sharp, clean knife or pruning tool are essential materials needed for repotting aloe vera. Gloves protect your hands from the sap of the aloe vera plant, which can be irritating to the skin and cause allergic reactions in some individuals. A sharp, clean knife or pruning tool is necessary for carefully removing the aloe vera plant from its pot and trimming away any dead or damaged roots or leaves. This helps to prevent the spread of disease and encourages healthy growth. A dull or dirty tool can cause more harm than good, so it's crucial to use a sharp, clean knife or pruning tool to minimize the risk of infection and promote a successful repotting process. Additionally, a sharp tool makes the process of repotting much easier and less messy, allowing you to focus on providing the best care for your aloe vera plant.
Step-by-Step Guide to Repotting Aloe Vera
Repotting an aloe vera plant is a relatively simple process that can help promote healthy growth and prevent the plant from becoming root-bound. To repot your aloe vera plant successfully, follow these steps. First, you will need to remove the aloe vera plant from its old pot, taking care not to damage the roots or disturb the soil. Next, you will need to trim any old or damaged roots and leaves to prevent the spread of disease and encourage new growth. Finally, you will need to plant the aloe vera in its new pot, using a well-draining potting mix and a pot that is only slightly larger than the previous one. By following these steps, you can help your aloe vera plant thrive in its new home. To start the process, let's begin with the first step: removing the aloe vera plant from its old pot.
Removing the Aloe Vera Plant from Its Old Pot
When removing the aloe vera plant from its old pot, it's essential to do so carefully to avoid damaging the roots or disturbing the plant's sensitive tissues. Start by gently grasping the base of the plant, just above the soil line, and slowly rotating the pot back and forth to loosen the soil's grip on the container. This will help to dislodge the plant from the pot without causing any unnecessary stress. Once the plant is loose, carefully lift it out of the pot, taking care not to touch or damage the roots. If the plant is stuck, you can run a knife or spatula around the inside of the pot to gently pry it loose. As you remove the plant, inspect the roots for any signs of rot or damage, and trim away any affected areas with sterile scissors or pruning shears. This will help to prevent the spread of disease and encourage healthy growth in the new pot. With the plant safely removed from its old pot, you can now prepare it for its new home, where it will continue to thrive and provide you with its many benefits.
Trimming Old or Damaged Roots and Leaves
Trimming old or damaged roots and leaves is a crucial step in the repotting process of Aloe Vera. This step helps to prevent the spread of disease and encourages healthy growth. To trim old or damaged roots, gently remove the plant from its pot and inspect the roots. Using a pair of sterile scissors or pruning shears, carefully cut away any dead or damaged roots, making sure to disinfect the tools between cuts to prevent the spread of disease. It's also essential to trim any old or damaged leaves, as these can be a haven for pests and diseases. Remove any leaves that are brown, wilted, or damaged, cutting them off at the base of the plant. This will help to promote healthy growth and prevent the spread of disease. Additionally, trimming old or damaged roots and leaves will help to reduce the risk of root rot, which can be a common problem in Aloe Vera plants. By removing any dead or damaged tissue, you can help to prevent the spread of disease and encourage healthy growth, giving your Aloe Vera the best chance to thrive in its new pot.
Planting the Aloe Vera in Its New Pot
When planting the aloe vera in its new pot, gently remove the plant from its old container, taking care not to damage the roots or disturb the soil. If the plant is stuck, you can run a knife or spatula around the inside of the pot to loosen it. Once removed, inspect the roots to see if they have become root-bound, which is a common issue with aloe vera plants. If the roots are circling or growing out of the drainage holes, use a pair of sterile scissors or pruning shears to gently trim them back, making sure not to cut too much of the root system. Next, place a layer of fresh potting soil in the bottom of the new pot, leaving enough space for the plant's roots to grow. Position the aloe vera in the center of the pot, making sure the base of the plant is level with the soil surface. Fill in the sides with more potting soil, gently firming it around the roots as you go to prevent air pockets from forming. Make sure not to pack the soil too tightly, as this can prevent proper drainage and cause the roots to rot. Finally, water the plant thoroughly to settle the soil and provide enough moisture to support establishment in its new home.