How To Mute On Zoom
Here is the introduction paragraph: In today's digital age, video conferencing has become an essential tool for remote communication. Zoom, one of the most popular video conferencing platforms, offers a range of features to enhance the user experience. However, with the increased use of Zoom, users often encounter audio issues that can disrupt meetings and discussions. To ensure a seamless and productive experience, it's crucial to understand how to manage your audio settings on Zoom. This article will provide you with a comprehensive guide on how to mute on Zoom, including muting your microphone, managing your audio settings, and troubleshooting common audio issues. By the end of this article, you'll be able to navigate Zoom's audio features with confidence. Let's start with the basics: muting your microphone on Zoom.
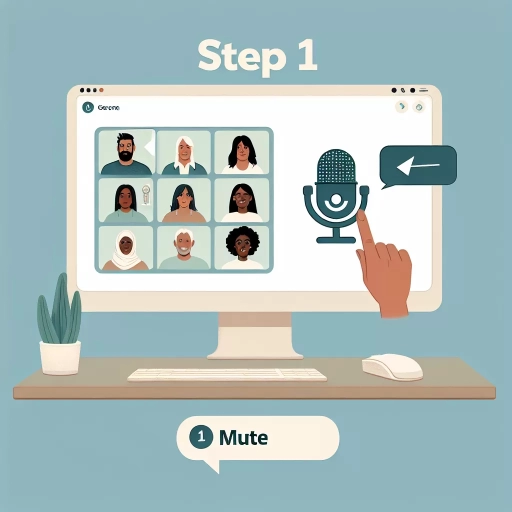
Muting Your Microphone on Zoom
When using Zoom for online meetings, it's essential to know how to mute your microphone to avoid background noise and distractions. There are several ways to do this, including using the mute button on the Zoom interface, using keyboard shortcuts, and muting your microphone before joining a meeting. In this article, we'll explore these methods in more detail, starting with the most straightforward approach: using the mute button on the Zoom interface. By mastering these techniques, you'll be able to communicate more effectively and professionally in your online meetings. So, let's dive in and learn how to mute your microphone on Zoom, starting with the simplest method.
Using the Mute Button on the Zoom Interface
When using the Zoom interface, the mute button is a crucial feature that allows you to control your audio input. To mute your microphone, simply click on the "Mute" button, which is usually located at the bottom left corner of the screen. This button is represented by a microphone icon with a red line through it. When you click on this button, your microphone will be muted, and you will not be heard by other participants in the meeting. To unmute your microphone, simply click on the "Unmute" button, which is represented by a microphone icon without a red line through it. You can also use the keyboard shortcut "Ctrl+M" (Windows) or "Cmd+Shift+A" (Mac) to quickly mute and unmute your microphone. Additionally, you can also use the "Spacebar" to temporarily unmute your microphone while it is muted, allowing you to quickly make a comment or ask a question without having to fully unmute your microphone. By using the mute button on the Zoom interface, you can easily control your audio input and avoid any background noise or distractions during meetings.
Using Keyboard Shortcuts to Mute Your Microphone
Using keyboard shortcuts to mute your microphone on Zoom is a convenient and efficient way to control your audio during meetings. By default, Zoom assigns the keyboard shortcut "Ctrl + M" (Windows) or "Command + Shift + A" (Mac) to mute and unmute your microphone. This shortcut allows you to quickly toggle your microphone on and off without having to navigate through the Zoom interface. To use this shortcut, simply press the corresponding keys on your keyboard, and your microphone will be muted or unmuted instantly. Additionally, you can also customize the keyboard shortcut to mute your microphone by going to the Zoom settings and selecting the "Audio" tab. From there, you can choose a different keyboard shortcut that suits your preferences. By using keyboard shortcuts to mute your microphone, you can minimize distractions, avoid background noise, and maintain a professional atmosphere during Zoom meetings. Furthermore, this feature is particularly useful for large meetings or presentations where multiple participants need to be muted and unmuted quickly. Overall, using keyboard shortcuts to mute your microphone on Zoom is a simple yet effective way to manage your audio and ensure a smooth and productive meeting experience.
Muting Your Microphone Before Joining a Meeting
Muting your microphone before joining a meeting is a considerate and professional practice that can help prevent background noise and distractions from disrupting the conversation. When you join a meeting with your microphone unmuted, you may inadvertently share background sounds, such as keyboard typing, rustling papers, or even personal conversations, with the other participants. This can be embarrassing and unprofessional, especially if you're not aware that your microphone is picking up these sounds. By muting your microphone before joining a meeting, you can avoid these awkward situations and ensure that you're not disturbing others. Additionally, muting your microphone can also help you avoid accidentally interrupting others or making unwanted noises during the meeting. It's a simple yet effective way to show respect for others and maintain a professional atmosphere during online meetings. Furthermore, muting your microphone before joining a meeting can also help you get into a focused mindset, allowing you to fully engage with the conversation and avoid distractions. Overall, muting your microphone before joining a meeting is a good habit to develop, and it can make a significant difference in the quality and productivity of your online meetings.
Managing Your Audio Settings on Zoom
Effective communication is key to a successful virtual meeting, and managing your audio settings on Zoom is crucial to ensure that your message is conveyed clearly. To achieve this, it's essential to configure your audio settings before a meeting, adjust them as needed during the meeting, and utilize features like "Push to Talk" to mute your microphone when not speaking. By taking these steps, you can minimize distractions, reduce echo and background noise, and ensure that your voice is heard loud and clear. In this article, we'll explore how to manage your audio settings on Zoom, starting with the importance of configuring your audio settings before a meeting. By doing so, you'll be able to test your audio and video, select the right microphone and speaker, and choose the optimal audio settings for your meeting. Let's dive into the details of configuring your audio settings before a meeting.
Configuring Your Audio Settings Before a Meeting
When joining a Zoom meeting, it's essential to configure your audio settings beforehand to ensure a seamless and distraction-free experience. To start, make sure you have a stable internet connection and a compatible device with a microphone and speakers. Next, open the Zoom app and navigate to the "Settings" or "Preferences" section, depending on your device. In the audio settings, select the correct microphone and speaker devices from the dropdown menus. If you're using a headset or external microphone, make sure it's properly connected and selected as the default device. You can also test your audio by clicking on the "Test Speaker" and "Test Microphone" buttons to ensure your devices are working correctly. Additionally, consider adjusting the audio settings to optimize your experience, such as selecting the "Original Sound" option to preserve the original audio quality or enabling "Stereo Audio" for a more immersive experience. By taking a few minutes to configure your audio settings before a meeting, you can avoid technical issues and focus on the discussion at hand.
Adjusting Your Audio Settings During a Meeting
When joining a meeting on Zoom, it's essential to adjust your audio settings to ensure a seamless and distraction-free experience for all participants. To start, make sure you're using a stable internet connection and a compatible device with a built-in microphone and speakers. Before the meeting begins, take a moment to test your audio by clicking on the "Test Speaker and Microphone" option in the Zoom settings. This will help you identify any issues with your audio equipment and make necessary adjustments. During the meeting, you can adjust your audio settings by clicking on the "Audio" icon in the bottom left corner of the screen. From here, you can select your preferred audio input and output devices, adjust the volume levels, and even switch to a different audio source if needed. Additionally, you can use the "Mute" button to temporarily silence your microphone, which is especially useful if you need to take a call or step away from your desk. By taking a few minutes to adjust your audio settings, you can ensure that your voice comes through clearly and that you can focus on the meeting without any distractions.
Using the "Push to Talk" Feature to Mute Your Microphone
Using the "Push to Talk" feature is a convenient way to mute your microphone on Zoom, allowing you to control when your audio is transmitted. To enable this feature, go to your Zoom settings, click on "Audio," and select "Press and hold SPACE key to unmute" or "Push to talk" depending on your device. Once enabled, you can press and hold the spacebar on your keyboard or the designated button on your device to unmute your microphone and start speaking. When you release the key or button, your microphone will automatically mute again. This feature is particularly useful in noisy environments or when you need to quickly mute your audio to avoid background noise or interruptions. By using the "Push to Talk" feature, you can ensure that your audio is only transmitted when you intend it to be, helping to minimize distractions and maintain a more professional atmosphere during your Zoom meetings.
Troubleshooting Common Audio Issues on Zoom
When using Zoom for online meetings, conferences, or classes, audio issues can be frustrating and disrupt the flow of communication. Common problems include echo or feedback, a muted microphone that won't unmute, and background noise or interference. To troubleshoot these issues, it's essential to understand the possible causes and solutions. In this article, we'll explore three common audio issues on Zoom and provide step-by-step guides on how to resolve them. We'll start by looking at how to resolve echo or feedback issues, which can be caused by a variety of factors, including poor internet connectivity, incorrect audio settings, or the use of multiple audio devices. By identifying the root cause of the problem and making a few simple adjustments, you can eliminate echo and feedback and ensure clear, uninterrupted audio. Let's dive into the first solution: Resolving Echo or Feedback Issues.
Resolving Echo or Feedback Issues
When dealing with echo or feedback issues on Zoom, there are several steps you can take to resolve the problem. First, check your audio settings to ensure that you are not using the same audio source for both your microphone and speaker. This can cause a loop of sound that results in echo or feedback. Try using a different audio source, such as a headset or earbuds, to see if this resolves the issue. Additionally, check to see if your microphone is too close to your speaker, as this can also cause echo or feedback. Try moving your microphone further away from your speaker or using a pop filter to reduce the sound. If you are using a computer, try closing any other programs that may be using your audio source, as this can also cause conflicts. You can also try restarting your computer or Zoom to see if this resolves the issue. If none of these steps resolve the issue, you may want to try using a different audio device or seeking further assistance from Zoom's technical support team.
Fixing a Muted Microphone That Won't Unmute
If your microphone is muted and won't unmute, there are several troubleshooting steps you can take to resolve the issue. First, check your microphone settings in Zoom to ensure that it is not muted or disabled. You can do this by clicking on the "Audio" tab in the Zoom settings and checking the "Mute" box. If the box is checked, uncheck it to unmute your microphone. Next, check your computer's audio settings to ensure that the microphone is not muted or disabled. You can do this by going to your computer's "Sound" or "Audio" settings and checking the microphone settings. If the microphone is muted or disabled, enable it and try to unmute it again in Zoom. Additionally, you can try restarting your computer or closing and reopening the Zoom application to see if this resolves the issue. If none of these steps work, you may need to check your internet connection or contact Zoom support for further assistance. It's also worth noting that some antivirus software or firewall settings may be blocking your microphone, so you may need to check those settings as well. By following these steps, you should be able to fix a muted microphone that won't unmute and get back to your Zoom meeting or call.
Dealing with Background Noise or Interference
Dealing with background noise or interference is a common challenge when using Zoom for online meetings or video conferencing. To minimize distractions and ensure clear communication, it's essential to identify and address the source of the noise. Start by checking your surroundings and equipment. Ensure that your microphone is not picking up background noise from your environment, such as traffic, construction, or household appliances. If possible, move to a quieter location or use noise-cancelling headphones. Next, inspect your audio equipment, including your microphone, headphones, and speakers. Make sure they are properly connected, and that there are no loose or damaged cables. If you're using a wireless microphone, check the battery level and ensure it's fully charged. Additionally, consider using a pop filter or windscreen to reduce plosive sounds and wind noise. If the issue persists, try adjusting your audio settings on Zoom. Go to the audio settings menu and select the "Suppress background noise" option. You can also try reducing the microphone sensitivity or switching to a different audio input. If you're still experiencing issues, consider using a noise-reducing software or app, such as Krisp or Noise Cancelling, to help eliminate background noise. By taking these steps, you can minimize background noise and ensure a more productive and distraction-free Zoom meeting.