How To Read A Crochet Pattern
Here is the introduction paragraph: Reading a crochet pattern can seem daunting, especially for beginners. However, with a little practice and patience, you can master the skill and create beautiful, intricate designs. To get started, it's essential to understand the basics of a crochet pattern, including the types of stitches, abbreviations, and symbols used. Once you have a solid grasp of the basics, you can break down the pattern into manageable sections, making it easier to follow along. As you become more confident in your ability to read the pattern, you'll be able to follow the instructions with ease, creating a beautiful finished product. In this article, we'll explore the fundamentals of reading a crochet pattern, starting with the basics.
Understanding the Basics of a Crochet Pattern
When it comes to understanding the basics of a crochet pattern, there are several key elements to consider. A well-written pattern should provide a clear and concise guide for crocheters to follow, but deciphering the instructions can be overwhelming for beginners. To successfully navigate a crochet pattern, it's essential to recognize the pattern format and structure, identify the type of crochet stitch used, and understand the abbreviations and symbols employed. By grasping these fundamental components, crocheters can ensure a smooth and enjoyable project. In this article, we'll delve into the world of crochet patterns, starting with the foundation of pattern recognition. Let's begin by exploring the format and structure of a typical crochet pattern, which will provide a solid understanding of how to approach and interpret the instructions.
Recognizing the Pattern Format and Structure
Recognizing the pattern format and structure is a crucial step in understanding how to read a crochet pattern. Most crochet patterns follow a standard format, which includes the pattern information, materials, gauge, abbreviations, and instructions. The pattern information typically includes the name of the pattern, the designer, and any relevant details about the project, such as the skill level and finished size. The materials section lists the yarn, hook, and any other supplies needed to complete the project. The gauge section provides information about the tension of the stitches, which is essential for ensuring that the finished project is the correct size. The abbreviations section explains any special stitches or techniques used in the pattern, and the instructions provide a step-by-step guide on how to complete the project. By recognizing the pattern format and structure, crocheters can quickly and easily find the information they need to get started with their project. Additionally, understanding the pattern format and structure can also help crocheters to identify any potential errors or inconsistencies in the pattern, which can save time and frustration in the long run. Overall, recognizing the pattern format and structure is an essential skill for any crocheter, and it can help to ensure that projects are completed successfully and with confidence.
Identifying the Type of Crochet Stitch Used
When it comes to identifying the type of crochet stitch used in a pattern, there are several key factors to consider. First, look at the stitch abbreviation or symbol used in the pattern. Most crochet patterns use standardized abbreviations, such as "sc" for single crochet or "dc" for double crochet. If you're unsure what an abbreviation means, refer to the pattern's key or legend, which should provide a list of all abbreviations used. Next, examine the stitch's texture and appearance. Different stitches produce distinct textures, such as the smooth, flat surface of a single crochet or the more textured, ridged surface of a double crochet. You can also look at the stitch's height and width, as some stitches are taller or wider than others. Additionally, pay attention to the number of yarn overs, chain stitches, and other stitches used in the pattern, as these can also indicate the type of stitch being used. By considering these factors, you can accurately identify the type of crochet stitch used in a pattern and ensure that your finished project looks as intended.
Understanding the Abbreviations and Symbols
When it comes to reading a crochet pattern, understanding the abbreviations and symbols used is crucial. These abbreviations and symbols are a shorthand way of communicating the stitches, techniques, and other important information needed to complete a project. The most common abbreviations include ch (chain), sc (single crochet), hdc (half double crochet), dc (double crochet), and st (stitch). You'll also come across symbols such as * (asterisk), which indicates a repeat, and ( ) (parentheses), which group stitches together. Other symbols like > (greater-than sign) and < (less-than sign) are used to indicate increases and decreases. Additionally, some patterns may use specialized symbols for specific stitches or techniques, such as the cable symbol or the Fair Isle symbol. It's essential to familiarize yourself with these abbreviations and symbols before starting a project, as they can greatly impact the overall look and fit of the finished item. By taking the time to understand these shorthand notations, you'll be able to confidently navigate even the most complex patterns and create beautiful, professional-looking crochet projects.
Breaking Down the Pattern into Manageable Sections
When working on a complex pattern, it can be overwhelming to look at the entire design and try to make sense of it. Breaking down the pattern into manageable sections is a crucial step in ensuring that your project turns out correctly. To do this, you'll need to start by identifying the gauge and swatch information, which will give you a clear understanding of the pattern's requirements. You'll also need to understand the pattern's schematic or diagram, which will help you visualize the overall design. Additionally, separating the pattern into repeating sections or rounds will make it easier to focus on one section at a time. By breaking down the pattern in this way, you'll be able to tackle each section with confidence and accuracy. So, let's start by taking a closer look at the gauge and swatch information, which is the foundation of any successful project.
Identifying the Gauge and Swatch Information
When it comes to reading a crochet pattern, one of the most crucial steps is identifying the gauge and swatch information. Gauge refers to the measure of how tightly or loosely the stitches are worked, and it's essential to ensure that your project will be the correct size. The gauge information is usually provided in the pattern and includes the number of stitches and rows per inch, as well as the type of yarn and hook used. To identify the gauge, look for a section in the pattern labeled "Gauge" or "Tension." This section will typically include a measurement, such as "12 dc stitches x 7 rows = 4 inches (10 cm) in single crochet stitch." This measurement tells you that if you crochet 12 double crochet stitches and 7 rows, the resulting fabric should measure 4 inches wide and 10 cm long. The swatch information is also crucial, as it provides a visual representation of the stitch pattern and helps you to ensure that your tension is correct. The swatch is usually a small sample of the fabric that you'll be creating, and it's worked using the same yarn, hook, and stitch pattern as the main project. By comparing your swatch to the gauge information, you can adjust your tension as needed to ensure that your project will be the correct size. It's essential to take the time to read and understand the gauge and swatch information, as it will save you time and frustration in the long run. By doing so, you'll be able to create a beautiful and professional-looking project that you'll be proud to show off.
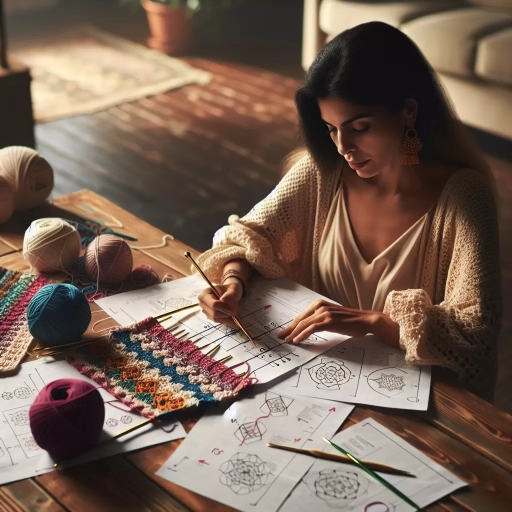
Understanding the Pattern's Schematic or Diagram
When it comes to understanding the pattern's schematic or diagram, it's essential to take a closer look at the visual representation of the project. The schematic or diagram is a crucial part of the pattern, as it provides a clear and concise overview of the project's construction. Typically, the schematic or diagram is a line drawing or a chart that illustrates the various components of the project, such as the body, sleeves, and any additional features like pockets or collars. By studying the schematic or diagram, you can gain a deeper understanding of how the different parts of the project fit together and how they relate to each other. This visual representation can also help you identify any potential challenges or areas of complexity, allowing you to plan and prepare accordingly. Furthermore, the schematic or diagram often includes important details such as stitch counts, row repeats, and shaping instructions, which are critical to ensuring that your finished project looks and fits as intended. By carefully examining the schematic or diagram, you can develop a clear mental picture of the project and make informed decisions about your yarn, hook, and stitch choices. Ultimately, taking the time to understand the pattern's schematic or diagram is an essential step in ensuring a successful and enjoyable crochet experience.
Separating the Pattern into Repeating Sections or Rounds
When separating the pattern into repeating sections or rounds, it's essential to identify the repeating elements, such as stitches, rows, or rounds, and group them together. This will help you understand the pattern's structure and make it easier to follow. Look for keywords like "repeat," "rep," or "rnd" to indicate the start of a new section or round. You can also use visual cues like asterisks (*) or parentheses to help you identify the repeating sections. Once you've identified the repeating elements, you can break them down into smaller, more manageable chunks, making it easier to focus on one section at a time. By separating the pattern into repeating sections or rounds, you'll be able to see the pattern's rhythm and flow, making it easier to crochet and reducing the likelihood of errors.
Following the Pattern Instructions with Confidence
When it comes to following pattern instructions with confidence, there are several key strategies that can make all the difference. One of the most important is to read the pattern row by row or round by round, rather than trying to take in the entire pattern at once. This approach allows you to focus on one step at a time and ensures that you don't miss any crucial details. Additionally, using stitch markers and placeholders can be a huge help in keeping track of your place and maintaining accuracy. Finally, counting stitches and rows regularly can help you catch any mistakes before they become major issues. By incorporating these techniques into your workflow, you can follow even the most complex patterns with confidence and achieve professional-looking results. So, let's start by taking a closer look at how to read the pattern row by row or round by round.
Reading the Pattern Row by Row or Round by Round
When reading a crochet pattern, it's essential to understand how to follow the instructions row by row or round by round. This involves breaking down the pattern into manageable sections and working through each one systematically. Start by identifying the beginning of the row or round, usually marked by a number or a symbol. Then, read the instructions for that specific row or round, taking note of any stitches, increases, decreases, or special techniques required. Work through the row or round, stitch by stitch, following the instructions carefully. As you complete each row or round, check your work against the pattern to ensure you're on track. If you encounter any errors or uncertainties, refer back to the pattern and re-read the instructions before proceeding. By reading the pattern row by row or round by round, you'll be able to follow the instructions with confidence and create a beautiful, professional-looking finished project.
Using Stitch Markers and Placeholders to Keep Track
Using stitch markers and placeholders is a crucial technique to master when working with crochet patterns. These small tools help you keep track of your place in the pattern, ensuring that you complete the correct number of stitches and rows. Stitch markers are small markers that you can place on your hook or on the stitches themselves to mark specific points in the pattern. They come in different shapes, sizes, and materials, and can be purchased at most craft stores or online. Placeholders, on the other hand, are small pieces of yarn or thread that you can use to mark specific stitches or rows. To use stitch markers and placeholders effectively, start by reading through the pattern and identifying the points where you need to mark your place. Then, place a stitch marker or placeholder at each of these points, making sure to note what each marker represents. As you work through the pattern, move the markers or placeholders as needed to keep track of your progress. This will help you stay organized and avoid mistakes, allowing you to complete your project with confidence. By using stitch markers and placeholders, you can ensure that your finished project looks professional and polished, and that you can enjoy the process of creating it without stress or frustration.
Counting Stitches and Rows to Ensure Accuracy
When it comes to ensuring accuracy in your crochet project, counting stitches and rows is crucial. This simple yet essential step can make all the difference in achieving the desired shape, size, and texture of your finished product. To count stitches, start by identifying the first stitch of the row or round, usually marked by a stitch marker or a specific instruction in the pattern. Then, count each stitch individually, making sure to include any increases, decreases, or special stitches. It's essential to count carefully, as miscounting can lead to errors that may be difficult to fix later on. To count rows, look for the row marker or the beginning of the round, and count each row or round individually. Make sure to count the foundation chain as the first row, unless the pattern specifies otherwise. By double-checking your stitch and row count, you can ensure that your project is on track and make any necessary adjustments before it's too late. This habit of counting stitches and rows will become second nature with practice, allowing you to work with confidence and accuracy, even on complex patterns.