How To Paint Behind A Toilet
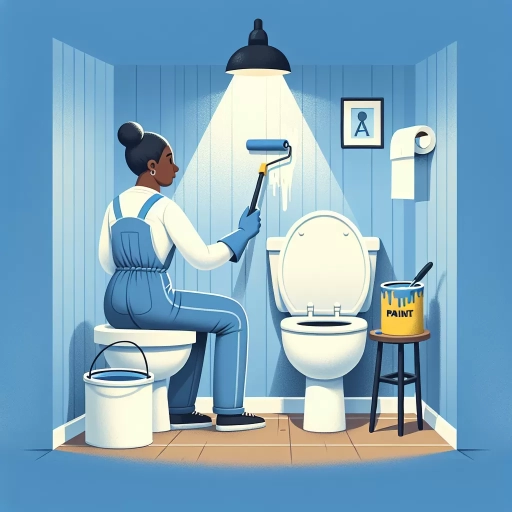
Painting behind a toilet can be a daunting task, but with the right approach, it can be a breeze. To achieve a professional-looking finish, it's essential to focus on three critical aspects: preparation, choosing the right tools and materials, and executing the painting process with ease. Preparation is key to ensuring a smooth and successful painting experience. By taking the time to prepare the area, you'll be able to avoid common mistakes and achieve a flawless finish. In this article, we'll delve into the importance of preparation, discuss the right tools and materials to use, and provide tips on how to paint behind the toilet with ease. So, let's start with the foundation of a successful painting project: preparation is key.
Preparation is Key
When it comes to toilet installation, preparation is key to a successful and stress-free experience. Before the installation process begins, it's essential to take the necessary steps to ensure a smooth and efficient process. This includes clearing the area around the toilet, covering the floor and surroundings, and removing any hardware or accessories. By doing so, you'll be able to avoid any potential obstacles and ensure that the installation team has a clear and safe working space. In this article, we'll dive deeper into the importance of preparation and provide you with a step-by-step guide on how to prepare your bathroom for a toilet installation. First, let's start with the first crucial step: clearing the area around the toilet.
Clear the Area Around the Toilet
Clear the area around the toilet to ensure a smooth and efficient painting process. Start by removing any items that are within a three-foot radius of the toilet, including trash cans, toilet paper holders, and any other decorative items. If you have a toilet brush holder, take it off the wall or remove it from the floor to prevent any paint from getting on it. Next, cover the floor and any surrounding surfaces with drop cloths or plastic sheets to protect them from paint spills and splatters. Use masking tape to secure the drop cloths in place and ensure they don't shift during the painting process. Additionally, consider removing the toilet seat and lid to prevent paint from getting on them, and to make it easier to paint the area behind the toilet. If you can't remove the toilet seat and lid, use a paint shield or a piece of cardboard to protect them from paint. By clearing the area around the toilet, you'll be able to paint behind it with ease and avoid any mess or damage.
Cover the Floor and Surroundings
When painting behind a toilet, it's essential to cover the floor and surroundings to prevent paint spills and splatters from damaging the area. Start by laying down a drop cloth or old sheets to cover the entire floor, ensuring it's large enough to extend under the toilet and surrounding areas. Secure the cloth with masking tape to prevent it from shifting during the painting process. Next, cover the baseboards, trim, and any adjacent surfaces with painter's tape, applying it carefully to ensure a seal. If you have a tile floor, consider using a tile and grout sealer to protect it from paint stains. Additionally, remove any rugs, mats, or other floor coverings to prevent them from getting damaged. By taking the time to cover the floor and surroundings, you'll be able to focus on painting behind the toilet without worrying about making a mess.
Remove Any Hardware or Accessories
When preparing to paint behind a toilet, it's essential to remove any hardware or accessories that may be in the way or obstruct the painting process. This includes toilet paper holders, towel racks, and any other decorative items that may be attached to the wall. Remove any screws, nails, or adhesive strips that hold these items in place, and set them aside for reinstallation later. Additionally, consider removing the toilet itself if possible, or at least the toilet seat and lid, to ensure a smooth and even paint job. If removal is not feasible, use a drop cloth or plastic sheeting to protect the toilet and surrounding areas from paint splatters and spills. By removing any hardware or accessories, you'll be able to paint the area behind the toilet with ease and achieve a professional-looking finish.
Choosing the Right Tools and Materials
When it comes to choosing the right tools and materials for a bathroom painting project, there are several factors to consider. The right tools and materials can make all the difference in achieving a professional-looking finish and ensuring the longevity of the paint job. In this article, we will explore the key considerations for selecting the right tools and materials for a bathroom painting project. We will discuss the importance of selecting a paint suitable for bathrooms, picking the right brush or roller for the job, and considering using a paint with mildew-resistant properties. By understanding these key factors, homeowners can ensure a successful and stress-free painting project. With the right tools and materials, homeowners can achieve a beautiful and durable finish that will withstand the humid conditions of a bathroom. So, let's start by exploring the first key consideration: selecting a paint suitable for bathrooms.
Select a Paint Suitable for Bathrooms
When it comes to painting a bathroom, selecting the right paint is crucial to ensure a durable and long-lasting finish. Bathrooms are prone to moisture, humidity, and mildew, which can damage the paint and compromise its appearance. To combat these challenges, it's essential to choose a paint specifically designed for bathrooms. Look for paints labeled as "bathroom" or "kitchen and bath" formulas, which are typically formulated with mildew-resistant additives and moisture-wicking properties. These paints are usually made with a higher sheen level, such as semi-gloss or high-gloss, to make cleaning easier and to resist water spots. Additionally, consider using a paint with a built-in primer to save time and effort. Some popular paint options for bathrooms include latex-based paints, which are water-resistant and easy to clean, and epoxy-based paints, which offer excellent durability and resistance to mildew and mold. When selecting a paint, also consider the color and finish you want to achieve. A lighter color can make the bathroom appear larger, while a semi-gloss finish can add a touch of elegance. Ultimately, choosing the right paint for your bathroom will ensure a beautiful and long-lasting finish that withstands the unique challenges of this high-moisture space.
Pick the Right Brush or Roller for the Job
When it comes to painting behind a toilet, choosing the right brush or roller is crucial for achieving a smooth, even finish. For this tight space, a brush is usually the better option. Opt for a high-quality, angled brush with synthetic bristles, which will allow you to reach into the corners and edges with ease. The angle of the brush will also help you to paint the area behind the toilet without having to stretch or contort. Look for a brush with bristles that are about 1-2 inches long, as this will give you the best control and precision. If you do decide to use a roller, choose a small, foam roller with a short nap (about 1/4 inch). This will help to prevent drips and unevenness, and will also allow you to get into the tight spaces. Regardless of whether you choose a brush or roller, make sure to select one that is specifically designed for use with the type of paint you are using. For example, if you are using a water-based paint, choose a brush or roller that is designed for use with water-based paints. This will ensure that the brush or roller doesn't absorb too much paint, causing it to become heavy and difficult to maneuver. By choosing the right brush or roller for the job, you'll be able to achieve a professional-looking finish and avoid the frustration of dealing with drips and unevenness.
Consider Using a Paint with Mildew-Resistant Properties
When painting behind a toilet, it's essential to consider using a paint with mildew-resistant properties. This is because the area behind a toilet is often prone to moisture, which can lead to the growth of mildew and mold. Mildew-resistant paint contains additives that inhibit the growth of mildew and mold, helping to keep the area clean and fresh. Additionally, mildew-resistant paint can also help to reduce the risk of unpleasant odors and stains. Look for paints that are specifically labeled as "mildew-resistant" or "mold-resistant," and follow the manufacturer's instructions for application and maintenance. By using a mildew-resistant paint, you can help to create a healthier and more hygienic environment in your bathroom.
Painting Behind the Toilet with Ease
Painting behind the toilet can be a daunting task, but with the right techniques and tools, it can be done with ease. To achieve a professional-looking finish, it's essential to use a combination of painting methods. First, use a paintbrush to cut in around the edges, ensuring a crisp, clean line where the wall meets the toilet. Next, apply paint to the main area with a roller, working in sections to maintain even coverage. By breaking down the process into these manageable steps, you'll be able to paint behind the toilet with confidence and achieve a beautiful, long-lasting finish. To get started, let's take a closer look at the first step: using a paintbrush to cut in around the edges.
Use a Paintbrush to Cut in Around the Edges
When painting behind a toilet, one of the most crucial steps is to cut in around the edges. This involves using a paintbrush to create a seal between the wall and the toilet, ensuring a clean and professional finish. To do this, start by loading your paintbrush with a small amount of paint, and then carefully paint a 2-3 inch border around the edges of the toilet. Make sure to work in small sections, using smooth, steady strokes to maintain even coverage. It's essential to keep the brush at a 45-degree angle, allowing you to get into tight spaces and corners. As you work, use a gentle touch to avoid getting paint on the toilet or surrounding surfaces. If necessary, use a damp cloth to wipe away any excess paint or mistakes. By taking the time to carefully cut in around the edges, you'll be able to achieve a seamless finish that looks like a professional did the job.
Apply Paint to the Main Area with a Roller
When painting the main area behind the toilet, a roller is the most efficient tool to use. Start by loading the roller with the right amount of paint, making sure to remove any excess paint from the roller to prevent drips and uneven coverage. Hold the roller at a 90-degree angle to the wall and work in sections, typically 4 feet by 4 feet. Apply the paint in a "W" or "M" pattern, working from top to bottom to prevent drips and runs. Use light, even strokes to cover the entire section, feathering the edges as you go to blend with the surrounding area. Apply two coats of paint, allowing the first coat to dry completely before applying the second coat. This will ensure a smooth, even finish and prevent any streaks or marks. By using a roller to paint the main area, you'll be able to cover a large surface quickly and efficiently, making the process of painting behind the toilet much easier.
Work in Sections to Maintain Even Coverage
When painting behind a toilet, it's essential to work in sections to maintain even coverage. Divide the area into smaller sections, such as the wall behind the toilet, the area around the toilet's base, and the space between the toilet and the adjacent wall. This approach allows you to focus on one section at a time, ensuring that you cover the entire area evenly. Start by painting the section that is most visible, usually the wall behind the toilet, and work your way down to the less visible areas. Use a high-quality paintbrush or roller to apply the paint, and make sure to work in small, smooth strokes to avoid drips and unevenness. As you complete each section, use a clean, damp cloth to wipe away any excess paint or drips, and allow the paint to dry completely before moving on to the next section. By working in sections, you'll be able to achieve a professional-looking finish and avoid the hassle of trying to paint the entire area at once. Additionally, working in sections also helps to prevent paint from getting on surrounding surfaces, such as the toilet, floor, or adjacent walls, making the painting process much neater and more efficient.