How To Change Led Bulb In Recessed Ceiling Light With Cover
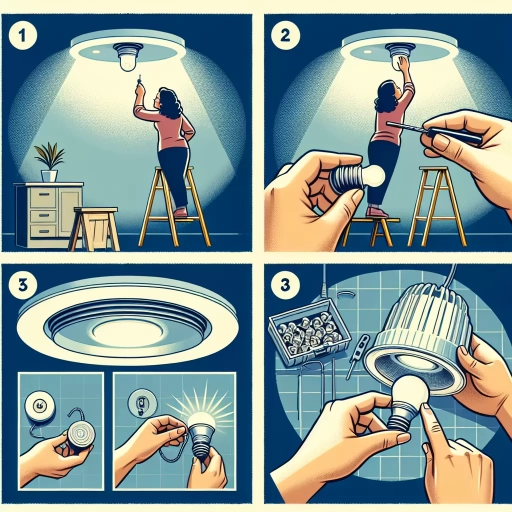
Changing a LED bulb in a recessed ceiling light with a cover can seem like a daunting task, but with the right guidance, it can be done efficiently and safely. To ensure a successful replacement, it's essential to approach the task with a clear understanding of the steps involved. The process can be broken down into three key stages: preparation, removal of the cover and old bulb, and installation of the new LED bulb. Preparation is crucial, as it sets the stage for the entire process. By having the necessary tools and information readily available, you can avoid potential pitfalls and ensure a smooth transition. In this article, we will delve into the specifics of each stage, starting with the importance of preparation. By understanding what to expect and how to prepare, you'll be well on your way to successfully changing your LED bulb. Preparation is Key.
Preparation is Key
Preparation is key when it comes to replacing a light fixture. Before starting the project, it's essential to take the necessary steps to ensure a smooth and safe process. This includes turning off the power to the light fixture, gathering the necessary tools and materials, and choosing the correct replacement LED bulb. By doing so, you'll avoid any potential hazards and ensure that the job is done efficiently. In this article, we'll dive deeper into each of these crucial steps, starting with the most critical one: turning off the power to the light fixture.
Turn Off the Power to the Light Fixture
To ensure a safe and successful LED bulb replacement in your recessed ceiling light with a cover, it's crucial to turn off the power to the light fixture before starting the process. This step is often overlooked, but it's essential to avoid any potential electrical shocks or injuries. Locate the main electrical panel or breaker box in your home and identify the switch or circuit breaker that controls the power to the light fixture. Flip the switch or toggle the breaker to the "off" position, and then verify that the light is completely dark. If you're still unsure, use a non-contact voltage tester to confirm that there's no electricity flowing to the fixture. Additionally, consider turning off the power to the entire circuit or switching off the main electrical panel to ensure your safety while working on the light fixture. By taking this precautionary step, you'll be able to work on the light fixture without worrying about electrical hazards, and you'll be able to complete the LED bulb replacement process efficiently and effectively.
Gather the Necessary Tools and Materials
To change an LED bulb in a recessed ceiling light with a cover, it's essential to gather the necessary tools and materials beforehand. Start by collecting a replacement LED bulb that matches the wattage and voltage of the existing one. You'll also need a ladder or step stool that's sturdy and tall enough to reach the ceiling safely. A non-contact voltage tester is crucial to ensure the power is off before starting the replacement process. Additionally, a screwdriver or Allen wrench may be required to remove the cover or trim ring, depending on the type of recessed light you have. If the bulb is stuck or difficult to remove, a pair of needle-nose pliers can come in handy. It's also a good idea to have a cloth or paper towel to clean any dust or debris that may have accumulated on the cover or bulb. Finally, make sure you have a pair of gloves and safety glasses to protect yourself from any potential electrical shock or falling debris. By gathering all the necessary tools and materials, you'll be well-prepared to tackle the replacement process efficiently and safely.
Choose the Correct Replacement LED Bulb
When it comes to replacing an LED bulb in a recessed ceiling light with a cover, choosing the correct replacement bulb is crucial to ensure proper fit, function, and safety. The first step is to identify the type of bulb you need, which can be determined by checking the packaging of the old bulb or the manufacturer's instructions. Look for the wattage, voltage, and base type (e.g., E26 or GU10) to ensure compatibility. Next, consider the color temperature and brightness you prefer, as LED bulbs come in a range of options, from warm white to cool white and dimmable to non-dimmable. Additionally, check if the bulb is IC-rated (insulation contact) or non-IC-rated, as this affects the bulb's ability to be in contact with insulation. It's also essential to verify the bulb's lumen output, as this will impact the overall brightness of the light. Finally, check the bulb's certifications, such as Energy Star or UL (Underwriters Laboratories), to ensure it meets safety and energy efficiency standards. By carefully selecting the correct replacement LED bulb, you can ensure a safe and successful installation.
Removing the Cover and Old Bulb
Removing the cover and old bulb is a crucial step in replacing a light fixture. To do this, you'll need to start by removing the cover or trim ring that holds the bulb in place. This will give you access to the bulb and allow you to remove it. Next, you'll need to gently pull out the old bulb from the socket. Be careful not to touch any of the electrical components or wires. Finally, you'll need to disconnect the old bulb from the socket, taking care not to damage the socket or the new bulb. By following these steps, you'll be able to successfully remove the cover and old bulb, making way for a new one. To begin, let's start with the first step: removing the cover or trim ring.
Remove the Cover or Trim Ring
To remove the cover or trim ring, start by identifying the type of recessed light fixture you have. If it has a spring-loaded clip, you'll need to push the clip inward while gently pulling the cover away from the ceiling. For fixtures with screws, use a screwdriver to remove the screws that hold the cover in place. Some covers may have a latch or clip that needs to be released before it can be removed. Once you've identified the type of fastening mechanism, carefully remove the cover or trim ring, taking note of any wires or clips that may be attached to it. Set the cover aside in a safe place to avoid damaging it or losing any screws. With the cover removed, you should now have access to the old bulb and be able to proceed with removing it.
Gently Pull Out the Old Bulb
Gently pull out the old bulb from the socket, taking care not to touch any of the internal components of the recessed light fixture. If the bulb is stuck, do not force it, as this can cause damage to the socket or the bulb itself. Instead, try gently rocking the bulb back and forth while pulling it out. This should help loosen it and allow it to be removed safely. Once the old bulb is out, set it aside and prepare to install the new LED bulb. Make sure to handle the new bulb carefully, as the glass or plastic components can be fragile and prone to breakage.
Disconnect the Old Bulb from the Socket
To disconnect the old bulb from the socket, start by identifying the type of bulb holder or socket your recessed ceiling light uses. Most common types include screw-in (E26 or E27), bayonet-style, or pin-based sockets. For screw-in bulbs, grasp the bulb firmly and twist it counterclockwise until it comes loose from the socket. For bayonet-style bulbs, press the bulb gently and twist it counterclockwise to release it from the socket. If your bulb has pins, pull it straight out of the socket. Be careful not to touch any of the internal components or wires, as this can cause damage or injury. Once the bulb is removed, take a moment to inspect the socket for any signs of wear or damage. If you notice any issues, consider replacing the socket or consulting a licensed electrician for assistance. With the old bulb disconnected, you can now proceed to remove the cover and prepare for the installation of your new LED bulb.
Installing the New LED Bulb
Installing a new LED bulb is a straightforward process that can be completed with a few simple steps. To ensure a successful installation, it's essential to follow the correct procedure to avoid any potential risks or damage to the lighting fixture. The process begins with inserting the new bulb into the socket, which requires careful handling to avoid touching any electrical components. Once the bulb is securely in place, the next step is to reconnect the new bulb to the socket, making sure all connections are secure and tightened properly. Finally, the cover or trim ring should be replaced to complete the installation and ensure a safe and secure fit. By following these steps, you can enjoy the benefits of energy-efficient LED lighting in your home or office. Now, let's start with the first step: inserting the new bulb into the socket.
Insert the New Bulb into the Socket
Insert the new bulb into the socket by gently pushing it in until it clicks into place. Make sure it's seated properly and the tabs or clips are securely holding it in position. If your recessed light has a spring-loaded socket, you may need to push the bulb in and then twist it slightly to secure it. Be careful not to touch any of the internal components or wires, as this can cause damage or create a safety hazard. Once the bulb is in place, double-check that it's securely fastened and won't come loose over time. If you're using a bulb with a different base type or size, ensure it's compatible with your recessed light fixture to avoid any issues.
Reconnect the New Bulb to the Socket
Reconnect the new bulb to the socket by gently pushing it into place, ensuring it's seated properly and the tabs or clips are securely fastened. Make sure not to touch any of the internal components or wires, as the oils from your skin can damage the bulb or cause it to malfunction. If your recessed ceiling light has a spring-loaded socket, you may need to press the bulb gently but firmly until it clicks into place. Once the bulb is secure, double-check that it's properly seated and the socket is closed to prevent any accidental falls or electrical shocks.
Replace the Cover or Trim Ring
To replace the cover or trim ring, start by gently grasping the cover and twisting it counterclockwise. This should loosen the cover, allowing you to remove it from the recessed lighting fixture. If the cover is stuck, you can use a soft cloth or a rubber grip to provide extra traction. Once the cover is removed, set it aside in a safe place to avoid losing it. Next, inspect the trim ring, which is usually held in place by small clips or screws. If the trim ring is held by clips, you can simply pull it away from the fixture. If it's held by screws, use a screwdriver to remove the screws and gently pry the trim ring away from the fixture. Be careful not to damage the trim ring or the surrounding area. With the cover and trim ring removed, you should now have access to the LED bulb and the socket. Make sure to handle the electrical components with care to avoid any accidents or injuries.