How To Cut Polycarbonate Panels
Polycarbonate panels are a popular choice for various applications, including greenhouses, roofing, and wall cladding, due to their durability, impact resistance, and energy efficiency. However, cutting these panels can be a challenging task, especially for those who are new to working with this material. To ensure a successful cutting process, it is essential to understand the best practices and techniques involved. In this article, we will explore the key steps to cut polycarbonate panels effectively, starting with the importance of preparation, followed by the various cutting techniques, and finally, the necessary post-cutting procedures. By following these guidelines, you will be able to achieve professional-looking results and avoid common mistakes. Preparation is Key, as it sets the stage for a smooth and efficient cutting process, and it is where we will begin our journey to mastering the art of cutting polycarbonate panels.
Preparation is Key
Preparation is key to a successful project. Whether you're a seasoned professional or a DIY enthusiast, having the right mindset and tools can make all the difference. To ensure a smooth and efficient process, it's essential to choose the right tools for the job, measure and mark the panel accurately, and wear protective gear to prevent injuries. By taking these crucial steps, you'll be able to tackle your project with confidence and achieve professional-looking results. In this article, we'll explore the importance of preparation and provide you with practical tips to get started. First, let's take a closer look at the first step: choosing the right tools.
Choose the Right Tools
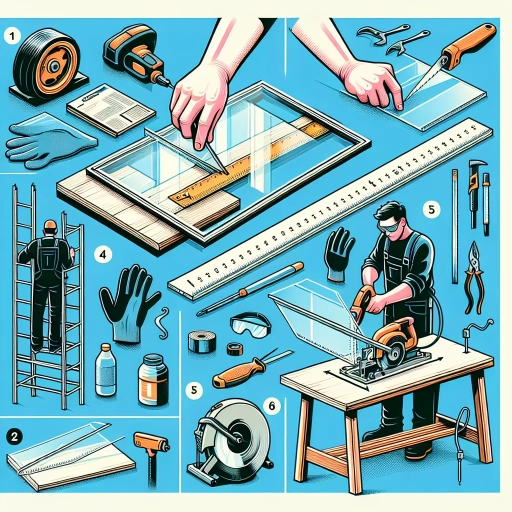
When it comes to cutting polycarbonate panels, having the right tools is essential for a successful and safe experience. The first tool you'll need is a high-quality utility knife or a specialized polycarbonate cutter. These tools are designed specifically for cutting through polycarbonate and will help you achieve a clean and precise cut. A utility knife with a sharp blade is also a good option, but be sure to use a straightedge or ruler to guide the blade and prevent accidents. In addition to a cutting tool, you'll also need a measuring tape, a square, and a pencil to mark your cut lines accurately. A safety glasses and a dust mask are also recommended to protect yourself from flying debris and dust. For more complex cuts or large panels, a power saw such as a circular saw or a jigsaw may be necessary. However, be sure to use a fine-toothed blade and a slow, steady motion to avoid damaging the panel. By choosing the right tools for the job, you'll be able to cut your polycarbonate panels with confidence and achieve professional-looking results.
Measure and Mark the Panel
To accurately cut a polycarbonate panel, it's crucial to measure and mark it correctly. Start by measuring the dimensions of the area where the panel will be installed, taking into account any obstructions or irregularities. Use a tape measure to record the length, width, and any angles or curves. Next, transfer these measurements to the polycarbonate panel using a marker or pencil, ensuring to mark the cutting line clearly. It's essential to double-check your measurements to avoid errors, as polycarbonate panels can be expensive to replace. If you're unsure, consider creating a template or mockup to test your measurements before cutting the actual panel. Additionally, use a straightedge or ruler to draw a straight line along the marked cutting line, providing a clear guide for your cutting tool. By taking the time to accurately measure and mark your polycarbonate panel, you'll ensure a precise cut and a successful installation.
Wear Protective Gear
Wearing protective gear is a crucial step in preparing to cut polycarbonate panels. This gear serves as a barrier between you and the potential hazards associated with the cutting process. Safety glasses or goggles protect your eyes from flying debris and shards of plastic, while a dust mask prevents inhalation of fine particles and dust. Gloves provide grip, protection, and control, reducing the risk of cuts and abrasions on your hands. A long-sleeved shirt, long pants, and closed-toe shoes further shield your skin from potential cuts and scratches. Additionally, a face shield or respirator can offer extra protection against more severe hazards, such as chemical splashes or intense dust. By wearing protective gear, you significantly reduce the risk of injury and create a safer working environment, allowing you to focus on the task at hand and achieve a successful outcome.
Cutting Techniques for Polycarbonate Panels
Polycarbonate panels are a popular choice for various applications, including greenhouses, roofing, and wall cladding, due to their durability, impact resistance, and transparency. However, cutting these panels can be a challenging task if you don't have the right techniques and tools. In this article, we will explore three effective cutting techniques for polycarbonate panels: using a circular saw for straight cuts, utilizing a jigsaw for curved cuts, and scoring and breaking for simple cuts. By mastering these techniques, you can achieve professional-looking results and ensure a safe and efficient cutting process. To start, let's dive into the first technique: using a circular saw for straight cuts, which is ideal for making precise and clean cuts in polycarbonate panels.
Using a Circular Saw for Straight Cuts
When it comes to making straight cuts in polycarbonate panels, a circular saw is an excellent tool to use. To achieve a precise cut, start by ensuring the saw blade is sharp and suitable for cutting plastics. A blade with a high tooth count, typically between 60 to 80 teeth, is ideal for cutting polycarbonate panels. Next, set the saw to the correct depth, taking care not to cut too deeply and damage the panel. It's also essential to use a straightedge or guide rail to keep the saw moving in a straight line. This can be achieved by clamping a straightedge to the panel or using a guide rail attached to the saw. As you make the cut, apply gentle to moderate pressure, depending on the thickness of the panel, and maintain a consistent speed. To prevent the saw from binding or kicking back, keep the panel firmly supported and use a push stick or other safety device if necessary. By following these steps and using a circular saw with a suitable blade, you can make accurate and straight cuts in polycarbonate panels with ease.
Utilizing a Jigsaw for Curved Cuts
When it comes to making curved cuts in polycarbonate panels, a jigsaw is an excellent tool to utilize. This versatile power tool is designed to handle a variety of cutting tasks, including curved cuts, with ease and precision. To achieve a smooth and accurate curved cut, it's essential to use a jigsaw blade specifically designed for curved cuts. These blades typically have a finer tooth pattern and a more flexible design, allowing for tighter turns and more precise control. When operating the jigsaw, maintain a steady and consistent pace, applying gentle to moderate pressure, depending on the thickness and type of polycarbonate panel being cut. It's also crucial to keep the jigsaw blade perpendicular to the cutting surface to prevent binding and ensure a clean cut. To further enhance accuracy and control, consider using a jigsaw with an orbital action, which allows for more aggressive cutting and improved maneuverability. Additionally, using a jigsaw with a dust blower or vacuum attachment can help keep the cutting area clean and clear of debris, reducing the risk of errors and improving overall cutting performance. By following these guidelines and utilizing a jigsaw specifically designed for curved cuts, you can achieve professional-grade results and successfully complete your polycarbonate panel cutting project.
Scoring and Breaking for Simple Cuts
Scoring and breaking is a simple and effective method for cutting polycarbonate panels, especially for straight cuts. To score the panel, use a utility knife or a specialized scoring tool to create a shallow groove along the desired cutting line. Apply gentle to moderate pressure, depending on the thickness of the panel, and maintain a consistent scoring depth to avoid applying too much pressure, which can cause the panel to crack or shatter. Once the scoring process is complete, place the panel on a flat surface with the scored line facing up and apply gentle pressure to the panel on either side of the scored line. The panel should break cleanly along the scored line, leaving a smooth edge. It's essential to note that scoring and breaking works best for thinner panels, typically up to 6 mm in thickness, and may not be effective for thicker panels. Additionally, this method may not be suitable for curved or complex cuts, as it can be challenging to maintain a consistent scoring depth and control the breaking process. However, for simple, straight cuts, scoring and breaking is a quick and efficient method that can produce high-quality results with minimal equipment and expertise.
Post-Cutting Procedures
After cutting a panel to size, several post-cutting procedures are necessary to ensure the final product meets the desired quality and functionality. These procedures are crucial in enhancing the overall appearance, safety, and performance of the panel. Three key post-cutting procedures that are commonly performed include deburring the cut edges, smoothing the cut surfaces, and assembling or installing the panel. Deburring the cut edges is a critical step that involves removing any sharp edges or burrs that may have formed during the cutting process. This is important for safety reasons, as sharp edges can cause injuries or damage to surrounding materials. Additionally, deburring helps to improve the overall appearance of the panel by creating a smooth, even finish. By deburring the cut edges, manufacturers can ensure a high-quality finish and prevent any potential safety hazards. Therefore, deburring the cut edges is a vital post-cutting procedure that should not be overlooked.
Deburring the Cut Edges
Deburring the cut edges is a crucial step in post-cutting procedures for polycarbonate panels. This process involves removing any sharp edges, burrs, or rough spots that may have formed during the cutting process. Deburring is essential to ensure the panel's safety, durability, and overall appearance. Sharp edges can be hazardous, causing injuries or damage to surrounding materials, while burrs can lead to cracks or breaks in the panel over time. Moreover, deburring helps to prevent dirt, dust, and moisture from accumulating on the edges, which can compromise the panel's structural integrity. To deburr polycarbonate panels, you can use a variety of methods, including hand tools such as files, sandpaper, or deburring knives, or power tools like rotary tools or belt sanders. It's essential to choose the right tool for the job, depending on the size and complexity of the cut edges. For example, hand tools are suitable for small, intricate cuts, while power tools are better suited for larger, more complex cuts. Regardless of the method used, it's crucial to work carefully and patiently to avoid damaging the panel or creating new scratches. By deburring the cut edges, you can ensure a smooth, safe, and durable finish that will enhance the overall quality of your polycarbonate panel project.
Smoothing the Cut Surfaces
Smoothing the cut surfaces of polycarbonate panels is a crucial step in post-cutting procedures. This process involves removing any rough edges, burrs, or debris that may have been created during the cutting process. Smoothing the cut surfaces not only improves the appearance of the panel but also helps to prevent damage and wear over time. There are several methods that can be used to smooth the cut surfaces of polycarbonate panels, including filing, sanding, and using a deburring tool. Filing is a simple and effective method that involves using a flat file to remove any rough edges or burrs. Sanding is another popular method that involves using progressively finer grits of sandpaper to smooth out the cut surface. A deburring tool is a specialized tool that is designed specifically for removing burrs and debris from cut surfaces. Regardless of the method used, it is essential to work carefully and patiently to avoid scratching or damaging the panel. Smoothing the cut surfaces of polycarbonate panels is an important step in ensuring a professional-looking finish and preventing damage over time.
Assembling or Installing the Panel
When assembling or installing the panel, it is essential to follow the manufacturer's instructions and take necessary precautions to ensure a secure and durable installation. Start by preparing the site, ensuring it is clean, dry, and free from debris. Next, lay out the panel and any supporting structures, such as frames or clips, according to the manufacturer's specifications. Apply a bead of sealant, such as silicone or polyurethane, to the edges of the panel and the supporting structures to create a watertight seal. Then, carefully place the panel into position, ensuring it is properly aligned and seated. Use the recommended fastening system, such as screws or clips, to secure the panel in place. Tighten the fasteners firmly, but avoid over-tightening, which can damage the panel. Finally, inspect the installation to ensure it is secure, watertight, and meets the manufacturer's specifications. Additionally, consider applying a protective film to the panel to prevent scratches and damage during installation. By following these steps and taking the necessary precautions, you can ensure a successful and long-lasting installation of your polycarbonate panel.