How To Turn On Vibration On Iphone
Here is the introduction paragraph: Are you having trouble getting your iPhone to vibrate when you receive notifications or calls? Do you want to customize the vibration settings to suit your preferences? Or perhaps you're experiencing issues with your iPhone's vibration feature and need help troubleshooting? In this article, we'll cover everything you need to know about enabling and customizing vibration on your iPhone. We'll start with a step-by-step guide on how to turn on vibration on your iPhone, followed by tips on customizing vibration settings to suit your needs. We'll also provide troubleshooting solutions for common vibration issues. So, let's get started with the basics - Enabling Vibration on iPhone: A Step-by-Step Guide.
Enabling Vibration on iPhone: A Step-by-Step Guide
Enabling vibration on your iPhone can be a straightforward process if you know where to look. To get started, you'll need to access the Settings app, which is usually found on your home screen. Once you're in the Settings app, you'll need to navigate to the Sounds and Haptics section, where you can customize your iPhone's vibration settings. From there, you can activate vibration alerts for various events, such as incoming calls, texts, and notifications. By following these simple steps, you can enable vibration on your iPhone and stay connected without relying on visual cues. To begin, let's start by accessing the Settings app.
Accessing the Settings App
To access the Settings app on your iPhone, locate the app icon on your home screen, which is typically represented by a gray gear icon. Tap on the icon to open the app. Alternatively, you can use Siri to open the Settings app by saying "Hey Siri, open Settings." If you have trouble finding the app, you can also swipe down from the middle of the screen to access the App Library, then tap on the "Utilities" folder to find the Settings app. Once you're in the Settings app, you'll see a list of options, including "Sounds & Haptics," which is where you'll go to enable vibration on your iPhone. From there, you can follow the steps outlined in the guide to turn on vibration for different types of notifications and alerts.
Navigating to the Sounds and Haptics Section
To navigate to the Sounds and Haptics section on your iPhone, start by unlocking your device and accessing the home screen. Locate the Settings app, which is typically represented by a gray icon with gears, and tap on it to open. Once inside the Settings app, scroll down and select the "Sounds and Haptics" option, which is usually situated near the top of the list. Alternatively, you can use the search function at the top of the Settings screen to quickly find the Sounds and Haptics section by typing in the relevant keywords. Upon entering the Sounds and Haptics section, you will be presented with a range of options that allow you to customize your iPhone's audio and vibration settings, including the ability to enable or disable vibration for various functions such as ringing, alerts, and notifications. By following these simple steps, you can easily access the Sounds and Haptics section and make adjustments to suit your preferences.
Activating Vibration Alerts
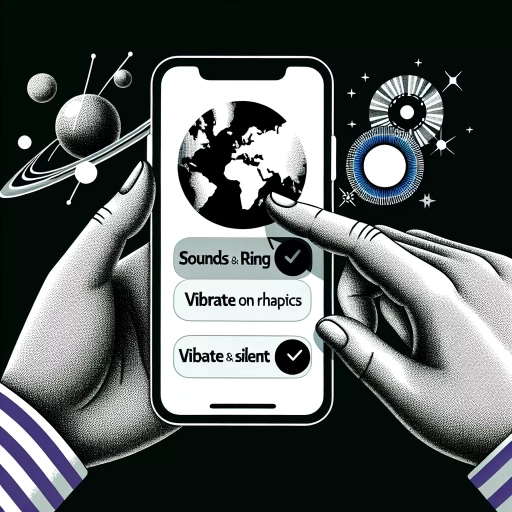
Activating vibration alerts on your iPhone is a straightforward process that can be completed in a few simple steps. To start, go to your iPhone's Settings app, which is typically found on the home screen. From there, tap on "Sounds and Haptics" or "Sounds" depending on your iPhone model. This will take you to a page where you can customize your iPhone's sound and vibration settings. Look for the "Vibrate on Ring" and "Vibrate on Silent" options and toggle the switches next to them to the right to enable vibration alerts. You can also adjust the vibration intensity by tapping on "Haptic Alerts" and selecting from the available options. Additionally, you can customize vibration patterns for specific alerts, such as texts or emails, by going to the "Notifications" section and selecting the app you want to customize. By following these steps, you can easily activate vibration alerts on your iPhone and stay notified of important events even when your phone is on silent mode.
Customizing Vibration Settings on iPhone
Customizing vibration settings on your iPhone can be a game-changer for those who want to personalize their device to suit their needs. With the ability to choose from pre-set vibration patterns, create custom patterns, and assign specific vibrations to contacts, you can take control of how your iPhone alerts you. Whether you're looking to differentiate between notifications, identify specific callers, or simply add some personality to your device, customizing vibration settings can make a big difference. In this article, we'll explore the various ways you can customize your iPhone's vibration settings, starting with the simplest option: choosing from pre-set vibration patterns. By selecting from a range of built-in patterns, you can quickly and easily customize your iPhone's vibrations to suit your style.
Choosing from Pre-Set Vibration Patterns
Choosing from pre-set vibration patterns on your iPhone is a convenient way to customize your device's haptic feedback. To access these patterns, go to Settings > Sounds and Haptics > Ringtone > Vibration. Here, you'll find a list of pre-set patterns, including Alert, Heartbeat, and S.O.S. You can browse through these options and select the one that suits your preference. If you want to create a custom vibration pattern, you can do so by tapping on "Create New Vibration" and using the screen to create a unique pattern. This feature allows you to personalize your iPhone's vibration settings to your liking, making it easier to distinguish between different types of notifications. Additionally, you can also set different vibration patterns for specific contacts, making it easier to identify who's calling or messaging you without having to look at your screen. By choosing from pre-set vibration patterns or creating your own, you can enhance your iPhone experience and make it more tailored to your needs.
Creating a Custom Vibration Pattern
Creating a custom vibration pattern on your iPhone allows you to personalize your device's alerts and notifications to suit your preferences. To create a custom vibration pattern, go to the "Settings" app, then tap on "Sounds and Haptics." From there, select "Ringtone" or "Text Tone" depending on the type of vibration you want to customize. Tap on "Vibration" and then select "Create New Vibration." You will then be taken to a screen where you can tap on the screen to create a custom vibration pattern. You can tap, double-tap, or triple-tap to create different vibrations, and you can also adjust the duration of each vibration by holding down on the screen. Once you have created your custom vibration pattern, you can save it and assign it to a specific contact or use it as your default vibration pattern. This feature allows you to differentiate between different types of notifications and alerts, making it easier to identify who is calling or texting you without having to look at your phone. Additionally, creating a custom vibration pattern can be a fun and creative way to personalize your iPhone and make it stand out from others.
Assigning Vibration Patterns to Specific Contacts
Assigning vibration patterns to specific contacts is a convenient feature on iPhone that allows you to identify who's calling or messaging you without even looking at the screen. To assign a vibration pattern to a specific contact, go to the Contacts app and select the contact you want to customize. Tap on "Edit" in the top right corner, then scroll down to the "Ringtone" section. Tap on "Vibration" and select from the list of pre-set vibration patterns, such as "Alert," "Pulse," or "SOS." If you want to create a custom vibration pattern, tap on "Create New Vibration" and use the screen to tap out your desired pattern. You can also record a custom vibration pattern by tapping on "Record" and then tapping on the screen to create the pattern. Once you've selected or created your vibration pattern, tap "Save" to assign it to the contact. Now, when that contact calls or messages you, your iPhone will vibrate with the assigned pattern, making it easy to identify who's reaching out to you. This feature is especially useful in situations where you can't look at your phone, such as in meetings or while driving. By assigning unique vibration patterns to specific contacts, you can stay connected and responsive without having to constantly check your phone.
Troubleshooting Vibration Issues on iPhone
If your iPhone is experiencing vibration issues, there are several troubleshooting steps you can take to resolve the problem. First, it's essential to check the mute switch and volume settings to ensure that they are not causing the issue. Additionally, disabling Do Not Disturb mode can also help to resolve vibration problems. If these steps don't work, resetting vibration settings to default can be an effective solution. By following these steps, you can identify and fix the root cause of the vibration issue on your iPhone. To start, let's take a closer look at the mute switch and volume settings, which can often be the culprit behind vibration problems.
Checking the Mute Switch and Volume Settings
When troubleshooting vibration issues on your iPhone, one of the first and simplest steps to take is to check the mute switch and volume settings. The mute switch, located on the top left side of your iPhone, can easily be overlooked, but it plays a crucial role in determining whether your device vibrates or not. Ensure that the switch is not set to the mute position, as this will prevent your iPhone from vibrating. Additionally, check the volume settings by going to Settings > Sounds and Haptics. Here, you can adjust the volume levels for ringtone and alert sounds, as well as toggle the "Haptic Alerts" switch on or off. If the switch is off, your iPhone will not vibrate when you receive notifications or alerts. Furthermore, if you have set your iPhone to "Do Not Disturb" mode, it may also prevent vibrations. To check, go to Settings > Do Not Disturb and ensure that the feature is turned off or set to allow vibrations during certain times or events. By checking and adjusting these settings, you can quickly resolve any issues related to vibration on your iPhone.
Disabling Do Not Disturb Mode
Disabling Do Not Disturb Mode is a crucial step in troubleshooting vibration issues on your iPhone. When Do Not Disturb Mode is enabled, it silences all notifications, including vibrations, to help you focus or sleep. However, if you're experiencing vibration issues, it's essential to disable this feature to ensure that your iPhone is set to vibrate normally. To disable Do Not Disturb Mode, go to your iPhone's Settings app, then tap on "Do Not Disturb." Toggle off the switch next to "Do Not Disturb" to disable the feature. You can also schedule Do Not Disturb Mode to turn on and off automatically at specific times of the day or night. Additionally, you can allow certain contacts to bypass Do Not Disturb Mode, so you'll still receive vibrations from important calls or messages. By disabling Do Not Disturb Mode, you'll be able to determine if the feature was causing your vibration issues, and you can then proceed to troubleshoot other potential causes.
Resetting Vibration Settings to Default
To reset vibration settings to default on your iPhone, go to the Settings app, then tap on Sounds and Haptics. Locate the Haptic Alerts slider and toggle it off. Wait for a few seconds, then toggle it back on. This will reset the vibration settings to their default state. Alternatively, you can also reset all settings on your iPhone by going to Settings, then General, and tapping on Reset. From there, select Reset All Settings. This will reset all settings on your iPhone, including vibration settings, to their default state. Note that resetting all settings will also reset other settings such as Wi-Fi networks and wallpaper, so use this method with caution. If you're experiencing issues with vibration on your iPhone, resetting the vibration settings to default may help resolve the problem. Additionally, you can also try restarting your iPhone or updating to the latest software to see if that resolves the issue.