How To Refresh Graphics Card
Here is the introduction paragraph: Refreshing your graphics card can significantly improve your computer's performance, especially if you're a gamer or use graphics-intensive programs. A refreshed graphics card can provide a smoother gaming experience, faster rendering times, and improved overall system efficiency. But how do you refresh your graphics card? Fortunately, it's easier than you think. To refresh your graphics card, you'll need to update your graphics card drivers, adjust your graphics card settings, and physically maintain the graphics card. By doing so, you'll be able to unlock your graphics card's full potential and enjoy a better computing experience. In this article, we'll explore these three methods in more detail, starting with the simplest and most effective way to refresh your graphics card: updating your graphics card drivers.
Update Graphics Card Drivers
Here is the introduction paragraph: Updating graphics card drivers is a crucial step in maintaining the performance and functionality of your computer. Outdated drivers can lead to issues such as poor graphics quality, slow performance, and even system crashes. Fortunately, updating graphics card drivers is a relatively straightforward process that can be done in a few simple steps. In this article, we will explore three methods to update your graphics card drivers: checking for updates through Device Manager, using the manufacturer's website to download updates, and utilizing third-party driver update tools. To get started, let's begin with the first method: checking for updates through Device Manager.
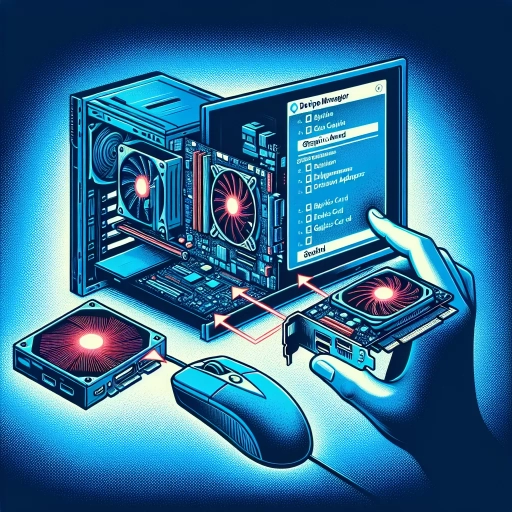
Check for Updates through Device Manager
To check for updates through Device Manager, follow these steps: Open Device Manager by pressing the Windows key + X and selecting Device Manager from the menu. In the Device Manager window, expand the "Display Adapters" section. Right-click on the graphics card device and select "Update driver." Click on "Search automatically for updated driver software." If an update is available, Windows will download and install it. If not, you can also click on "Search for updated drivers on Windows Update" to check for updates through the Windows Update service. Additionally, you can also check for updates through the graphics card manufacturer's website, such as NVIDIA or AMD, and follow their instructions to download and install the latest drivers. Regularly checking for updates through Device Manager can help ensure that your graphics card is running with the latest drivers, which can improve performance, fix bugs, and add new features. It's recommended to check for updates at least once a month, or whenever you notice any issues with your graphics card. By keeping your graphics card drivers up to date, you can enjoy a smoother and more stable gaming and graphics experience.
Use the Manufacturer's Website to Download Updates
To update your graphics card drivers, one of the most reliable sources is the manufacturer's website. This is because the manufacturer's website typically offers the most up-to-date and compatible drivers for your specific graphics card model. To download updates from the manufacturer's website, start by identifying your graphics card model. You can do this by checking the device manager on your computer or by looking for the model number on the graphics card itself. Once you have the model number, visit the website of the manufacturer, such as NVIDIA or AMD, and navigate to the support or download section. From there, enter your graphics card model number and select the operating system you are using. The website will then provide you with a list of available drivers, including the latest version. Be sure to read the release notes and system requirements before downloading and installing the update to ensure it is compatible with your system. Additionally, it's a good idea to create a system restore point before installing the update, in case you encounter any issues. By downloading updates from the manufacturer's website, you can ensure that your graphics card is running with the latest drivers, which can improve performance, fix bugs, and add new features.
Utilize Third-Party Driver Update Tools
To ensure your graphics card is running at its best, it's essential to keep its drivers up-to-date. While you can manually update drivers through the manufacturer's website or the Device Manager, utilizing third-party driver update tools can simplify the process. These tools scan your system, identify outdated drivers, and provide a one-click solution to update them. Some popular options include Driver Talent, Driver Booster, and Snappy Driver Installer. These tools not only update your graphics card drivers but also other outdated drivers on your system, ensuring your computer runs smoothly and efficiently. Additionally, they often include features such as driver backup and restore, which can be useful in case you encounter any issues during the update process. By leveraging third-party driver update tools, you can save time and effort, and ensure your graphics card is always running with the latest drivers.
Adjust Graphics Card Settings
Adjusting your graphics card settings can significantly enhance your computing experience, especially when it comes to gaming and graphics-intensive applications. By tweaking these settings, you can improve performance, reduce lag, and enjoy a smoother visual experience. There are several ways to adjust your graphics card settings, and this article will explore three key methods. Firstly, you can modify graphics card settings through the control panel, which allows you to adjust settings such as resolution, refresh rate, and graphics quality. Secondly, you can adjust graphics quality settings in games and applications, which enables you to customize the visual experience to your liking. Finally, disabling unnecessary graphics features can also help improve performance. In this article, we will delve into each of these methods, starting with modifying graphics card settings through the control panel.
Modify Graphics Card Settings through the Control Panel
To modify graphics card settings through the Control Panel, follow these steps. First, open the Control Panel by searching for it in the Start menu or by typing "control panel" in the Run dialog box (Windows key + R). Once the Control Panel is open, click on "Hardware and Sound" or "System and Security" depending on your Windows version. Next, click on "Device Manager" and expand the "Display Adapters" section. Right-click on your graphics card and select "Properties." In the Properties window, click on the "Driver" tab and then click on "Update Driver" to check for any updates. If an update is available, follow the prompts to install it. If not, click on the "Details" tab to view information about your graphics card, such as its model, memory, and driver version. You can also click on the "Resources" tab to view information about the system resources allocated to your graphics card. Additionally, you can click on the "Power Management" tab to adjust settings related to power consumption and performance. For example, you can set your graphics card to use more power when the system is plugged in and less power when it's running on battery. Finally, click "OK" to save any changes you made. By modifying your graphics card settings through the Control Panel, you can optimize your graphics card's performance, update its drivers, and adjust its power management settings to suit your needs.
Adjust Graphics Quality Settings in Games and Applications
Adjusting graphics quality settings in games and applications is a crucial step in optimizing your computer's performance and enhancing your visual experience. By tweaking these settings, you can achieve a perfect balance between graphics quality and system performance. To start, navigate to the game's or application's settings menu, usually found in the options or preferences section. Look for the graphics or display settings, where you'll find a range of options to adjust, such as resolution, texture quality, anti-aliasing, and more. Experiment with different settings to find the sweet spot that works best for your system. For example, if you're playing a demanding game, you may need to reduce the resolution or turn off certain graphics features to achieve smoother performance. On the other hand, if you're working with graphics-intensive applications, you may want to crank up the settings to take full advantage of your graphics card's capabilities. Additionally, some games and applications offer customizable presets or profiles that can help you quickly switch between different graphics settings. By adjusting graphics quality settings, you can unlock better performance, reduce lag, and enjoy a more immersive experience.
Disable Unnecessary Graphics Features
Disabling unnecessary graphics features can significantly improve your computer's performance and refresh your graphics card. To do this, start by opening your graphics control panel, which can usually be found in the system tray or by searching for it in the start menu. Once open, look for the "3D Settings" or "Graphics Settings" section and click on it. Here, you'll find a list of various graphics features that are currently enabled on your system. Carefully review this list and disable any features that you don't need or use. For example, if you don't play games that require advanced physics or tessellation, you can safely disable these features. Additionally, if you don't use multiple monitors or have a high-resolution display, you can also disable features like multi-monitor support or high-dynamic-range (HDR) rendering. By disabling these unnecessary features, you'll free up system resources and allow your graphics card to focus on more important tasks, resulting in improved performance and a refreshed graphics experience.
Physically Maintain the Graphics Card
To physically maintain the graphics card, it is essential to perform a few simple tasks to ensure optimal performance and longevity. Three key steps to maintain the graphics card include cleaning dust from the graphics card, applying thermal paste to the graphics card, and ensuring proper airflow around the graphics card. By following these steps, you can help prevent overheating, improve performance, and extend the lifespan of your graphics card. Regular maintenance can also help prevent costly repairs and replacements. In this article, we will explore each of these steps in detail, starting with the importance of cleaning dust from the graphics card.
Clean Dust from the Graphics Card
Cleaning dust from the graphics card is a crucial step in maintaining its performance and longevity. Over time, dust and debris can accumulate on the graphics card's heat sink, fans, and other components, causing it to overheat and reducing its ability to perform at its best. To clean dust from the graphics card, start by shutting down your computer and unplugging the power cord. Ground yourself by touching a metal object or wearing an anti-static wrist strap to prevent static electricity from damaging the components. Next, remove the graphics card from the computer case and gently brush off any loose dust or debris using a soft-bristled brush or a can of compressed air. Be careful not to touch any of the electrical components or pins on the graphics card. For more stubborn dust and dirt, you can use a cotton swab or a small, dry paintbrush to gently scrub the affected areas. Avoid using liquids or chemicals, as they can damage the graphics card's components. Once you've cleaned the graphics card, use compressed air to blow away any remaining dust or debris. Finally, reinsert the graphics card into the computer case and plug in the power cord. Turn on your computer and test the graphics card to ensure it's working properly. Regular cleaning of the graphics card can help prevent overheating, improve performance, and extend its lifespan.
Apply Thermal Paste to the Graphics Card
Applying thermal paste to the graphics card is a crucial step in maintaining its performance and longevity. Thermal paste, also known as thermal interface material (TIM), is a substance that fills the microscopic gaps between the GPU die and the heat sink, allowing for efficient heat transfer. Over time, the thermal paste can dry out and lose its effectiveness, causing the graphics card to overheat and potentially leading to throttling, crashes, or even damage. To apply thermal paste, start by cleaning the GPU die and heat sink with a soft brush and a mild cleaning solution to remove any debris or old thermal paste. Next, apply a small amount of thermal paste to the center of the GPU die, using a pea-sized amount or a small dot. Gently spread the paste evenly across the die using a credit card or a similar tool, making sure to cover the entire surface. Be careful not to apply too much pressure, which can damage the GPU. Finally, reattach the heat sink and secure it firmly, making sure that it is properly seated and that the thermal paste is evenly distributed. It's recommended to reapply thermal paste every 2-3 years or when the graphics card is showing signs of overheating. By applying thermal paste correctly, you can ensure that your graphics card runs at optimal temperatures, maintaining its performance and extending its lifespan.
Ensure Proper Airflow around the Graphics Card
To ensure proper airflow around the graphics card, it is essential to maintain a well-ventilated computer case. This can be achieved by installing case fans that provide a sufficient airflow rate, typically measured in cubic feet per minute (CFM). A general rule of thumb is to have at least two case fans, one for intake and one for exhaust, to create a balanced airflow system. The intake fan should be placed at the front or bottom of the case to draw in cool air, while the exhaust fan should be located at the rear or top of the case to expel hot air. Additionally, it is crucial to ensure that the graphics card is not obstructed by other components, such as RAM or CPU coolers, which can block airflow and reduce the card's performance. Furthermore, keeping the computer case clean and dust-free is vital, as dust buildup can clog fans and reduce airflow. Regularly cleaning the case fans and vents with compressed air can help maintain optimal airflow and prevent overheating. By following these steps, you can ensure that your graphics card receives the proper airflow it needs to function efficiently and effectively.