How To Fix A Zipper That Splits From The Bottom
A zipper that splits from the bottom can be frustrating and render your favorite garment or bag useless. However, with the right techniques and tools, you can easily fix the issue and have your item looking like new again. To fix a zipper that splits from the bottom, it's essential to understand the process and take the necessary steps to ensure a successful repair. This article will guide you through the process, starting with the importance of preparation, which is crucial in ensuring a smooth and effective repair. We will also cover the step-by-step process of fixing a split zipper and provide valuable tips on how to prevent future zipper splits. By following these simple steps, you'll be able to fix your zipper and extend the life of your garment or bag. So, let's get started with the first step: Preparation is Key.
Preparation is Key
Preparation is key to any successful project, and when it comes to fixing a damaged wall, it's no exception. To ensure a seamless and efficient repair process, it's essential to take the time to prepare properly. This involves assessing the damage to determine the extent of the repair needed, gathering the necessary tools and materials to get the job done, and choosing the right fixing method to achieve a professional-looking finish. By taking these crucial steps, you'll be able to tackle the repair with confidence and achieve a successful outcome. So, let's start by assessing the damage to determine the best course of action.
Assess the Damage
Assess the damage to determine the best course of action. Examine the zipper carefully to see how far the split has progressed. If the split is minor and only affects a small portion of the zipper, you may be able to fix it with a simple repair. However, if the split is more extensive or has caused significant damage to the surrounding fabric, you may need to replace the zipper entirely. Check if the zipper's teeth are still intact and if the slider is still functional. If the teeth are damaged or the slider is broken, replacement may be the only option. Additionally, inspect the surrounding fabric for any signs of wear or damage that may have contributed to the zipper split. This will help you identify any underlying issues that need to be addressed to prevent future problems. By assessing the damage, you can determine the best approach to fix the zipper and prevent further damage to your garment.
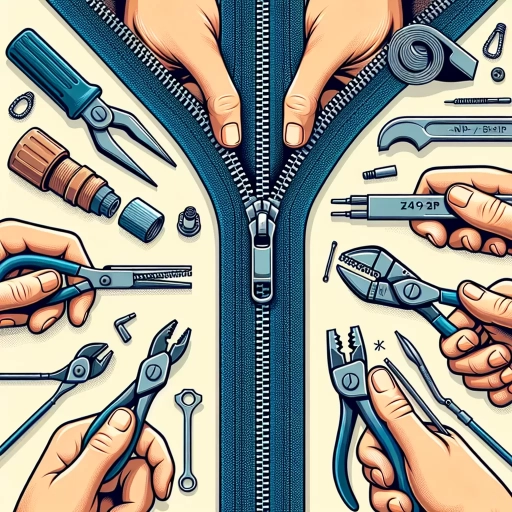
Gather the Necessary Tools and Materials
To fix a zipper that splits from the bottom, it's essential to gather the necessary tools and materials before starting the repair process. You'll need a few basic items, including a zipper stop, a zipper slider, and a zipper pull. If the zipper is damaged beyond repair, you may need to purchase a replacement zipper. Additionally, you'll need a needle, thread, and a pair of scissors. If the zipper is stuck or corroded, you may also need some lubricant, such as silicone spray or oil. It's also a good idea to have some pliers and a seam ripper on hand, in case you need to remove any stitching or debris. Having all the necessary tools and materials within reach will make the repair process much easier and less frustrating. By taking the time to gather everything you need, you'll be able to focus on fixing the zipper and getting it working smoothly again.
Choose the Right Fixing Method
When it comes to fixing a zipper that splits from the bottom, choosing the right fixing method is crucial to ensure a successful repair. There are several methods to fix a zipper, and the right one for you will depend on the type of zipper, the severity of the split, and your level of sewing expertise. If the split is minor and only affects a few teeth, you may be able to get away with a simple fix using a zipper stop or a dab of clear nail polish to hold the teeth in place. However, if the split is more extensive or the zipper is badly damaged, you may need to use a more invasive method such as replacing the zipper entirely or using a zipper repair kit. These kits usually include a new zipper stop, a replacement zipper slider, and a set of instructions to guide you through the repair process. In some cases, you may also need to use a sewing machine to reinforce the zipper and prevent further damage. Ultimately, the key to choosing the right fixing method is to assess the damage carefully and choose a method that is suitable for your level of expertise and the type of zipper you are working with.
Fixing a Split Zipper
A split zipper can be frustrating and render your favorite jacket, backpack, or pants useless. However, with a few simple steps, you can fix a split zipper and have it working like new again. To fix a split zipper, you'll need to realign the zipper teeth, replace the zipper stop, and reattach the zipper slider. By following these steps, you'll be able to repair your zipper and get back to using your gear. In this article, we'll take a closer look at each of these steps, starting with the first and most crucial step: realigning the zipper teeth. By realigning the teeth, you'll be able to get the zipper working smoothly again and set the stage for the rest of the repair process.
Realigning the Zipper Teeth
Realigning the zipper teeth is a crucial step in fixing a split zipper. To do this, start by holding the zipper in one hand and the garment or fabric in the other. Gently pull the zipper away from the fabric, taking care not to pull too hard and cause further damage. Next, use your fingers or a blunt object like a chopstick or pencil to carefully realign the teeth, making sure they are properly interlocked. It's essential to be patient and gentle when doing this, as forcing the teeth into place can cause them to break or become misshapen. Once the teeth are realigned, try zipping the zipper up and down a few times to ensure it's working smoothly. If the zipper still doesn't zip up properly, you may need to use a bit of lubricant, such as wax or silicone spray, to help the teeth glide more smoothly. By realigning the zipper teeth, you can often fix a split zipper without needing to replace it, saving you time and money.
Replacing the Zipper Stop
Replacing the zipper stop is a relatively simple process that can be done with a few basic tools. To start, you'll need to remove the old zipper stop by sliding it off the zipper teeth. This can be a bit tricky, as the stop is usually attached to the zipper with a small metal or plastic clip. Use a pair of needle-nose pliers to gently pry the clip open and slide the stop off. Once the old stop is removed, take a close look at the zipper teeth to make sure they are not damaged or bent. If the teeth are damaged, you may need to replace the entire zipper. If the teeth are in good condition, you can proceed with installing the new zipper stop. To do this, simply slide the new stop onto the zipper teeth, making sure it is securely attached with the clip. Make sure the stop is positioned at the correct spot on the zipper, usually at the bottom of the zipper track. Finally, test the zipper to make sure it is working smoothly and the stop is holding in place. If the zipper is still not working properly, you may need to adjust the stop or replace the entire zipper.
Reattaching the Zipper Slider
Reattaching the zipper slider is a relatively simple process that can be done with a few basic tools. To start, you'll need to gather the necessary materials, including the zipper slider, a pair of needle-nose pliers, and a small amount of fabric glue or thread. Begin by examining the zipper slider and identifying the small metal or plastic tab that holds it in place. This tab is usually located on the underside of the slider and is designed to catch onto the zipper teeth. Next, use the needle-nose pliers to carefully bend the tab back into its original position, making sure it is securely attached to the slider. If the tab is broken or damaged, you may need to replace it with a new one. Once the tab is in place, apply a small amount of fabric glue or thread to the area where the slider meets the zipper teeth. This will help hold the slider in place while you reattach it. Finally, carefully slide the zipper slider back onto the zipper teeth, making sure it is properly aligned and securely attached. With the slider reattached, your zipper should now be functional again.
Preventing Future Zipper Splits
Zipper splits can be frustrating and costly to repair, especially if they occur on essential items like jackets, backpacks, or luggage. To prevent future zipper splits, it's essential to take proactive measures. One effective way to do this is by regularly cleaning and lubricating the zipper, which helps to reduce friction and wear. Additionally, using a zipper stop or retainer can prevent the zipper from coming apart, while avoiding overstuffing or overloading can reduce the strain on the zipper. By implementing these simple strategies, you can significantly reduce the risk of zipper splits and extend the lifespan of your belongings. In this article, we'll explore these methods in more detail, starting with the importance of regularly cleaning and lubricating the zipper.
Regularly Cleaning and Lubricating the Zipper
Regularly cleaning and lubricating the zipper is a simple yet effective way to prevent future splits. Dirt, dust, and debris can accumulate on the zipper teeth and cause friction, leading to splits and breaks. Cleaning the zipper with a soft brush or cloth can remove these particles and keep the zipper running smoothly. Additionally, applying a lubricant such as silicone spray or wax can reduce friction and wear on the zipper teeth, making it less likely to split. It's recommended to clean and lubricate the zipper every 1-2 months, or more often if the zipper is used frequently. By doing so, you can extend the life of the zipper and prevent future splits. Furthermore, cleaning and lubricating the zipper can also help to prevent rust and corrosion, which can weaken the zipper and make it more prone to splits. Overall, regular cleaning and lubrication is a simple and effective way to keep your zipper in good condition and prevent future splits.
Using a Zipper Stop or Retainer
Using a zipper stop or retainer is a simple yet effective way to prevent future zipper splits. A zipper stop is a small device that is attached to the end of the zipper to prevent it from coming apart. It works by creating a barrier that stops the zipper from separating, thereby preventing the split from occurring. To use a zipper stop, simply attach it to the end of the zipper, making sure it is securely fastened. This will prevent the zipper from coming apart, even if it is subjected to heavy use or stress. Alternatively, a zipper retainer can be used to achieve the same result. A zipper retainer is a small device that is attached to the zipper and prevents it from separating by creating a secure hold on the zipper teeth. By using a zipper stop or retainer, you can prevent future zipper splits and ensure that your zipper remains functional and secure. This is especially useful for zippers that are prone to splitting, such as those on jackets, pants, or bags. By taking this simple step, you can extend the life of your zipper and prevent the hassle and expense of repairing or replacing it.
Avoiding Overstuffing or Overloading
When it comes to preventing future zipper splits, one of the most crucial steps is to avoid overstuffing or overloading your garment or bag. Overstuffing can put excessive pressure on the zipper, causing it to split or break. To avoid this, make sure to leave some extra space in your garment or bag, especially when it comes to bulky or heavy items. For example, if you're packing a suitcase, try to distribute the weight evenly and avoid overpacking. Similarly, if you're wearing a jacket or coat, avoid stuffing too many items into the pockets. By giving your zipper some breathing room, you can reduce the likelihood of it splitting or breaking. Additionally, consider using a garment or bag with a sturdy zipper that is designed to withstand heavy use. By taking these precautions, you can help prevent future zipper splits and keep your garments and bags in good condition.