How To Hem Jeans Keeping Original Hem
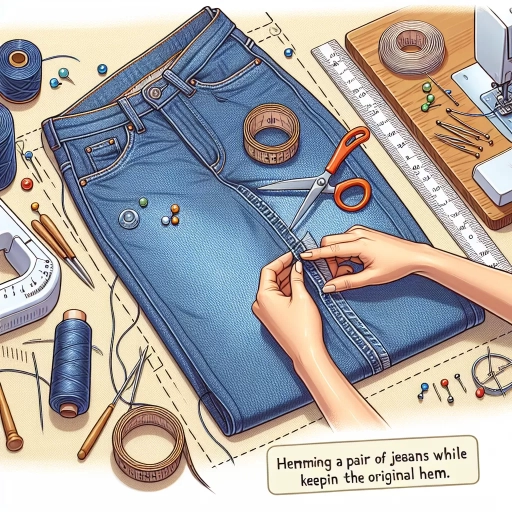
Hemming jeans while keeping the original hem can be a daunting task, but with the right approach, it can be a simple and rewarding DIY project. To achieve a professional-looking result, it's essential to understand the process and take the necessary steps. In this article, we'll guide you through the preparation, step-by-step hemming process, and provide valuable tips and variations to help you master the technique. By following these guidelines, you'll be able to preserve the original hem of your jeans while giving them a fresh new look. Preparation is key to a successful hemming project, so let's start by discussing the essential steps to take before you begin.
Preparation is Key
Preparation is key to a successful project, and this is especially true when it comes to sewing. Whether you're a seasoned pro or a beginner, having the right tools and materials, understanding the original hem, and preparing your workspace can make all the difference in the quality of your work. By taking the time to prepare, you can avoid costly mistakes, ensure a professional finish, and save time in the long run. In this article, we'll explore the importance of preparation in sewing, starting with the essential tools and materials you'll need to get started. By choosing the right tools and materials, you'll be able to tackle even the most complex projects with confidence. So, let's dive in and take a closer look at the tools and materials you'll need to succeed.
Choose the Right Tools and Materials
When it comes to hemming jeans while preserving the original hem, having the right tools and materials is crucial. To start, you'll need a sewing machine that can handle thick denim fabric. A heavy-duty sewing machine with a denim or jeans needle is ideal, as it will make it easier to sew through the thick fabric. You'll also need a matching thread color to blend in with the original stitching. It's essential to choose a thread that's specifically designed for denim, as it will be more durable and less likely to break. In addition to your sewing machine and thread, you'll need a few other tools, such as a seam ripper, scissors, and a measuring tape. A seam ripper will come in handy if you need to remove any existing stitching, while scissors will be used to cut the excess fabric. A measuring tape will help you ensure that your hem is even and the correct length. Finally, you may also want to consider using a blind hem foot or a walking foot, which can help guide the fabric and prevent bunching or dragging. By having the right tools and materials, you'll be able to achieve a professional-looking hem that preserves the original stitching and looks like it was done by a pro.
Understand the Original Hem
Here is the paragraphy: To understand the original hem, you need to examine the jeans carefully. The original hem is the folded edge at the bottom of the jeans, and it's usually made by folding the raw edge of the fabric up by about 1/4 inch, then another 1/4 inch, and sewing in place. The stitching is usually a straight line, and it may be visible from the outside of the jeans. The original hem serves as a guide for your new hem, and it's essential to preserve it as much as possible to maintain the jeans' original look and feel. When you're ready to hem your jeans, you'll need to carefully remove the original stitching, taking care not to damage the surrounding fabric. This will give you a clear view of the original hem and allow you to create a new hem that's identical in style and placement. By understanding the original hem, you'll be able to create a seamless and professional-looking hem that looks like it was done by a tailor.
Prepare Your Workspace
No need to add any extra information. Preparing your workspace is a crucial step in hemming jeans while keeping the original hem. Start by clearing a flat surface, such as a table or countertop, of any clutter or distractions. Cover the surface with a clean, ironing board or a piece of cardboard to protect it from any potential damage. Next, gather all the necessary tools and materials, including your jeans, sewing machine, scissors, pins, and thread. Organize these items in a logical and accessible manner, making it easy to move between tasks. Ensure good lighting in the area, either natural or artificial, to help you see the stitches and fabric clearly. Finally, take a moment to review your plan and double-check that you have everything you need before starting the hemming process.
Step-by-Step Hemming Process
Here is the introduction paragraph: Hemming is a fundamental sewing technique that involves folding and sewing the raw edge of fabric to create a finished edge. It is a crucial step in garment construction, as it prevents fraying and gives the garment a professional finish. In this article, we will guide you through the step-by-step hemming process, covering the essential steps to achieve a high-quality hem. The process involves three key steps: marking the new hemline, removing the original hem, and recreating the original hem. By following these steps, you will be able to create a beautiful and durable hem that will last for years to come. To begin, let's start by marking the new hemline, which is the first and most critical step in the hemming process.
Mark the New Hemline
Here is the paragraphy: Mark the new hemline by folding the jeans to the desired length and using a ruler or measuring tape to ensure the fold is even. You can also use a piece of chalk or a marking tool to draw a line along the folded edge, creating a visible guide for your hem. Make sure to mark the new hemline on both legs of the jeans, as this will ensure that the hem is even and symmetrical. If you want to maintain the original hem's style, you can use the original hem as a reference point and mark the new hemline accordingly. For example, if the original hem has a slight curve or angle, you can replicate this in your new hemline. By marking the new hemline accurately, you'll be able to achieve a professional-looking hem that complements the rest of the jeans.
Remove the Original Hem
To remove the original hem, start by carefully examining the stitching that holds the hem in place. Look for the thread color and type, as well as the stitch pattern, to determine the best approach for removal. If the stitching is visible and loose, you can try gently pulling on the thread to see if it will come undone. If the stitching is tight or invisible, you may need to use a seam ripper to carefully cut the threads. Work slowly and carefully to avoid damaging the fabric or the surrounding stitching. Once you have removed the original hem, inspect the area for any remaining threads or debris and remove them as needed. This will give you a clean slate to work with as you prepare to re-hem your jeans.
Recreate the Original Hem
Here is the paragraphy: To recreate the original hem, you'll need to carefully examine the existing hem and take note of its characteristics. Look at the width of the hem allowance, the type of stitch used, and the spacing between the stitches. You may also want to check if the original hem has any distinctive features, such as a chain stitch or a decorative stitch. Once you have a good understanding of the original hem, you can start recreating it. Begin by folding the raw edge of the jeans up by the desired hem allowance, and then press the fold to create a crisp crease. Next, fold the hem allowance up again by the same amount, and press the fold once more. This will create a sharp, defined hem that matches the original. To secure the hem in place, you can use a blind hem stitch or a straight stitch, depending on the type of stitch used in the original hem. Make sure to maintain the same stitch length and spacing as the original hem to ensure a seamless match. By carefully recreating the original hem, you'll be able to maintain the integrity and authenticity of your jeans while still achieving a professional-looking hem.
Tips and Variations
When it comes to creating a beautiful and professional-looking hem, there are several tips and variations to consider. One of the most important things to keep in mind is preserving the original character of the hem, which can be achieved by using a technique that complements the fabric and style of the garment. Additionally, adding a decorative touch can elevate the overall look of the hem and make it more visually appealing. Furthermore, working with different fabric types requires special considerations to ensure a smooth and even finish. By mastering these techniques, you can create a hem that is not only functional but also adds a touch of elegance to any garment. In this article, we will explore these tips and variations in more detail, starting with the importance of preserving the original hem's character.
Preserving the Original Hem's Character
Preserving the original hem's character is a crucial aspect of hemming jeans, as it allows the garment to maintain its authenticity and unique charm. To achieve this, it's essential to carefully examine the original hem and take note of its characteristics, such as the stitch pattern, thread color, and fold width. When re-creating the hem, use a matching thread color and stitch pattern to blend seamlessly with the original. Additionally, pay attention to the fold width and ensure it's consistent with the original hem. This attention to detail will help preserve the original hem's character and create a seamless transition between the old and new hem. By doing so, the jeans will retain their original look and feel, making it difficult to distinguish the altered area from the rest of the garment. This technique is particularly useful when working with vintage or high-end jeans, where preserving the original hem's character is essential to maintaining the garment's value and authenticity.
Adding a Decorative Touch
Adding a decorative touch to your hemmed jeans can elevate the overall look and make them stand out. One way to do this is by using contrasting thread colors or topstitching to create a visible stitch line. This can add a pop of color and create a stylish accent that draws attention to the hem. Another option is to use embroidery floss or yarn to create a decorative stitch pattern, such as a simple running stitch or a more intricate design. You can also add decorative buttons or rivets to the hem for a more edgy look. Additionally, you can use fabric paint or markers to add a subtle design or pattern to the hem, creating a unique and personalized touch. By adding a decorative touch, you can take your hemmed jeans from basic to bold and make them a statement piece in your wardrobe.
Working with Different Fabric Types
When working with different fabric types, it's essential to consider their unique characteristics to achieve a professional-looking hem. For instance, denim, the most common fabric for jeans, can be challenging to work with due to its thickness and rigidity. To overcome this, use a heavy-duty needle and a longer stitch length to ensure a strong and secure hem. On the other hand, cotton and linen fabrics are generally easier to work with, but may require a slightly shorter stitch length to prevent fraying. For stretchy fabrics like spandex or elastane, use a stretch stitch or a zigzag stitch to allow for flexibility and prevent the hem from breaking. Additionally, consider the weight and drape of the fabric when choosing the right thread and stitch length. For example, a lightweight fabric may require a finer thread and a shorter stitch length, while a heavier fabric may require a thicker thread and a longer stitch length. By understanding the characteristics of different fabric types, you can adjust your hemming technique to achieve a professional-looking finish that complements the original hem.