How To Delete Slides On Google Slides
Here is the introduction paragraph: Google Slides is a powerful tool for creating and editing presentations, but sometimes you may need to delete slides to refine your content or reorganize your presentation. Deleting slides in Google Slides is a straightforward process, but it's essential to understand the basics of the platform and how to manage your slides effectively. In this article, we'll explore the fundamentals of Google Slides, walk you through the steps to delete slides, and provide tips on managing and organizing your slides. By the end of this article, you'll be able to efficiently delete slides and create a well-structured presentation. To get started, let's begin with understanding the basics of Google Slides.
Understanding the Basics of Google Slides
Google Slides is a powerful tool for creating and editing presentations online. With its user-friendly interface and collaborative features, it has become a popular choice for individuals and businesses alike. But before you can start creating stunning presentations, it's essential to understand the basics of Google Slides. In this article, we'll explore what Google Slides is and its purpose, its key features, and how to access it. By the end of this article, you'll be equipped with the knowledge to create engaging presentations that captivate your audience. So, let's start by understanding what Google Slides is and its purpose.
What is Google Slides and its purpose
Google Slides is a free online presentation software developed by Google. It allows users to create, edit, and share presentations online. The primary purpose of Google Slides is to provide a collaborative and accessible platform for individuals and teams to create engaging presentations. With Google Slides, users can create slides from scratch or import existing presentations from other software, such as Microsoft PowerPoint. The platform offers a range of features, including templates, themes, and design tools, to help users create visually appealing presentations. Google Slides also allows real-time collaboration, enabling multiple users to work on a presentation simultaneously. Additionally, the platform integrates seamlessly with other Google apps, such as Google Drive and Google Docs, making it easy to share and access presentations from anywhere. Overall, Google Slides is a powerful tool for creating and sharing presentations, making it an ideal choice for students, professionals, and anyone looking to communicate ideas effectively.
Key features of Google Slides
Google Slides is a powerful presentation software that offers a range of key features to help users create engaging and effective presentations. One of the most significant advantages of Google Slides is its seamless collaboration capabilities, allowing multiple users to work on a presentation simultaneously in real-time. This feature enables teams to collaborate efficiently, track changes, and communicate effectively. Additionally, Google Slides offers a vast library of templates, themes, and layouts to help users get started with their presentations. The software also provides a range of formatting options, including font styles, colors, and images, to enhance the visual appeal of presentations. Furthermore, Google Slides allows users to add multimedia elements, such as videos, audio files, and animations, to make presentations more engaging and interactive. The software also offers a range of sharing and exporting options, including the ability to share presentations with others, export to PDF or PowerPoint, and embed presentations on websites or blogs. Another key feature of Google Slides is its revision history, which allows users to track changes and revert to previous versions of a presentation if needed. Overall, Google Slides offers a range of features that make it an ideal choice for creating and sharing presentations.
How to access Google Slides
To access Google Slides, start by going to the Google Drive website and signing in with your Google account. Once you're logged in, click on the "New" button and select "Google Slides" from the drop-down menu. This will open a new, blank presentation in Google Slides. Alternatively, you can also access Google Slides by going directly to the Google Slides website and signing in with your Google account. If you have an existing presentation, you can access it by clicking on the "Open" button and selecting the presentation from your Google Drive files. You can also access Google Slides through the Google Drive mobile app, which allows you to create and edit presentations on-the-go. Additionally, you can also access Google Slides through the Google Classroom platform, if you're a student or teacher. Once you're in Google Slides, you can start creating and editing your presentation by adding slides, text, images, and other multimedia elements. You can also collaborate with others in real-time, making it a great tool for group projects and presentations.
Deleting Slides in Google Slides
Here is the introduction paragraph: Google Slides is a popular presentation software that allows users to create and edit slideshows online. One of the essential features of Google Slides is the ability to delete slides, which can help users organize and refine their presentations. In this article, we will explore the different ways to delete slides in Google Slides, including deleting a single slide, deleting multiple slides at once, and using the "Undo" feature to restore deleted slides. Whether you're a student, teacher, or business professional, mastering the art of deleting slides in Google Slides can help you create more effective and engaging presentations. So, let's start by learning how to delete a single slide in Google Slides.
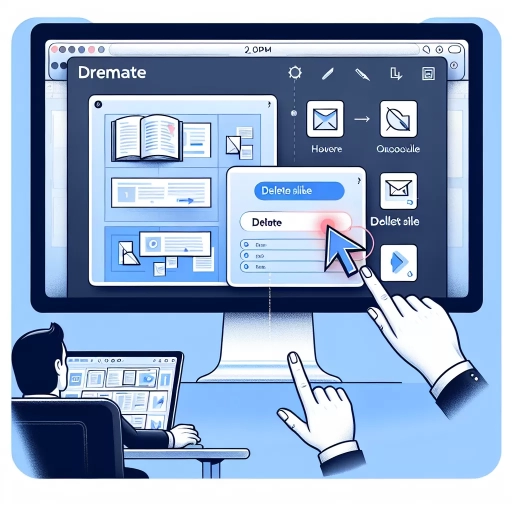
Deleting a single slide
To delete a single slide in Google Slides, you can follow a few simple steps. First, open your presentation and navigate to the slide you want to delete. You can do this by clicking on the slide in the slide panel on the left side of the screen or by using the arrow keys to move to the slide. Once you have selected the slide, you can delete it by clicking on the "Delete" button in the toolbar at the top of the screen or by right-clicking on the slide and selecting "Delete slide" from the context menu. Alternatively, you can also use the keyboard shortcut "Ctrl+M" (Windows) or "Cmd+M" (Mac) to delete the selected slide. When you delete a slide, it will be removed from your presentation, and the remaining slides will be renumbered accordingly. If you accidentally delete a slide, you can use the "Undo" feature to restore it. To do this, click on the "Edit" menu and select "Undo" or use the keyboard shortcut "Ctrl+Z" (Windows) or "Cmd+Z" (Mac).
Deleting multiple slides at once
When you need to remove multiple slides from your Google Slides presentation, you can do so efficiently by deleting them at once. This feature is particularly useful when you're working on a large presentation and need to make significant changes or when you're collaborating with others and need to remove slides that are no longer relevant. To delete multiple slides at once, start by selecting the slides you want to remove. You can do this by holding down the Ctrl key (or Command key on a Mac) and clicking on each slide you want to delete. Alternatively, you can select a range of slides by clicking on the first slide, holding down the Shift key, and then clicking on the last slide in the range. Once you've selected the slides, right-click on one of the selected slides and choose "Delete" from the context menu. You can also use the keyboard shortcut Ctrl+Delete (or Command+Delete on a Mac) to delete the selected slides. If you're using a touchscreen device, you can tap on the three vertical dots at the top right corner of the slide and then tap "Delete" to remove the selected slides. After confirming that you want to delete the slides, they will be removed from your presentation, and the remaining slides will be renumbered accordingly. Deleting multiple slides at once can save you time and effort, especially when working on complex presentations.
Using the "Undo" feature to restore deleted slides
If you accidentally delete a slide in Google Slides, don't panic. The "Undo" feature is here to save the day. Located in the top menu bar, the "Undo" button allows you to restore deleted slides with just a click. To use this feature, simply click on the "Undo" button, and the deleted slide will reappear in its original position. You can also use the keyboard shortcut Ctrl+Z (Windows) or Command+Z (Mac) to undo the deletion. This feature is especially useful when you're working on a presentation and accidentally delete a crucial slide. With the "Undo" feature, you can quickly restore the slide and continue working on your presentation without losing any progress. Additionally, you can also use the "Redo" feature to reapply any changes you made before undoing them. This feature is located next to the "Undo" button and can be accessed by clicking on it or using the keyboard shortcut Ctrl+Y (Windows) or Command+Shift+Z (Mac). By using the "Undo" and "Redo" features, you can work on your presentation with confidence, knowing that you can easily restore any deleted slides or changes.
Managing and Organizing Your Slides
Effective slide management is crucial for creating a clear and concise presentation. A well-organized slide deck can help you convey your message more efficiently, engage your audience, and make a lasting impression. To achieve this, it's essential to employ strategies that streamline your slide creation process. Three key techniques can help you manage and organize your slides effectively: rearranging slides to maintain a logical order, duplicating slides to save time and effort, and using the "Slide sorter" view to manage multiple slides. By implementing these methods, you can ensure that your presentation flows smoothly and your message is conveyed clearly. By starting with the basics of rearranging your slides, you can set the foundation for a well-organized and engaging presentation. Rearranging slides to maintain a logical order is a simple yet effective way to improve the overall structure of your presentation.
Rearranging slides to maintain a logical order
When it comes to managing and organizing your slides, rearranging them to maintain a logical order is crucial for effective communication and presentation flow. This involves reordering your slides to ensure that your message is conveyed in a clear and concise manner, making it easier for your audience to follow and understand. To achieve this, start by reviewing your slide content and identifying the key points you want to convey. Then, group related slides together and arrange them in a logical sequence, such as chronologically or categorically. You can also use the "Sort" feature in Google Slides to automatically arrange your slides alphabetically or by date. Additionally, consider using a consistent layout and design throughout your presentation to create a cohesive look and feel. By rearranging your slides to maintain a logical order, you can improve the overall flow and coherence of your presentation, making it more engaging and effective for your audience.
Duplicating slides to save time and effort
Duplicating slides is a valuable feature in Google Slides that can save you a significant amount of time and effort. When working on a presentation, you may find yourself needing to create multiple slides with similar content, such as a series of slides with the same layout and design, but with different text or images. Instead of creating each slide from scratch, you can duplicate an existing slide and make the necessary changes. This feature is especially useful when creating presentations with repetitive content, such as a series of product descriptions or a set of instructional slides. By duplicating slides, you can quickly create multiple versions of a slide, make the necessary changes, and then arrange them in the desired order. This feature can also be useful when creating a presentation with a consistent design theme, as you can duplicate a slide with the desired design elements and then add new content. Additionally, duplicating slides can also help you to maintain consistency in your presentation, as you can ensure that all slides with similar content have the same layout and design. Overall, duplicating slides is a powerful feature in Google Slides that can help you to work more efficiently and effectively, and can save you a significant amount of time and effort in the long run.
Using the "Slide sorter" view to manage multiple slides
Using the "Slide sorter" view is an effective way to manage multiple slides in Google Slides. This view allows you to see all your slides in a grid format, making it easier to organize and rearrange them. To access the "Slide sorter" view, simply click on the "View" menu and select "Slide sorter" from the drop-down list. In this view, you can see all your slides at once, and you can easily drag and drop them to reorder them. You can also use the "Slide sorter" view to delete multiple slides at once by selecting them and pressing the "Delete" key. Additionally, you can use the "Slide sorter" view to add new slides, duplicate existing ones, and even apply themes and layouts to multiple slides at once. By using the "Slide sorter" view, you can efficiently manage your slides and create a well-organized presentation.