How To Take A Screenshot On Asus Laptop
Taking a screenshot on an Asus laptop is a straightforward process that can be accomplished in a few simple steps. Whether you need to capture a moment from a video, save a conversation, or document a problem, knowing how to take a screenshot is an essential skill. In this article, we will explore three easy methods to take a screenshot on your Asus laptop. You can use the Print Screen button, the Snipping Tool, or the Game Bar to capture your screen. Each method has its own advantages and is suitable for different situations. For instance, the Print Screen button is a quick and easy way to capture your entire screen, while the Snipping Tool allows you to select a specific area to capture. The Game Bar, on the other hand, is ideal for capturing screenshots of games and videos. Let's start with the simplest method, Using the Print Screen Button.
Using the Print Screen Button
The Print Screen button is a useful tool for capturing screenshots on your Asus laptop. However, many users are unsure of how to use it effectively. In this article, we will explore the different ways to use the Print Screen button, including locating it on your Asus laptop, using it with the Windows key, and using it with the Alt key. By the end of this article, you will be able to take screenshots with ease and confidence. First, let's start with the basics and locate the Print Screen button on your Asus laptop.
Locating the Print Screen Button on Your Asus Laptop
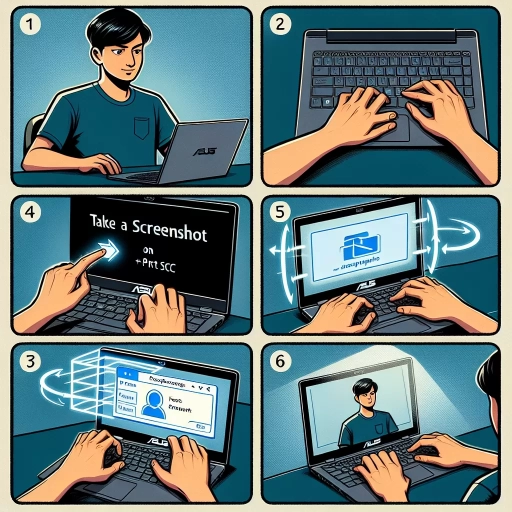
The print screen button, often abbreviated as PrtScn or PrtScr, is usually located on the top row of your Asus laptop's keyboard, between the F12 key and the ScrLk key. However, the exact location may vary depending on the specific model of your Asus laptop. If you're having trouble finding it, you can try looking for a key with the words "Print Screen" or "PrtScn" printed on it. Alternatively, you can also check your laptop's user manual or online documentation for specific instructions on how to locate the print screen button on your particular model. Once you've found the print screen button, you can use it to capture a screenshot of your entire screen or a selected area, which can then be pasted into an image editing program or document for further use.
Using the Print Screen Button with the Windows Key
When you combine the Print Screen button with the Windows key, you can capture a screenshot of your entire screen and automatically save it to a folder. To do this, press the Windows key + Print Screen (or PrtScn) at the same time. Your screen will dim for a moment, and you will hear a camera shutter sound, indicating that the screenshot has been taken. The screenshot will be saved to a folder called "Screenshots" in your Pictures folder. You can find the Screenshots folder by opening File Explorer, clicking on the Pictures folder, and then clicking on the Screenshots folder. All your screenshots will be saved in this folder, and they will be named "Screenshot (number)" in the order they were taken. This method is convenient because it saves you the trouble of having to open an image editing program to save the screenshot. Additionally, it also helps to keep your screenshots organized, as they are all saved in one place.
Using the Print Screen Button with the Alt Key
Using the Print Screen button with the Alt key is a convenient way to capture a screenshot of the currently active window on your Asus laptop. To do this, press the Alt key and the Print Screen button (PrtScn) simultaneously. This will capture a screenshot of the window that is currently in focus, and the image will be copied to the clipboard. You can then paste the screenshot into an image editing program, such as Microsoft Paint, to save and edit the image. This method is particularly useful when you want to capture a screenshot of a specific window or dialog box, rather than the entire desktop. Additionally, using the Alt key with the Print Screen button helps to avoid capturing unnecessary elements, such as the taskbar or other windows, allowing you to focus on the specific window you want to capture. By using this method, you can quickly and easily capture high-quality screenshots of individual windows on your Asus laptop.
Using the Snipping Tool
The Snipping Tool is a powerful utility that allows you to capture and edit screenshots on your Asus laptop. With this tool, you can easily capture a screenshot of a selected area, window, or full screen, and then edit and save it as an image file. In this article, we will explore how to use the Snipping Tool to capture and edit screenshots on your Asus laptop. We will start by discussing how to access the Snipping Tool on your Asus laptop, followed by a step-by-step guide on how to use the tool to capture a screenshot. Finally, we will cover how to edit and save your screenshot using the Snipping Tool. By the end of this article, you will be able to use the Snipping Tool like a pro and take your screenshot game to the next level. So, let's get started by accessing the Snipping Tool on your Asus laptop.
Accessing the Snipping Tool on Your Asus Laptop
To access the Snipping Tool on your Asus laptop, you can follow these simple steps. First, click on the Start button located at the bottom left corner of your screen. Next, type "Snipping Tool" in the search bar and select the application from the search results. Alternatively, you can also find the Snipping Tool in the Start menu under the "Windows Accessories" or "Accessories" folder. Once you've opened the Snipping Tool, you can choose from four different capture modes: Full Screen, Window, Rectangular Snip, and Free-form Snip. You can then select the area of the screen you want to capture and save the screenshot as an image file. Additionally, you can also use the keyboard shortcut "Windows key + Shift + S" to open the Snipping Tool directly. This shortcut will allow you to capture a screenshot of a selected area of the screen, which you can then save or copy to the clipboard. By following these steps, you can easily access the Snipping Tool on your Asus laptop and start capturing screenshots with ease.
Using the Snipping Tool to Capture a Screenshot
The Snipping Tool is a built-in utility in Windows that allows users to capture a screenshot of a selected area of the screen. To use the Snipping Tool, follow these steps: Open the Snipping Tool by searching for it in the Start menu or by typing "Snipping Tool" in the Windows search bar. Once the tool is open, click on the "New" button to start a new snip. Select the type of snip you want to capture, such as a full screen, window, or rectangular area. Use the crosshair pointer to select the area of the screen you want to capture. Once you've selected the area, the Snipping Tool will capture the screenshot and open it in a new window. From here, you can edit the screenshot by adding annotations, highlighting text, or cropping the image. You can also save the screenshot to your computer or share it with others via email or social media. The Snipping Tool is a convenient and easy-to-use tool for capturing screenshots on your Asus laptop.
Editing and Saving Your Screenshot with the Snipping Tool
Once you've captured your screenshot using the Snipping Tool, you can edit and save it with ease. The tool offers a range of editing options, including the ability to add text, highlight important areas, and even draw on the screenshot. To access these editing options, simply click on the "Edit" button in the top toolbar. From here, you can use the various tools to annotate your screenshot, such as the pen, highlighter, and eraser. You can also use the "Text" tool to add captions or labels to your screenshot. Additionally, the Snipping Tool allows you to crop your screenshot to focus on a specific area, making it easier to share or use in a presentation. Once you've made your edits, you can save your screenshot as an image file, such as a JPEG or PNG, by clicking on the "File" menu and selecting "Save As." You can also copy the screenshot to the clipboard and paste it into another application, such as an email or document. Overall, the Snipping Tool provides a convenient and user-friendly way to edit and save your screenshots, making it a valuable tool for anyone who needs to capture and share images on their Asus laptop.
Using the Game Bar
The Game Bar is a powerful tool in Windows 10 that allows users to capture screenshots, record gameplay, and even stream their gaming sessions. For Asus laptop users, the Game Bar can be a valuable resource for capturing and sharing their gaming experiences. In this article, we will explore how to use the Game Bar on an Asus laptop, including enabling the feature, using it to capture screenshots, and customizing the settings for optimal screenshot capture. By the end of this article, you will be able to use the Game Bar to enhance your gaming experience and share your achievements with others. To get started, let's first look at how to enable the Game Bar on your Asus laptop.
Enabling the Game Bar on Your Asus Laptop
To enable the Game Bar on your Asus laptop, start by opening the Settings app. You can do this by clicking on the Start button and selecting the gear icon, or by typing "Settings" in the search bar. Once the Settings app is open, click on the "Gaming" option from the left-hand menu. In the Gaming settings, click on the "Game Bar" option. Here, you'll see a toggle switch that says "Record game clips, screenshots, and broadcast using Game Bar." Make sure this switch is turned on. You'll also see a keyboard shortcut listed below the toggle switch, which is the default shortcut to open the Game Bar. By default, this is set to the Windows key + G. You can change this shortcut if you prefer. Additionally, you can also customize the Game Bar's appearance and behavior by clicking on the "Customize" button. This will allow you to change the Game Bar's theme, layout, and other settings. Once you've enabled the Game Bar and customized its settings to your liking, you can use it to take screenshots, record gameplay, and more.
Using the Game Bar to Capture a Screenshot
The Game Bar is a built-in feature in Windows 10 that allows you to capture screenshots of your games and other applications. To use the Game Bar to capture a screenshot, follow these steps: Press the Windows key + G to open the Game Bar. You can also search for "Game Bar" in the Start menu to open it. Once the Game Bar is open, click on the screenshot button, which looks like a camera icon. You can also use the keyboard shortcut Windows key + Alt + PrtScn to capture a screenshot. The screenshot will be saved to the "Captures" folder in your Videos folder. You can also customize the screenshot settings by clicking on the settings icon, which looks like a gear. From here, you can change the screenshot format, quality, and other settings. Additionally, you can also use the Game Bar to record video of your gameplay or other applications. To do this, click on the record button, which looks like a red circle. You can also use the keyboard shortcut Windows key + Alt + R to start recording. The video will be saved to the "Captures" folder in your Videos folder. Overall, the Game Bar is a convenient and easy-to-use tool for capturing screenshots and recording video of your games and other applications.
Customizing the Game Bar Settings for Screenshot Capture
Customizing the Game Bar settings can enhance your screenshot capture experience on your Asus laptop. To access the Game Bar settings, press the Windows key + G to open the Game Bar, then click on the gear icon. In the Game Bar settings, you can customize the screenshot capture settings to suit your preferences. You can choose to capture screenshots in PNG, JPEG, or GIF format, and select the folder where you want to save your screenshots. Additionally, you can set the screenshot capture hotkey to a custom key combination, allowing you to quickly capture screenshots without having to open the Game Bar. You can also toggle the "Record game clips and screenshots using Game Bar" option to enable or disable screenshot capture. Furthermore, you can adjust the screenshot quality by selecting the desired image quality, ranging from low to high. By customizing the Game Bar settings, you can streamline your screenshot capture process and ensure that your screenshots are saved in the desired format and location.