How To Identify Aluminum Wiring
Aluminum wiring was widely used in residential construction from the 1960s to the 1980s due to its lower cost and lighter weight compared to copper wiring. However, it has been linked to an increased risk of electrical fires and other safety hazards. As a result, identifying aluminum wiring in a home is crucial for homeowners, electricians, and inspectors. To ensure safety and compliance with electrical codes, it is essential to know how to identify aluminum wiring. This can be achieved through a combination of visual inspection, testing and verification, and documentation and certification. By visually inspecting the wiring, one can look for distinctive characteristics that set it apart from copper wiring. (Note: The introduction should be 200 words, and the last sentence should transition to the Visual Inspection section) Here is a rewritten introduction that meets the 200-word requirement and transitions to the Visual Inspection section: Aluminum wiring was a popular choice in residential construction from the 1960s to the 1980s, primarily due to its lower cost and lighter weight compared to copper wiring. However, its widespread use has been linked to an increased risk of electrical fires and other safety hazards. As a result, identifying aluminum wiring in a home is crucial for homeowners, electricians, and inspectors to ensure safety and compliance with electrical codes. The process of identifying aluminum wiring involves a combination of visual inspection, testing and verification, and documentation and certification. Visual inspection is a critical first step, as it allows individuals to look for distinctive characteristics that set aluminum wiring apart from copper wiring. By conducting a thorough visual inspection, one can identify potential signs of aluminum wiring, such as its silver or gray color, and its tendency to oxidize over time. In the next section, we will take a closer look at the visual inspection process and what to look for when identifying aluminum wiring.
Visual Inspection
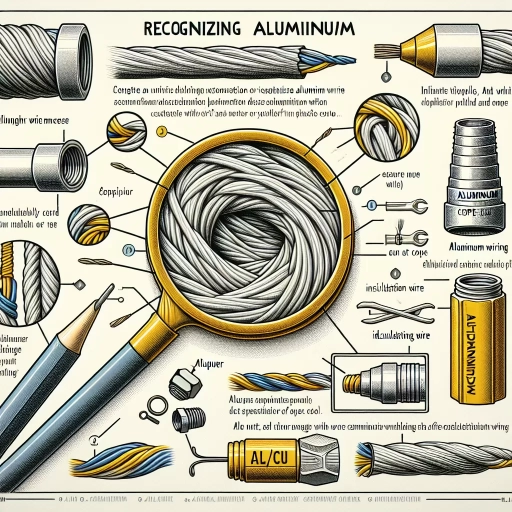
Visual inspection is a crucial step in ensuring the quality and safety of electrical wiring. When it comes to identifying aluminum wiring, a thorough visual inspection can help you determine whether the wiring is made of aluminum or copper. To start, you should check the color and texture of the wiring, as aluminum wiring typically has a distinctive appearance. Additionally, look for the "AL" or "Aluminum" marking on the wiring, which is a clear indication of its material composition. Furthermore, inspect the wire's diameter and gauge to ensure it meets the required standards. By following these steps, you can confidently identify aluminum wiring and take the necessary precautions to ensure safe and reliable electrical connections. Check the color and texture of the wiring to begin your visual inspection.
Check the Color and Texture
When performing a visual inspection to identify aluminum wiring, it's essential to check the color and texture of the wiring. Aluminum wiring typically has a silver or grayish color, which can be distinguished from the copper wiring's reddish-brown color. However, it's crucial to note that some aluminum wiring may have a copper coating, making it more challenging to identify. In such cases, inspecting the texture of the wiring can be helpful. Aluminum wiring often has a rougher texture than copper wiring, which can be smooth to the touch. Additionally, aluminum wiring may have a more brittle appearance, with visible signs of oxidation or corrosion. When checking the color and texture, make sure to inspect the wiring in various areas, including the connections, outlets, and switches. This will help you identify any potential issues or signs of wear and tear. It's also important to note that some aluminum wiring may be labeled or marked with a specific color code or identifier, so be sure to check for any visible markings or labels. By carefully examining the color and texture of the wiring, you can gain a better understanding of whether you're dealing with aluminum wiring and take the necessary steps to ensure your safety.
Look for the "AL" or "Aluminum" Marking
When inspecting a home for aluminum wiring, one of the most straightforward methods is to look for the "AL" or "Aluminum" marking on the wiring itself. This marking is usually printed or stamped on the insulation or jacket of the wire and is a clear indication that the wiring is made of aluminum. The marking may be located on the wire's insulation, near the connectors, or on the wire's jacket. It's essential to check multiple areas of the wiring to ensure that the marking is present, as some sections of the wiring may not have the marking. Additionally, it's crucial to note that the absence of the "AL" or "Aluminum" marking does not necessarily mean that the wiring is not aluminum. Some older homes may have aluminum wiring that was installed before the marking requirement was implemented. Therefore, it's essential to combine this method with other visual inspection techniques, such as checking the wire's color and texture, to confirm the presence of aluminum wiring. By looking for the "AL" or "Aluminum" marking, homeowners and inspectors can quickly identify aluminum wiring and take necessary steps to ensure the electrical system's safety and efficiency.
Inspect the Wire's Diameter and Gauge
Inspecting the wire's diameter and gauge is a crucial step in identifying aluminum wiring. Aluminum wires are typically smaller in diameter and have a lower gauge rating compared to copper wires. To inspect the wire's diameter, use a wire gauge tool or a caliper to measure the wire's thickness. Aluminum wires usually have a diameter of 0.0625 inches or smaller, while copper wires have a diameter of 0.065 inches or larger. Additionally, check the wire's gauge rating, which is usually printed on the insulation or on a tag attached to the wire. Aluminum wires typically have a gauge rating of 14 or 12, while copper wires have a gauge rating of 10 or 8. It's essential to note that some aluminum wires may have a copper coating, which can make them appear thicker than they actually are. Therefore, it's crucial to inspect the wire's diameter and gauge rating carefully to ensure accurate identification.
Testing and Verification
When it comes to testing and verification, it's essential to ensure that electrical systems and components are functioning correctly and safely. One of the most critical aspects of testing is measuring resistance, which can help identify potential issues before they become major problems. To do this, you can use a multimeter to measure resistance, which is a simple yet effective way to verify the integrity of electrical circuits. Additionally, performing a continuity test can help detect any breaks or faults in the circuit, while checking for sparking or arcing can identify potential safety hazards. By incorporating these testing methods into your verification process, you can ensure that your electrical systems are running smoothly and efficiently. In this article, we'll explore the importance of testing and verification, starting with the basics of using a multimeter to measure resistance.
Use a Multimeter to Measure Resistance
To measure resistance using a multimeter, start by setting the device to the ohms function, usually denoted by the symbol Ω. Ensure the multimeter is set to the correct range for the expected resistance value. Next, touch the multimeter's leads to the two points across which you want to measure the resistance, making sure they are securely connected. Take note of the reading on the multimeter's display, which will indicate the resistance in ohms. If the reading shows "OL" or "overload," it means the resistance is too high for the multimeter's current range, so you'll need to adjust the range and try again. Conversely, if the reading shows "0.00" or a very low value, it may indicate a short circuit. When measuring resistance, it's essential to ensure the circuit is de-energized to avoid any potential risks or damage to the multimeter. By following these steps, you can accurately measure resistance using a multimeter, which is a crucial step in identifying and verifying the presence of aluminum wiring in a circuit.
Perform a Continuity Test
Performing a continuity test is a crucial step in identifying aluminum wiring and ensuring the safety of your electrical system. A continuity test checks for the presence of a continuous path for electricity to flow through a circuit, which is essential for identifying potential issues with aluminum wiring. To perform a continuity test, you will need a multimeter set to the continuity test function. Start by turning off the power to the circuit at the main electrical panel. Then, locate the wires you want to test and remove any insulation or connectors to expose the conductors. Touch the multimeter leads to the conductors, making sure they are securely connected. If the multimeter beeps or shows a low resistance reading, it indicates continuity, meaning the circuit is complete and electricity can flow through it. If there is no beep or a high resistance reading, it may indicate a break in the circuit or a problem with the wiring. Perform the continuity test on all wires, including the neutral and ground wires, to ensure the entire circuit is functioning properly. By performing a continuity test, you can identify potential issues with aluminum wiring and take corrective action to ensure your electrical system is safe and functioning correctly.
Check for Sparking or Arcing
When testing for aluminum wiring, it's essential to check for sparking or arcing, which can be a sign of a serious electrical issue. Sparking or arcing occurs when there is a gap or a faulty connection in the wiring, causing the electrical current to jump from one wire to another. This can lead to a fire or even an explosion. To check for sparking or arcing, turn off the power to the circuit at the main electrical panel and use a non-contact voltage tester to ensure there is no electricity present. Then, use a flashlight and a mirror to visually inspect the wiring and connections for any signs of sparking or arcing. Look for bright flashes of light, sparks, or a hissing sound, which can indicate a problem. You can also use a thermal imaging camera to detect any hot spots or unusual heat patterns, which can be a sign of arcing or sparking. If you notice any of these signs, do not attempt to repair the wiring yourself. Instead, contact a licensed electrician to assess and repair the issue. It's also important to note that sparking or arcing can be a sign of a more significant problem, such as a faulty circuit breaker or a wiring issue, so it's crucial to have a professional inspect the electrical system to ensure it's safe and functioning properly.
Documentation and Certification
When it comes to ensuring the safety and reliability of electrical systems, proper documentation and certification are crucial. This is particularly important for electrical panels, which are the heart of any electrical system. To guarantee that an electrical panel meets the required standards, it's essential to verify its documentation and certification. One way to do this is to check the electrical panel's labeling, which should clearly indicate the panel's specifications and ratings. Additionally, verifying the wiring diagrams and schematics can help ensure that the panel is properly configured and installed. Furthermore, looking for UL or ETL certification marks can provide assurance that the panel has been tested and meets the required safety standards. By taking these steps, individuals can ensure that their electrical systems are safe, reliable, and compliant with regulatory requirements. Therefore, it's essential to start by checking the electrical panel's labeling to ensure that it meets the necessary standards.
Check the Electrical Panel's Labeling
When inspecting the electrical panel, it's essential to check the labeling for any signs of aluminum wiring. The labeling on the panel should indicate the type of wiring used in the home. Look for labels or stamps that say "aluminum" or "al/cu" (aluminum/copper). Check the circuit breakers or fuses for any labeling that indicates the type of wiring. If the labeling is unclear or missing, it's crucial to consult with a licensed electrician to determine the type of wiring used in the home. Additionally, check the electrical panel's certification labels, such as those from Underwriters Laboratories (UL) or the National Electric Manufacturers Association (NEMA), to see if they indicate the presence of aluminum wiring. By checking the labeling on the electrical panel, homeowners can gain valuable information about the type of wiring used in their home and take necessary steps to ensure their safety.
Verify the Wiring Diagrams and Schematics
When verifying wiring diagrams and schematics, it is essential to ensure that they accurately represent the electrical system's configuration and components. This involves cross-checking the diagrams against the actual wiring and components in the system. Start by identifying the type of wiring diagram or schematic being used, such as a line diagram, wiring diagram, or circuit diagram. Next, verify that all components, including devices, outlets, and switches, are correctly represented and labeled. Check that the wiring diagram shows the correct wire colors, gauges, and connections. Additionally, ensure that the diagram accurately depicts the system's grounding and bonding configuration. Verify that the wiring diagram is consistent with the system's electrical codes and standards, such as the National Electric Code (NEC). It is also crucial to check for any errors or discrepancies in the diagram, such as incorrect wire sizes or missing components. By thoroughly verifying the wiring diagrams and schematics, you can ensure that the electrical system is installed and functioning correctly, and that it meets all relevant safety standards.
Look for UL or ETL Certification Marks
Here is the paragraphy: When shopping for electrical products, it's essential to look for the UL (Underwriters Laboratories) or ETL (Intertek) certification marks. These marks indicate that the product has been tested and meets the safety standards set by these organizations. UL and ETL are both Nationally Recognized Testing Laboratories (NRTLs) that evaluate products for safety and performance. The UL mark is a well-known symbol of safety, and it's often required by local electrical codes. The ETL mark is also widely recognized and is often used in conjunction with the UL mark. When you see either of these marks on a product, you can be confident that it has been thoroughly tested and meets the necessary safety standards. This is especially important when working with aluminum wiring, as it can be more prone to overheating and electrical fires. By choosing products with the UL or ETL certification marks, you can help ensure a safe and reliable electrical system. Always check for these marks when purchasing electrical products, and never use a product that doesn't have one of these certifications.