How To Play The Recorder
 Embarking on a musical journey can be both an enriching and enlightening experience. A prime instrument to commence this journey for amateurs and experts alike is the recorder. This instrument, simple in its form but brimming with depth and versatility, remains a popular choice across a multitude of musical domains. This comprehensive article will offer authoritative insights and practical strategies on mastering the art of playing the recorder. It is divided into three key sections to simplify your assimilation process, starting with 'Getting Started with the Recorder', designed to provide a comprehensive understanding and familiarity with the instrument. The second section, 'Learning Basic Recorder Techniques', delves into the building blocks of fine-tuning your performance, ensuring a solid technical foundation. Following this, the final section 'Playing Simple Melodies and Songs' promises exciting guidance to play your first tunes and step forward into the world of music confidently. Now, without further ado, let's pave the way to our first topic of discussion, 'Getting Started with the Recorder'.
Getting Started with the Recorder
of the musical fraternity, the recorder is an integral tool for beginners, enthusiasts and professionals alike. Embarking on this enriching journey requires a detailed understanding of many aspects pertinent to the recorder. As such, this guide has been specifically curated to provide you with comprehensive insights into getting started with the Recorder and elevate your implicit musicality. It unfolds with 'Choosing the Right Recorder', which guides you on picking an instrument that resonates with your skills and identity. The subsequent section 'Assembling and Holding the Recorder' will equip you with all the practical knowledge on the handling and setup of your chosen recorder, ensuring a seamless playing experience. Finally, 'Basic Hand Positions and Finger Placement' is your bible to laying the bedrock for your recorder journey with correct and comfortable positioning of your hands to create harmonious sounds. Now, let's dive into the first section: Choosing the Right Recorder. Doing so is of paramount importance as it sets the stage for your relationship with the instrument and heavily influences your motivation and progress in learning.
Choosing the Right Recorder
Choosing the right recorder can significantly impact your journey of learning how to play this wonderful instrument. Since recorders come in diverse sizes, materials, and quality standards, making the right choice can appear daunting at first; however, it is essential in enriching your playing experience and mastering the nuances of sound production. The most common types of recorders include the soprano (or descant), alto (or treble), tenor, and bass. Soprano recorders, with their light and bright tone, are perfect for beginners, especially children, due to their small size, simplicity, and affordability. In contrast, the alto recorder offers a deeper, mellower sound and requires slightly more advanced finger dexterity, making it fitting for adults with developed motor skills. If you're looking for a richer, fuller sound, the tenor recorder, characterized by its warm tone and pronounced lower range, might capture your interest. And if you're keen on exploring the depths of the recorder's melody, the bass, with its resonant low pitch, caps off the standard recorder family. Another critical factor in choosing the right recorder is the material with which it is built. Plastic recorders are the most cost-effective and are ideal for beginners — they hold up well to the rigors of handling by young learners and offer a decent sound quality. If you want to take a serious plunge into the recorder world, wooden recorders are your best bet. Crafted from a variety of woods like maple, pear, or famously, grenadilla, they produce a beautiful, warm, and nuanced tone that's unparalleled by their plastic counterparts. Within the realm of wooden recorders, you'll come across two variants — those with baroque fingering and those with German fingering. Baroque is the more commonly preferred style due to its superior intonation and accurate tuning, a feature that proves instrumental in ensemble playing scenarios. Pay attention to the construction of the recorder – one-piece, two-piece, or three-piece. While one-pieced recorders are beneficial for young novices due to their robustness, two and three-piece recorders offer the advantage of precise tuning adjustments and supports various playing styles. Also, consider the brand of the recorder as well. Reputed brands like Yamaha, Aulos, and Zen-On are known for their quality instruments that cater to all skill levels. In summary, choosing the right recorder requires considerable thought into factors like the recorder's size (which influences the tone), the material it's made from, its construction, and the brand it represents. Each aspect intertwines with the other, influencing the overall output and your mastery of the instrument. With these determinants, you can make a well-informed choice that heightens your recorder-learning journey, allowing you to hone your talent and experience the joy of music-making.
Assembling and Holding the Recorder
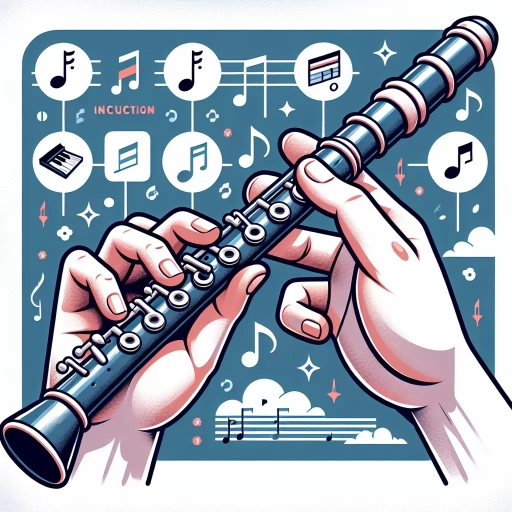
Assembling and Holding the Recorder is a crucial part of the initial process of learning to play this instrument. Handling a recorder adeptly calls for an understanding of its parts and assembly procedure. The recorder, a woodwind instrument belonging to the family of flutes, typically consists of three main parts: the head joint, which houses the mouthpiece where sound is produced; the body or mid-section, adorned with holes for finger placement; and the foot joint which influences sound control and tonal variation. Assembling the recorder requires a careful approach. For this, hold each piece of the recorder at the joint, not at the end, to prevent unnecessary strain or possible damage to the instrument. Start by connecting the head joint to the body piece. Ensure you gently twist them together to secure a firm fit. It's essential not to use excessive force during this process to avoid damaging the instrument. Complement this by adding the foot joint to the other end of the body, once again using a gentle twisting motion. Upon successful assembly, the recorder should be held in a comfortable yet firm manner for optimal play. The left hand should be positioned towards the upper part of the recorder, encircling it near the mouthpiece, while the right hand should rest towards the lower part around the foot joint. This grip offers stability and easy access to the nine finger holes on the recorder's body. It's worth noting that thumb placement plays a vital role in holding the recorder; the left thumb should be placed beneath the thumb hole, while the right thumb supports the instrument from underneath, providing balance and stability. Perfecting the posture while holding the recorder is fundamental for producing good sound and maintaining comfort during play. Stand or sit up straight, engage your core and ensure your neck and shoulders are relaxed. The recorder should be held at a slight angle, pointing downwards, with the mouthpiece resting lightly against your lower lip. Avoid hunching your back or raising your shoulders, as this could alter the wind flow and potentially affect sound production negatively. The holding technique and posture not only significantly influence the quality of the music produced but also promote playability and continuous learning. Ultimately, Assembling and Holding the Recorder right sets the ground for smoothly transitioning into the next stages such as blowing air into the recorder, controlling your breath and fingering, which are primary in bringing out the melodic grace that characterizes the recorder.
Basic Hand Positions and Finger Placement
of mastering any musical instrument is an understanding and ability to maintain proper hand positions and finger placement. When it comes to playing the recorder, this becomes even more vital as it not only affects the quality of the sound produced but also determines the fluidity of transitioning between notes. The two hand positions the recorder player primarily uses include the "left hand on top" position and the "right hand on top" position. As a rule of thumb, beginners, more often than not, adopt the "left hand on top" position. In this arrangement, the left hand fingers cover the upper holes of the recorder while the right hand fingers cover the lower holes. The thumb of the left hand is used to control the back hole and assists in producing different notes. Transitioning from one note to another smoothly requires a high degree of finger dexterity and muscle memory, developed over time with constant practice. A point to remember is that fingers should be relaxed and rounded, almost as if lightly gripping a tennis ball, and not stiff or flat. The thumb and index finger work in a pincer-like movement to control the recorder. The remaining fingers should cover the holes completely to prevent air leaks, which can distort the sound produced. When any note has to be played, the corresponding finger lifts off the hole it was covering, and when the note concludes, the finger should lower back onto the hole, sealing it completely. Finger placement on the recorder not only affects sound production but also the player's comfort. When placed correctly, fingers allow for seamless navigation along the recorder, crafting a melodious blend of high and low notes. However, inaccuracies in finger placement can cause discomfort, leading to a choppy performance. In conclusion, the basic hand positions and finger placement on a recorder are simple, yet critical aspects aspiring recorder players should master. These foundational skills will pave the way for more complex note sequences and an overall heightened musical experience. Moreover, it will allow the player to express musicality with relative ease, making the recorder an extension of their creative expression. The road to mastering the recorder begins with getting the basics right; the importance of proper hand positions and finger placement cannot be overstated.
Learning Basic Recorder Techniques
of successful recorder playing lies in mastering basic techniques - proper breathing and air support, developing good tone and pitch, and understanding basic fingerings and articulation. Grasping these skills will make your journey toward becoming a proficient recorder player less daunting and more enjoyable. Firstly, proper breathing and air support are crucial; these underpin the voice of the instrument. The power of your breath directly impacts the quality and volume of sound, making it a critical aspect to master. The second technique revolves around developing a good tone and pitch. A well-echoed pitch and tone on your recorder will set you aside as an excellent player. Lastly, mastering basic fingerings and articulation creates a foundation for complex patterns and creates fluidity in your music. The combination of these techniques paves the way to not just playing notes, but creating music. Now, let's delve into the first technique, proper breathing and air support, which serves as the breath of life for all recorder music.
Proper Breathing and Air Support
of learning Basic Recorder Techniques lies on the mastery of Proper Breathing and Air Support. These significant elements facilitate effective and precise play of the recorder. Regardless of the recorder's size, from soprano to bass, proper air support requires suitable breath pressure. Musical expression can be largely influenced by breath control as it impacts pitch, volume, and tone quality. When playing the recorder, correct breathing begins with diaphragmatic or "deep" breathing. Drawing your breath deeply into your abdomen instead of just filling your chest enhances control. An effective method to practice this is laying flat on the ground with a book on your abdomen and observing it rise and fall as you inhale and exhale. This presents a clear visual indication of proper 'deep' breathing. Directly related to diaphragmatic breathing is the principle of consistent air support. It pertains to the continuous flow of air you deliver into the recorder, regulated by your diaphragm. Maintaining a consistent airflow is vital to producing a smooth and reliable sound, preventing unwanted variations in pitch and tone. Novice recorder players often make the mistake of puffing their cheeks or tightening their throat to manage airflow, but these techniques invariably lead to tension and inefficient breath use. A practical exercise to develop consistent air support is sustaining long tones on the recorder. By holding a single note for as long as your breath allows, you gradually improve your diaphragmatic control and airflow consistency. As an extension of this practice, you can also experiment with varying the volume of your long tones, starting softly, escalating to full volume, and then decreasing to a gentle finish. This provides valuable training in dynamic control, a major aspect of expressive recorder playing. Establishing solid breath control and consistent air support not only fosters technical skill but greatly benefits the musical understanding and creativity. While these techniques take time and patience to master, their pay-off is tremendous. They serve as the foundation of recorder playing, paving the way for a refined and articulate musical voice. Driven by the breath, the recorder becomes an extension of the player's own body and emotions. Embracing proper breathing and air support techniques is a sure path towards attaining freedom and satisfaction in the art of recorder music. Regardless of your level of proficiency, these principles stand as invaluable tools to enhance and elevate your recorder playing journey.
Developing Good Tone and Pitch
of learning to play any instrument, including the recorder, is mastering the control of tone and pitch. Developing good tone and pitch is an essential skill that distinguishes a professional player from an amateur. Without a good tone and pitch accuracy, your music may sound flat, monotonous and uninspiring. However, with practice and perseverance, one can cultivate this artistry of playing the recorder. First and foremost, it’s key to understand the terms tone and pitch. While tone refers to the unique and specific color or character of a sound you produce, pitch denotes the highness or lowness of a particular note or sound as perceived by the ear. Usually influenced by the speed of the vibration that produces the sound, the right pitch hits the note perfectly whereas improper pitch means the note played is either too high or too low. In the context of playing a recorder, maintaining good tone essentially means producing a sound that is clear, full, and resonant. It’s about control and consistency in your breath support, tonguing, and fingering techniques. It’s recommended to start by playing long, even tones on your recorder, at a comfortable volume, while trying your best to keep the pitch consistent. Regular practice would enable you to increase the duration of your tones, improve your breath control, and allow you to play expressively with dynamics and vibrato. Accuracy in pitch, on the other hand, is about hitting and maintaining the right notes. Each note played on the recorder should sound distinct and separate from other notes. Practive with a tuner can be incredibly beneficial in helping beginners visually see when they are in tune. This aids in training your ears and fingers to hear and feel the frequency of correct and steady pitch. Using sheet music can hone your note-reading skills and using a metronome can assist in staying rhythmically consistent. A disciplined routine of practice, experimenting with different techniques, and receiving feedback from instructors or peers can significantly aid in developing good tone and pitch. This essential skill set would not only make your recorder playing sound more attractive and professional, but it also opens doors to more complex and expressive ways of playing music. Therefore, put a conscientious effort into mastering good tone and pitch, as it is undoubtedly an indispensable aspect of learning basic recorder techniques.
Mastering Basic Fingerings and Articulation
Learning the basics of a musical instrument such as the recorder requires a consistent, focused approach, especially towards mastering the fundamental elements like the basic fingerings and articulation. The positioning and movement of fingers on the recorder are instrumental in the generation of various notes. Different fingerings produce different pitches, moving from low to high, on the musical scale. Studying the fingering chart, which shows where your fingers should go on the recorder to make various notes, can go a long way in developing your mastery. Furthermore, practicing the 'scale' daily, which is a series of notes that rise or fall in sequence, will undoubtedly build your confidence, agility, and precision. Articulation, on the other hand, pertains to the clarity and expressiveness of the notes produced. It involves the manipulation of breath and tongue, notably the technique known as 'tonguing.' In tonguing, the notes are separated by a gentle 'tuh' action of the tongue, akin to softly saying 'tuh' into the mouthpiece of the recorder. This action gives each note a clean beginning, providing a distinctive sound. Slurring, another vital aspect of articulation, involves smoothly joining notes together in a single breath. The notes are not separated by the tongue, resulting in a flowing, musical phrase. It is crucial to vary between slurring and tonguing to enhance the tonal character and the emotional depth of the music you are playing. Proper finger and tongue placement in recorder playing does not happen overnight; it requires substantial practice. Just as a child needs time to master walking, you will need to practice over a period for this muscular learning to take place. It is essential to learn slowly and accurately, concentrating on distinct and clear sounds, then gradually increase your speed as your skill improves. Always remember that making mistakes is part of learning. It's important to correct these errors immediately and continue practicing. Mastering basic fingerings and articulation boosts your ability to interpret sheet music effectively. It also opens an extensive array of musical possibilities, enabling you to play complex pieces with elegance and subtlety. Indeed, the mastery of these skills is foundational and a key determinant of your progression in not just the recorder, but virtually in any wind instrument. Therefore, the effort invested in mastering these techniques is not only rewarding but also empowering towards your musical journey. All in all, mastering basic fingerings and articulation is fundamentally crucial in learning to play the recorder. They form the bedrock of achieving fluency and precision in playing the instrument, thereby captivating your audience's attention. Harness your patience, dedication, and resilience, and brace yourself for an exciting, fulfilling musical journey on the recorder.
Playing Simple Melodies and Songs
The captivating world of music unfolds not in complex symphonies alone, but gracefully within the boundaries of simple melodies and songs. These bite-sized musical elements bring music itself closer to the novices and enrich the understanding of seasoned players. Starting from reading sheet music and understanding notation, practicing simple melodies and exercises, to eventually playing familiar songs and tunes, this journey is foundational to any musical endeavour. Familiarizing oneself with sheet music provides the roadmap to navigate the universe of rhythm and melody. Then, practicing simple exercises and melodies builds upon this basic knowledge, translating it into practical skills. Finally, applying these skills to play familiar songs and tunes marries theory with practice, solidifying the comprehensive understanding of music. This layered method, underpinned by patience and regular practice, guarantees sure-shot progress in this musical journey, even for beginners. Transitioning to the first major stride, let us delve into the nuances of reading sheet music and understanding notation.
Reading Sheet Music and Understanding Notation
Gaining the ability to read sheet music and understanding notation plays a major role in mastering the art of playing simple melodies and songs on the recorder. Deciphering musical notation may at first seem complex, akin to studying a foreign language, but with diligent practice, one swiftly navigates this pathway. Reading sheet music entails grasping the combination of musical symbols - notes, rests, key signatures, time signatures, and clefs, all strategically placed on the stave, which consists of five parallel lines. In the context of the recorder, a treble clef or G clef is the primary clef used, indicating the high range of pitches the instrument can produce. The time signature, usually consisting of two numbers, indicates how many beats are in each measure, and which note receives the beat. The notes themselves, whether quarter notes or half notes, depict the rhythm and duration of sounds. To begin comprehending this, equate quarter notes to a single beat, half notes to two beats, and whole notes to four beats. The simultaneous understanding of rhythm, pitch, and duration that sheet music notation provides is essential in producing cohesive harmonies and melodies. Equally vital, rests in sheet music are symbolic of silence or the absence of sound, offering a seamless transition between notes or a moment of pause, thus promoting balance within the melody. Key signatures, on the other hand, indicate which group of pitches or scale, major or minor, the melody adheres to, presenting a map of sharps or flats throughout the piece. Hence, to adeptly play simple melodies and songs on the recorder, one must first learn to decipher these musical symbols, each an integral piece of a broader puzzle. As sheet music is a universal language in the realm of music, acquiring this skill not only equips you with the tool to play the recorder but also widens your accessibility to play other instruments. To conclude, reading sheet music and understanding notation is indeed a bedrock skill in the journey of enhancing one's musical prowess, facilitating a rich, full-bodied engagement with the recorder and wider music world.
Practicing Simple Melodies and Exercises
Practicing simple melodies and exercises is a fundamental step in learning to play the recorder. When beginning this musical journey, it is essential to start with straightforward melodies and scales that will help you master core techniques and the basic elements of musical theory. These beginner exercises not only help in laying the foundation for your musical knowledge but also expand your understanding of rhythm, timing, and note value, which are integral parts of playing any musical instrument proficiently. Simple melodies are a great place to start because their simplicity helps beginners focus on the basics. They provide an avenue to understand how different notes work together to create a harmonious sound, and help train your ears to recognize those notes. Practicing these melodies repetitively solidifies your finger positioning, breath control, and timing – crucial aspects when playing the recorder. Becoming skilled at simple melodies also helps in improving your sight-reading skills, as you gradually learn to associate musical notes on the page with the corresponding finger positions on the recorder. Besides simple melodies, exercises play a significant role in honing your recorder playing skills. Scales and arpeggios, for example, are basic exercises that have a profound impact on your playing ability. Scales teach you how to successively play the notes in a key, leading to better finger dexterity and breath control while arpeggios let you practice the primary chords in a key and help in building strength and fluidity in your transitions between notes. These exercises are pivotal for learning harmonization and understanding chord progression – two critical components in music composition. Another practical exercise for beginners is to play duets, which can be as simple as each player repeating the same melody. By doing so, you learn to listen to how your playing sounds in relation to another player, developing your ability to play in harmony and in rhythm with others. This also encourages you to listen critically to your own playing, an often overlooked but vital skill in becoming a proficient musician. Exercises also help build your stamina, a key requirement for playing longer pieces. For instance, practicing long tones – holding a single note for an extended period – can increase your breath control and endurance. Moreover, these training pieces can also foster your expressive skills. As you move from merely playing notes to creating music, you'll realize that exercises and simple melodies serve as learning platforms for applying dynamics and expressions, thereby bringing your performance to life. Practicing simple melodies and exercises might seem monotonous and basic, but they are the stepping stone to elevated musical proficiency. Hence, one should approach them with patience, understanding, and consistency. Gradually, these simple scales, arpeggios, and melodies will morph into complex, enticing pieces, transforming you from a novice recorder player into a skilled musician while enriching your musical journey along the way.
Playing Familiar Songs and Tunes
Playing familiar songs and tunes is one of the most entertaining and rewarding aspects of learning to play the recorder. It provides learners with a practical application of the skills they have honed through practice and study. As the second phase progressing from playing simple melodies, it challenges the learner to adapt their knowledge to a broader musical context. This phase can offer moments of great satisfaction and self-expression, as these are songs that the player already connects with on a personal level. Notably, this stage serves to bolster the learner's understanding of melody and rhythm which were ingrained during the initial stage. Chances are, you already have memorized the rhythm and melody of familiar songs, making it easier to apply those concepts when playing them on the recorder. This stage also presents an opportunity to refine the fingering techniques that were introduced in the initial stages. The intricate finger positions and movements required to cue different notes become significantly easier while playing familiar songs due to the pre-established mental auditory representation of the tune. Moreover, playing familiar songs and tunes helps build confidence in a nascent player. The ability to reproduce a known sound is a great morale booster as it provides tangible evidence of progress. You’re not only entertaining yourself by playing something you enjoy, but also reinforcing your learning through repeated practice. Each successful rendition strengthens mental and physical coordination, speeding up further learning. In essence, playing familiar songs and tunes on the recorder is both a pedagogical tool and a source of joy. It offers a seamless blend of skill refinement and personal entertainment. Through this phase, learners shift from being passive recipients of knowledge to active creators of melodious tunes. From executing simple notes to replaying favorite tunes, the journey reinforces the importance of practice, patience, and passion in mastering this wonderful instrument, and indeed, any form of art or craft. It is an integral part of the recorder learning journey, beautifully bridging the gap between playing simple melodies and more complex musical compositions. The sight of a recorder should instill in learners the excitement of the tunes they can create, the familiar songs they could play with relative ease, and the melodic narratives they can weave with their continued practice. It is an encouraging reaffirmation of the underlying fact that with commitment to learning, you will always be just a breath away from making beautiful music.