How To Put An Image In A Shape Google Slides
Here is the introduction paragraph: Adding images to your Google Slides presentation can elevate its visual appeal and help convey your message more effectively. However, simply inserting an image into a slide may not be enough to capture your audience's attention. To take your presentation to the next level, you can put an image in a shape, adding a creative touch to your design. But before you can achieve this, it's essential to understand the basics of Google Slides, including its interface and features. Once you have a solid grasp of the platform, you can learn how to insert and format images to enhance your slides. Finally, you can use shapes to add an extra layer of visual interest to your presentation. In this article, we'll explore these concepts in more detail, starting with the fundamentals of Google Slides.
Understanding the Basics of Google Slides
Google Slides is a popular presentation software that offers a range of features and tools to help users create engaging and professional-looking slides. To get started with Google Slides, it's essential to understand the basics of the platform. In this article, we'll explore the fundamentals of Google Slides, including what it is and its key features, how to create a new presentation, and the basic tools and menus available. By the end of this article, you'll have a solid understanding of how to use Google Slides to create effective presentations. First, let's start with the basics - what is Google Slides and what features does it offer?
What is Google Slides and its features
Google Slides is a free online presentation software offered by Google as part of its Google Drive service. It allows users to create, edit, and share presentations online. With Google Slides, users can create engaging presentations with various features such as text, images, videos, and animations. The software also allows real-time collaboration, enabling multiple users to work on a presentation simultaneously. Google Slides offers a range of templates and themes to help users get started, and its intuitive interface makes it easy to use, even for those who are new to presentation software. Additionally, Google Slides integrates seamlessly with other Google apps, such as Google Drive, Google Docs, and Google Sheets, making it a powerful tool for creating and sharing presentations. Some of the key features of Google Slides include the ability to add images, videos, and audio files, as well as the option to customize layouts, fonts, and colors. Users can also add transitions and animations to make their presentations more engaging, and the software allows for easy sharing and collaboration. Overall, Google Slides is a versatile and user-friendly presentation software that is ideal for creating and sharing presentations for personal, educational, or professional purposes.
How to create a new presentation in Google Slides
To create a new presentation in Google Slides, start by logging into your Google account and navigating to the Google Drive homepage. From there, click on the "New" button and select "Google Slides" from the dropdown menu. This will open a new, blank presentation in Google Slides. You can also access Google Slides directly by typing slides.google.com into your web browser. Once you're in the Google Slides interface, you can choose from a variety of pre-designed templates or start from a blank slide. To choose a template, click on the "Template gallery" button and browse through the available options. If you prefer to start from scratch, simply click on the "Blank" template. You can then give your presentation a title by clicking on the "Untitled presentation" text at the top of the screen and typing in your desired title. From there, you can begin adding content to your presentation, including text, images, and shapes. You can also customize the layout and design of your presentation by using the various tools and features available in the Google Slides toolbar. As you work on your presentation, you can save it automatically to your Google Drive account, and you can also collaborate with others in real-time by sharing the presentation and granting them editing permissions.
Basic tools and menus in Google Slides
Google Slides offers a range of basic tools and menus that enable users to create and edit presentations efficiently. The toolbar at the top of the screen provides access to frequently used tools, such as text formatting options, alignment tools, and shape and line drawing tools. The "Insert" menu allows users to add various elements to their slides, including images, tables, charts, and links. The "Format" menu provides options for customizing the appearance of text, shapes, and images, including font styles, colors, and sizes. The "Arrange" menu enables users to manage the layout of their slides, including options for aligning, grouping, and ordering objects. Additionally, the "Tools" menu offers features such as spell check, research, and accessibility options. The "View" menu allows users to switch between different views, including the normal view, outline view, and presenter view. By familiarizing themselves with these basic tools and menus, users can create professional-looking presentations and effectively communicate their ideas.
Inserting and Formatting Images in Google Slides
Inserting and formatting images in Google Slides is a crucial aspect of creating visually appealing and engaging presentations. When it comes to adding images to your slides, there are several key considerations to keep in mind. First, you need to know how to insert an image into a Google Slides presentation, which involves uploading or searching for images within the platform. Once you've added an image, you may need to resize and crop it to fit your slide's layout, which can be done using Google Slides' built-in editing tools. Additionally, you can also adjust the image's transparency and color to match your presentation's theme and style. By mastering these skills, you can enhance the overall look and feel of your presentation and effectively communicate your message to your audience. In this article, we'll start by exploring how to insert an image into a Google Slides presentation.
How to insert an image into a Google Slides presentation
To insert an image into a Google Slides presentation, start by opening your presentation and navigating to the slide where you want to add the image. Click on the "Insert" menu at the top of the screen and select "Image" from the drop-down menu. A new window will appear, giving you several options to choose from. You can upload an image from your computer by clicking on the "Upload from computer" button and selecting the file you want to use. Alternatively, you can search for an image online by clicking on the "Search the web" button and entering a keyword or phrase. You can also use images from your Google Drive account by clicking on the "Google Drive" button and selecting the file you want to use. Once you've selected your image, click on the "Insert" button to add it to your slide. The image will be inserted at its original size, but you can resize it by dragging the corners or edges of the image. You can also adjust the image's position on the slide by dragging it to the desired location. Additionally, you can add a link to the image by right-clicking on it and selecting "Link" from the context menu. This will allow you to link the image to a website or another slide in your presentation. By following these steps, you can easily insert an image into your Google Slides presentation and enhance its visual appeal.
Resizing and cropping images in Google Slides
When working with images in Google Slides, resizing and cropping are essential skills to master. Resizing an image allows you to adjust its dimensions to fit perfectly within your slide, while cropping enables you to remove unwanted parts of the image and focus on the essential elements. To resize an image in Google Slides, simply select the image and drag the corners or edges to adjust its size. You can also use the "Size & position" option in the toolbar to enter specific dimensions. To crop an image, select the image and click on the "Crop" button in the toolbar. Then, drag the crop handles to select the area of the image you want to keep. You can also use the "Aspect ratio" option to maintain the original proportions of the image while cropping. Additionally, you can use the "Reset" button to revert the image to its original size and shape. By mastering the art of resizing and cropping images in Google Slides, you can enhance the visual appeal of your presentations and effectively communicate your message to your audience.
Adjusting image transparency and color in Google Slides
Adjusting image transparency and color in Google Slides is a straightforward process that can enhance the visual appeal of your presentation. To adjust the transparency of an image, select the image and navigate to the "Format" tab in the top menu. Click on "Adjustments" and then select "Transparency" from the drop-down menu. A slider will appear, allowing you to adjust the transparency level of the image from 0% to 100%. You can also enter a specific percentage value in the text box next to the slider. Adjusting the transparency can help the image blend in with the background or make it stand out more. Additionally, you can also adjust the color of the image by selecting the "Recolor" option from the "Adjustments" menu. This will open a color palette, allowing you to choose from a range of pre-set colors or enter a custom color code. You can also adjust the brightness, contrast, and saturation of the image using the corresponding sliders. By adjusting the transparency and color of an image, you can create a more cohesive and visually appealing presentation that engages your audience.
Using Shapes to Enhance Your Presentation
When it comes to creating engaging and informative presentations, using shapes can be a game-changer. Shapes can help to break up text, add visual interest, and even convey complex information in a simple and intuitive way. In this article, we'll explore three key ways to use shapes to enhance your presentation: inserting shapes to add visual interest, customizing shape properties and styles to match your brand, and using shapes to create a mask for an image. By mastering these techniques, you'll be able to take your presentations to the next level and communicate your message more effectively. So, let's get started by exploring the first step: how to insert a shape in Google Slides.
How to insert a shape in Google Slides
To insert a shape in Google Slides, start by opening your presentation and navigating to the slide where you want to add the shape. Click on the "Insert" menu at the top of the screen, then select "Shape" from the drop-down menu. This will open a submenu with various shape options, including rectangles, circles, triangles, and more. Choose the shape you want to insert by clicking on it. Once you've selected a shape, you can customize its size, color, and other properties by using the tools in the toolbar at the top of the screen. You can also add text to your shape by clicking on it and typing. Additionally, you can use the "Format" tab to adjust the shape's fill, outline, and other settings. If you want to add an image to your shape, you can use the "Format" tab to select a picture from your computer or Google Drive. By following these steps, you can easily insert a shape in Google Slides and enhance your presentation with visual elements.
Customizing shape properties and styles in Google Slides
Customizing shape properties and styles in Google Slides allows you to personalize your presentation and make it more visually appealing. To start, select the shape you want to customize by clicking on it. You can then access the shape properties by going to the "Format" tab in the top menu. From here, you can adjust the shape's fill color, border color, and border width. You can also add a shadow or reflection to give your shape some depth. Additionally, you can customize the shape's style by selecting from a variety of pre-designed options, such as a gradient or a texture. If you want to get really creative, you can even use the "Custom shape" tool to create your own unique shape. This tool allows you to draw a shape freehand, giving you complete control over its design. Once you've customized your shape, you can use it to enhance your presentation by adding text, images, or other elements to it. You can also use shapes to create diagrams, flowcharts, and other visual aids that help to illustrate your points. By customizing shape properties and styles in Google Slides, you can add a professional touch to your presentation and make it more engaging for your audience.
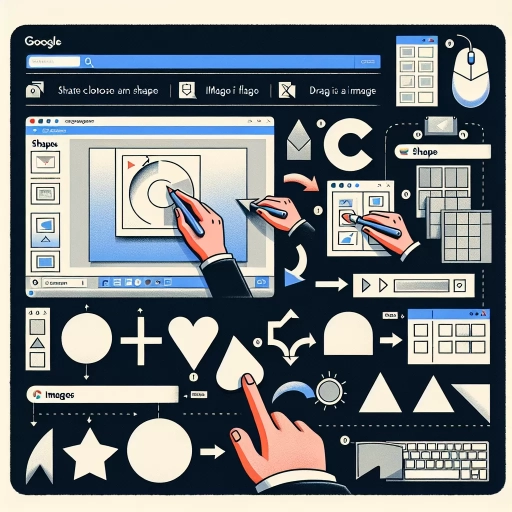
Using shapes to create a mask for an image in Google Slides
Using shapes to create a mask for an image in Google Slides is a creative way to add visual interest to your presentation. To do this, start by selecting the image you want to mask and then click on the "Shapes" tool in the toolbar. Choose a shape that complements the image, such as a circle or a rectangle with rounded corners. Draw the shape over the image, making sure to cover the entire area you want to mask. Next, right-click on the shape and select "Format options." In the format options panel, click on the "Merge shapes" dropdown menu and select "Subtract." This will remove the shape from the image, creating a mask. You can then adjust the shape's size and position to fine-tune the mask. To add more complexity to the mask, you can use multiple shapes and layer them on top of each other. For example, you can use a circle to create a rounded corner and then add a triangle to create a pointed edge. By using shapes to create a mask, you can add a unique and creative touch to your presentation.