How To Add Device To Find My
Here is the introduction paragraph: Losing a device can be a stressful and frustrating experience, especially if it contains sensitive information or holds sentimental value. Fortunately, Apple's Find My feature allows you to locate your device on a map, remotely lock or erase it, and even display a message on the screen. To take advantage of this feature, you need to add your device to Find My. In this article, we will guide you through the process of setting up your device for Find My, adding a device to Find My on your iPhone or iPad, and adding a device to Find My on your Mac or PC. By following these steps, you can ensure that your device is protected and easily locatable in case it gets lost or stolen. So, let's get started by setting up your device for Find My.
Setting Up Your Device for Find My
To set up your device for Find My, you'll need to complete a few simple steps. First, you'll need to enable location services on your device, which allows it to determine its location and share it with Apple. Next, you'll need to sign in with your Apple ID, which links your device to your account and allows you to access Find My features. Finally, you'll need to turn on Find My on your device, which activates the feature and allows you to locate your device on a map. By following these steps, you'll be able to use Find My to keep track of your device and stay connected. Let's start by enabling location services on your device.
Enable Location Services on Your Device
To enable location services on your device, go to the Settings app, then tap on "Location Services" or "Location" depending on your device. Toggle the switch next to "Location Services" to the right to turn it on. You may be prompted to allow your device to access your location while using certain apps, so tap "Allow" to grant permission. Additionally, you can customize which apps have access to your location by scrolling down and selecting the apps you want to allow or deny location access. Make sure to enable "Location Services" for the Find My app to ensure accurate location tracking. If you're using an iPhone, you can also enable "Precise Location" to allow the Find My app to access your device's precise location. This will help improve the accuracy of location tracking and make it easier to locate your device on a map. By enabling location services on your device, you'll be able to take full advantage of the Find My app's features and ensure that your device can be easily located if it's ever lost or stolen.
Sign in with Your Apple ID
To sign in with your Apple ID, start by going to the Settings app on your device. Tap on your name at the top of the screen, then select "Sign in with Apple ID" or "Sign in to your iPhone/iPad." If you don't have an Apple ID, you can create one by tapping "Create a Free Apple ID." Enter your birthday, name, and email address to create your account. If you already have an Apple ID, enter your email address and password to sign in. You may be prompted to enter a verification code sent to your email address or phone number associated with your Apple ID. Once you've signed in, you'll be asked to agree to the terms and conditions. After agreeing, you'll be signed in with your Apple ID and can start using it to access various Apple services, including Find My. Make sure to use the same Apple ID on all your devices to ensure that you can locate them using Find My.
Turn On Find My on Your Device
To turn on Find My on your device, follow these straightforward steps. First, ensure your device is connected to a stable internet connection. Then, go to the Settings app on your device, which is usually represented by a gear icon. Scroll down and select the "Find My" option, which may be located under the "Apple ID" or "iCloud" section, depending on your device and operating system. If you're using an iPhone or iPad, you may need to tap on "iCloud" first, then select "Find My iPhone" or "Find My iPad." On a Mac, you can find the "Find My" option under "Apple ID" in the System Preferences. Once you've selected "Find My," toggle the switch next to "Find My [Device]" to the right, turning it green. This will enable the feature on your device. Additionally, you may be prompted to sign in with your Apple ID and password to activate Find My. If you're using a Mac, you may also need to click on "Allow" to enable location services. By following these simple steps, you'll be able to turn on Find My on your device and start using its features to locate your device on a map, remotely lock or erase it, and more.
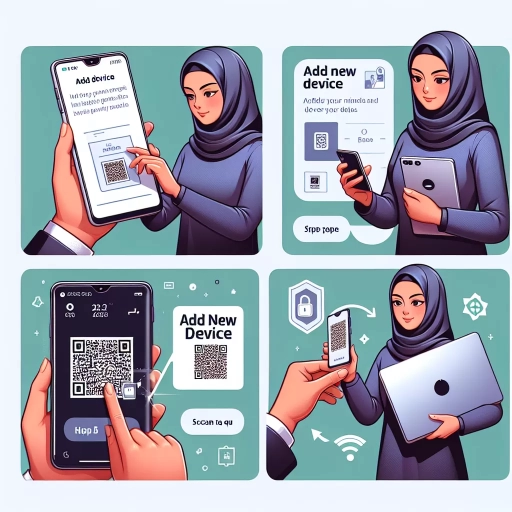
Adding a Device to Find My on Your iPhone or iPad
To add a device to Find My on your iPhone or iPad, you'll need to follow a few simple steps. First, you'll need to open the Find My app and sign in with your Apple ID. This will give you access to the app's features and allow you to add a new device. Once you're signed in, you'll be able to select the device you want to add from a list of available options. This list will include any devices that are already associated with your Apple ID, as well as any new devices that you want to add. Finally, you'll need to follow the on-screen instructions to complete the setup process and add the device to Find My. By following these steps, you'll be able to easily add a device to Find My and start using the app's features to locate and manage your devices. So, let's get started by opening the Find My app and signing in with your Apple ID.
Open the Find My App and Sign in with Your Apple ID
To add a device to Find My on your iPhone or iPad, start by opening the Find My app. This app is usually pre-installed on your device, and you can find it on your home screen or in a folder. If you can't find it, you can also search for it in the App Library. Once you've located the app, tap on it to open it. Next, you'll need to sign in with your Apple ID. This is the same ID you use to access other Apple services, such as iCloud, the App Store, and iTunes. If you're already signed in to your device with your Apple ID, you might not need to sign in again. However, if you're using a new device or have recently signed out, you'll need to enter your Apple ID and password to access the Find My app. Make sure you enter the correct credentials, as this will ensure that you can access all the features of the app. Once you've signed in, you'll be taken to the Find My app's main screen, where you can start adding devices to the app.
Select the Device You Want to Add from the List
To add a device to Find My on your iPhone or iPad, you'll need to select the device you want to add from the list. This list includes all the devices that are associated with your Apple ID, such as your iPhone, iPad, iPod touch, Apple Watch, AirPods, and Mac. To select a device, simply tap on it from the list. If you have multiple devices with the same name, you may need to check the device's model or serial number to ensure you're selecting the correct one. Once you've selected the device, you'll be prompted to enter a name for the device, which will help you identify it in the Find My app. You can also add a custom name or label to the device, such as "My iPhone" or "Work iPad". After you've entered a name for the device, you'll be asked to confirm that you want to add it to Find My. Once you've confirmed, the device will be added to your Find My account, and you'll be able to locate it on a map, play a sound to help you find it, and remotely erase or lock the device if it's lost or stolen.
Follow the On-Screen Instructions to Complete the Setup
To complete the setup, follow the on-screen instructions that appear on your iPhone or iPad. These instructions will guide you through the process of adding a device to Find My, ensuring that you can locate and manage your device remotely. The on-screen instructions will prompt you to sign in with your Apple ID and password, and then you will be asked to confirm that you want to add the device to Find My. Once you have completed these steps, you will be able to view the device's location on a map, remotely lock or erase the device, and receive notifications when the device is moved or goes offline. By following the on-screen instructions, you can quickly and easily set up Find My on your iPhone or iPad and start managing your device remotely.
Adding a Device to Find My on Your Mac or PC
Adding a device to Find My on your Mac or PC is a straightforward process that can be completed in a few simple steps. To get started, you'll need to sign in to iCloud.com with your Apple ID, which will grant you access to the Find My feature. Once you're logged in, you'll need to click on the Find My icon and select the device you want to add, which will prompt you to follow the on-screen instructions to complete the setup. By following these easy steps, you can ensure that your device is connected to Find My and can be easily located if it's ever lost or stolen. To begin, simply sign in to iCloud.com with your Apple ID.
Sign in to iCloud.com with Your Apple ID
To sign in to iCloud.com with your Apple ID, start by opening a web browser on your Mac or PC and navigating to iCloud.com. Click on the "Sign in" button located in the top right corner of the page. Enter your Apple ID and password in the required fields, then click the arrow button or press Enter to proceed. If you have two-factor authentication (2FA) enabled on your Apple ID, you will be prompted to enter the verification code sent to one of your trusted devices. Once you've entered the code, click "Verify" to complete the sign-in process. If you're using a shared computer or public network, consider using a private browsing mode to add an extra layer of security to your session. After signing in, you'll have access to various iCloud features, including Find My, which allows you to locate and manage your Apple devices remotely. From here, you can add a device to Find My by clicking on the "All Devices" tab and following the on-screen instructions.
Click on the Find My Icon and Select the Device You Want to Add
To add a device to Find My on your Mac or PC, start by clicking on the Find My icon. This icon is usually located in the Dock on a Mac or in the Start menu on a PC. Once you've clicked on the icon, a new window will open, displaying a list of all the devices that are currently connected to your Apple ID. To add a new device, click on the "Add Device" button, which is usually located in the top right corner of the window. A new window will then open, asking you to select the type of device you want to add. Choose the device you want to add, such as an iPhone, iPad, or Apple Watch, and follow the prompts to complete the setup process. If you're adding an iPhone or iPad, you'll need to enter the device's serial number or IMEI number, which can be found on the device's packaging or in the Settings app. Once you've entered the required information, click "Next" to continue the setup process. The device will then be added to your Find My account, and you'll be able to view its location on a map, remotely lock or erase it, and receive notifications if it's lost or stolen.
Follow the On-Screen Instructions to Complete the Setup
To complete the setup, follow the on-screen instructions that appear on your Mac or PC. These instructions will guide you through the process of adding your device to Find My, ensuring that you can locate it on a map, remotely lock or erase it, and receive notifications if it's lost or stolen. The on-screen instructions will prompt you to sign in with your Apple ID and password, and then you'll be asked to confirm that you want to add the device to Find My. You may also be asked to set up a passcode or password to secure your device, and to enable Location Services, which allows Find My to access your device's location. Once you've completed these steps, your device will be added to Find My, and you'll be able to access its location and other information from your Mac or PC. It's essential to follow the on-screen instructions carefully to ensure that the setup process is completed correctly and that your device is properly configured to work with Find My.