How To Screen Record On Mac With Internal Audio
Screen recording on Mac is a valuable tool for creating tutorials, presentations, and demonstrations. With the ability to capture both video and audio, you can effectively communicate your message and showcase your skills. However, many Mac users struggle with recording internal audio, which is a crucial aspect of screen recording. In this article, we will explore the steps to screen record on Mac with internal audio. To get started, it's essential to prepare your Mac for screen recording, which includes setting up your system preferences and choosing the right software. We will also delve into using built-in screen recording tools on Mac, which provide a convenient and user-friendly way to capture your screen. Additionally, we will discuss the specific steps for recording internal audio on Mac, which requires some extra setup but yields high-quality results. By following these steps, you'll be well on your way to creating professional-looking screen recordings with internal audio. First, let's start with the preparation process.
Preparation for Screen Recording on Mac
To ensure a seamless screen recording experience on your Mac, it's essential to prepare your device beforehand. This involves several key steps that will help you achieve high-quality recordings. First, you need to update your Mac to the latest operating system, as newer versions often include bug fixes and performance enhancements that can significantly impact your screen recording experience. Additionally, selecting the right screen recording software is crucial, as different tools offer varying features and functionalities that cater to different needs. If you're looking to enhance your audio quality, consider connecting external audio equipment, such as a microphone or headphones. By taking these steps, you'll be well on your way to creating professional-looking screen recordings. Let's start by exploring the importance of updating your Mac to the latest operating system.
Update Your Mac to the Latest Operating System
To ensure a seamless screen recording experience on your Mac, it's essential to update your operating system to the latest version. This is because newer operating systems often include bug fixes, security patches, and feature enhancements that can improve the overall performance of your Mac. To update your Mac, click on the Apple logo in the top left corner of the screen and select "System Preferences." From there, click on "Software Update" and follow the prompts to download and install the latest operating system. If you're running macOS Mojave or later, you can also update your operating system by going to "System Preferences" > "Software Update" and clicking on the "Update Now" button. Additionally, make sure your Mac is connected to a stable internet connection and has enough free disk space to accommodate the update. By keeping your operating system up to date, you'll be able to take advantage of the latest features and improvements, including enhanced screen recording capabilities. For instance, macOS Catalina and later versions allow you to record your screen with internal audio, making it easier to create high-quality screen recordings. So, take a few minutes to update your Mac and get ready to start screen recording with internal audio.
Choose the Right Screen Recording Software
When it comes to screen recording on a Mac, choosing the right software is crucial to ensure high-quality recordings and a seamless experience. With numerous options available, it's essential to consider your specific needs and preferences. If you're looking for a free and user-friendly option, OBS Studio is an excellent choice. This popular software offers a wide range of features, including customizable hotkeys, audio mixing, and support for multiple video formats. Alternatively, if you're willing to invest in a premium solution, Camtasia is a top-notch option that offers advanced features like video editing, screen drawing, and closed captions. For those who prefer a more straightforward approach, QuickTime Player is a built-in Mac app that allows for easy screen recording with minimal setup. Additionally, ScreenFlow is another popular option that offers a user-friendly interface and advanced features like video editing and audio ducking. Ultimately, the right screen recording software for you will depend on your specific needs, budget, and personal preferences. By considering your options and choosing the right software, you'll be well on your way to creating high-quality screen recordings on your Mac.
Connect External Audio Equipment (Optional)
To enhance the quality of your screen recording on Mac, you may want to consider connecting external audio equipment. This is optional, but it can make a significant difference in the overall audio quality of your recording. If you're using a microphone or other audio device, you can connect it to your Mac via USB, Thunderbolt, or an audio interface. Make sure to select the correct input device in your recording software to ensure that your external audio equipment is being used. Additionally, you can also connect external speakers or headphones to your Mac to improve the audio playback quality. This can be especially useful if you're recording a tutorial or presentation and want to ensure that the audio is clear and crisp. By connecting external audio equipment, you can take your screen recording to the next level and produce high-quality content that engages your audience.
Using Built-in Screen Recording Tools on Mac
Mac users have a variety of built-in screen recording tools at their disposal, making it easy to capture and share content from their screens. Whether you're looking to create tutorials, record gameplay, or simply share a quick video with friends, these tools have got you covered. In this article, we'll explore three different methods for screen recording on a Mac: using QuickTime Player, the Screenshot toolbar, and Terminal commands. Each of these methods offers unique benefits and features, allowing you to choose the one that best suits your needs. We'll start by looking at how to use QuickTime Player for screen recording, a simple and intuitive method that's perfect for beginners. With QuickTime Player, you can easily record your screen and save the video as a file, making it easy to share with others. Let's dive in and take a closer look at how to use QuickTime Player for screen recording.
Using QuickTime Player for Screen Recording
Using QuickTime Player for screen recording is a straightforward process that allows you to capture your screen activity with ease. To start, open QuickTime Player, which can be found in the Applications folder or by using Spotlight search. Once open, click on "File" in the top menu bar and select "New Screen Recording" from the drop-down menu. This will open a new window with a red record button. Before you start recording, you can choose to record your entire screen or select a specific portion by dragging the crosshairs to the desired area. You can also choose to record audio from your computer's microphone or an external microphone. To start the recording, click the red record button, and a countdown will begin. Once the countdown is complete, your screen recording will start, and you can perform the actions you want to capture. To stop the recording, click the stop button in the menu bar or press Command + Control + Esc. The recorded video will be saved as a .mov file, which can be edited, shared, or exported in various formats. QuickTime Player also allows you to trim, split, and merge clips, making it a versatile tool for screen recording and video editing. Overall, using QuickTime Player for screen recording is a convenient and user-friendly option that is built right into your Mac.
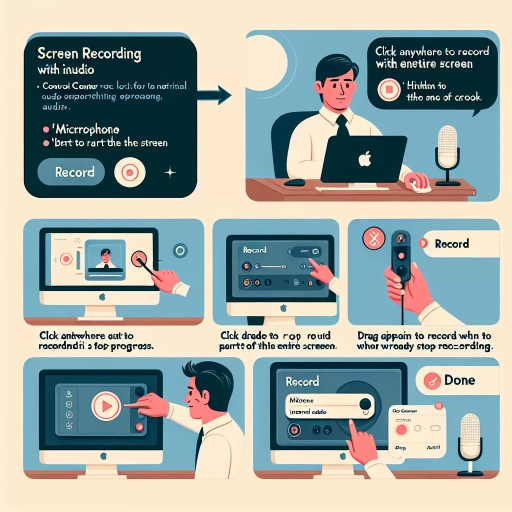
Using Screenshot Toolbar for Screen Recording
Using the Screenshot toolbar for screen recording on a Mac is a convenient and user-friendly option. To access the Screenshot toolbar, press Command + Shift + 5 on your keyboard. This will open a toolbar at the bottom of your screen, offering various screen capture and recording options. To start a screen recording, click on the "Record Selected Portion" or "Record Entire Screen" button, depending on your preference. You can then select the area of the screen you want to record or choose to record the entire screen. The Screenshot toolbar also allows you to record your screen with audio, either from your Mac's built-in microphone or an external microphone. To do this, click on the "Options" menu and select the microphone you want to use. Additionally, you can also set a timer to start the recording after a delay, which can be useful if you need to prepare something before starting the recording. Once you've started the recording, you can stop it by clicking on the "Stop" button in the menu bar or by pressing Command + Shift + 5 again. The recorded video will be saved as a .mov file on your desktop, which you can then edit or share as needed. Overall, using the Screenshot toolbar for screen recording on a Mac is a quick and easy way to capture your screen with high-quality video and audio.
Using Terminal Commands for Advanced Screen Recording
Using Terminal Commands for Advanced Screen Recording For advanced users, Terminal commands can be used to customize and enhance the screen recording experience on Mac. By using the `screencapture` command, users can specify the file format, resolution, and other settings to create high-quality recordings. For example, to record the entire screen in 4K resolution, users can use the command `screencapture -x -r -t jpg -o ~/Desktop/Recording.jpg`. This command will record the entire screen, including the cursor, and save it as a JPEG file on the desktop. Additionally, users can use the `ffmpeg` command to record the screen with internal audio. By using the command `ffmpeg -f avfoundation -i "1" -c:v libx264 -crf 18 -c:a aac -b:a 128k output.mp4`, users can record the screen with high-quality video and audio. These Terminal commands offer advanced users more control over the screen recording process and allow for customization of the output file.
Recording Internal Audio on Mac
Recording internal audio on a Mac can be a bit tricky, but with the right steps, you can easily capture high-quality audio from your computer. To start, it's essential to understand the basics of internal audio recording and the tools you'll need to get started. In this article, we'll explore three key methods for recording internal audio on a Mac: enabling internal audio recording in System Preferences, using third-party software, and configuring audio settings for high-quality recording. By the end of this article, you'll be able to record internal audio like a pro. First, let's start with the most straightforward method: enabling internal audio recording in System Preferences. This built-in feature allows you to record audio from your Mac's internal speakers, making it easy to capture audio from online meetings, tutorials, and more. By enabling this feature, you'll be able to record high-quality audio without the need for external equipment or software. So, let's dive in and explore how to enable internal audio recording in System Preferences.
Enabling Internal Audio Recording in System Preferences
To enable internal audio recording in System Preferences, navigate to the "Security & Privacy" section. Click on the "Privacy" tab and select "Screen Recording" from the left-hand menu. You will see a list of applications that have requested access to screen recording. Check the box next to the application you want to allow to record internal audio, such as QuickTime Player or OBS Studio. If the application is not listed, you may need to quit and reopen it to prompt the request. Additionally, ensure that the "Microphone" option is also selected for the application to capture internal audio. Once you've made these changes, you can close the System Preferences window and proceed with recording internal audio using your chosen application. It's essential to note that some applications may require additional setup or configuration to record internal audio, so be sure to consult the application's documentation or support resources if needed. By following these steps, you can successfully enable internal audio recording in System Preferences and capture high-quality audio alongside your screen recordings.
Using Third-Party Software for Internal Audio Recording
Using third-party software is a popular method for recording internal audio on Mac, especially when the built-in QuickTime Player or OBS Studio don't meet your requirements. There are several options available, including Audacity, GarageBand, and Adobe Audition. These software programs offer advanced features such as multi-track recording, noise reduction, and effects processing, making them ideal for podcasters, musicians, and content creators. To use third-party software for internal audio recording, simply download and install the chosen program, then follow the software's instructions for setting up and configuring the recording settings. Some software may require you to select the correct audio input device or adjust the recording levels, while others may offer more advanced options such as selecting specific audio channels or applying effects in real-time. Once you've set up the software, you can start recording your internal audio and edit the file as needed. Some popular third-party software for internal audio recording on Mac include Audacity, which is free and open-source, and Adobe Audition, which is a professional-grade digital audio workstation. GarageBand is another popular option, which is free and comes pre-installed on Macs. By using third-party software, you can achieve high-quality internal audio recordings and edit them to perfection, making it an essential tool for anyone looking to create professional-sounding audio content on their Mac.
Configuring Audio Settings for High-Quality Recording
To configure audio settings for high-quality recording, start by accessing the Audio MIDI Setup utility on your Mac. This can be found in the Applications/Utilities folder or by using Spotlight search. Once opened, select the "Show Info" option and click on the "Properties" tab. Here, you can adjust the audio format to a higher quality setting, such as 44.1 kHz or 48 kHz, and select the desired bit depth, typically 16-bit or 24-bit. Additionally, ensure that the sample rate is set to the same frequency as your recording device to prevent any potential audio sync issues. Next, navigate to the "Input" tab and select the correct input device, such as the built-in microphone or an external audio interface. You can also adjust the input level to optimize the audio signal. To further enhance audio quality, consider using an external audio interface or a high-quality microphone, and invest in a pair of monitor speakers or headphones to accurately monitor your recordings. By carefully configuring your audio settings, you can achieve professional-sounding recordings and ensure that your screen recordings on Mac with internal audio sound their best.