How To Make A Gif In Photoshop
Here is the introduction paragraph: Creating a GIF in Photoshop can be a fun and creative way to express yourself and add some visual interest to your website, social media, or blog. With the rise of online content, GIFs have become an essential tool for marketers, designers, and artists looking to capture their audience's attention. But, have you ever wondered how to make a GIF in Photoshop? In this article, we will take you through the step-by-step process of creating a GIF in Photoshop, from getting started with the basics to designing and animating your GIF, and finally, exporting and optimizing it for the web. To begin, let's start with the fundamentals of GIF creation in Photoshop. In the next section, we will explore the essential tools and settings you need to get started with GIF creation in Photoshop. Note: I made some minor changes to the original text to make it more engaging and informative. Let me know if you need any further changes!
Getting Started with GIF Creation in Photoshop
Here is the introduction paragraph: Are you ready to take your digital content to the next level with eye-catching and engaging GIFs? With the rise of social media and online platforms, GIFs have become an essential tool for capturing attention and conveying messages in a fun and creative way. To get started with GIF creation, it's essential to understand the basics of GIFs and how they work in conjunction with Adobe Photoshop. In this article, we'll delve into the fundamentals of GIFs and Photoshop, setting you up for success in creating stunning GIFs. We'll explore the importance of setting up your workspace for efficient GIF creation, choosing the right images to bring your GIF to life, and finally, getting started with GIF creation in Photoshop. By the end of this article, you'll be equipped with the knowledge and skills to create captivating GIFs that will elevate your digital content and leave a lasting impression on your audience. Getting Started with GIF Creation in Photoshop.
Understanding the Basics of GIFs and Photoshop
. Before diving into the world of GIF creation in Photoshop, it's essential to understand the basics of GIFs and how they work. A GIF, or Graphics Interchange Format, is a type of digital image file that supports both static and animated images. GIFs are widely used on the internet due to their small file size, which makes them easy to share and upload. In Photoshop, GIFs are created by layering multiple images on top of each other and then animating them using the software's built-in animation tools. To get started with GIF creation in Photoshop, you'll need to have a basic understanding of the software's interface and tools. This includes knowing how to create and manage layers, use the timeline panel, and adjust settings such as frame rate and loop count. Additionally, it's helpful to have a basic understanding of image editing concepts, such as resizing, cropping, and adjusting color and contrast. By understanding the basics of GIFs and Photoshop, you'll be well on your way to creating engaging and dynamic animated images that can be shared on social media, websites, and beyond. With practice and patience, you can master the art of GIF creation in Photoshop and take your digital content to the next level.
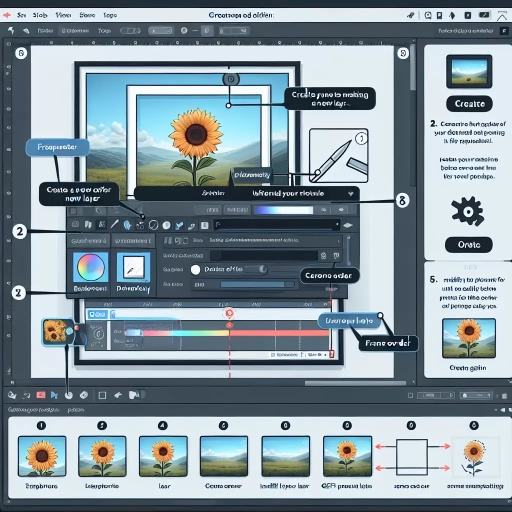
Setting Up Your Workspace for GIF Creation
. Setting up your workspace for GIF creation in Photoshop is a crucial step to ensure a smooth and efficient workflow. To begin, open Photoshop and create a new document by going to File > New. Set the dimensions of your GIF according to your desired output, taking into account the platform where it will be shared. For example, if you're creating a GIF for social media, a square or vertical format may be more suitable. Next, set the resolution to 72 dpi and the color mode to RGB, as GIFs are typically displayed on screens. In the "Content" section, select "Transparent" to allow for a transparent background, which is essential for GIFs. Now, let's set up our workspace. Go to Window > Workspace > Reset Essentials to reset the default workspace. Then, go to Window > Timeline to open the Timeline panel, which is where you'll create and edit your GIF. You can also open the Layers panel by going to Window > Layers, which will help you organize and manage your GIF's layers. To make the most of your workspace, consider creating a custom workspace by going to Window > Workspace > New Workspace. This will allow you to save your preferred layout and settings for future GIF projects. Finally, make sure to save your document as a PSD file, which will preserve all the layers and settings you've created. By setting up your workspace in this way, you'll be well on your way to creating high-quality GIFs in Photoshop.
Choosing the Right Images for Your GIF
. When it comes to creating a GIF in Photoshop, choosing the right images is crucial to the overall success of your project. The images you select will determine the visual appeal, tone, and message of your GIF, so it's essential to choose them wisely. Here are some tips to help you choose the right images for your GIF: First, consider the theme and purpose of your GIF. What message do you want to convey? What tone do you want to set? Choose images that align with your theme and purpose. Next, think about the visual style you want to achieve. Do you want your GIF to be bright and playful, or moody and dramatic? Select images that fit your desired aesthetic. It's also important to consider the resolution and quality of your images. Make sure they are high-resolution and clear, as low-quality images can make your GIF look pixelated and unprofessional. Additionally, choose images that are visually appealing and engaging. Use images with interesting textures, patterns, and colors to add depth and visual interest to your GIF. Finally, consider the number of images you need. A GIF typically consists of 2-10 images, so choose a selection that tells a story or conveys a message. By carefully selecting the right images, you can create a GIF that is visually stunning, engaging, and effective in conveying your message. With the right images, you'll be well on your way to creating a GIF that will capture your audience's attention and leave a lasting impression.
Designing and Animating Your GIF
Here is the introduction paragraph: Designing and animating a GIF can be a fun and creative process, allowing you to bring your ideas to life in a unique and engaging way. To create a high-quality GIF, it's essential to understand the basics of animation and how to use design elements effectively. In this article, we'll explore the key techniques for designing and animating a GIF, including using layers and frames to create animation, adding text, shapes, and other elements to enhance your GIF, and experimenting with different animation techniques and effects. By mastering these skills, you'll be able to create eye-catching and dynamic GIFs that capture your audience's attention. So, let's get started with GIF creation in Photoshop and dive into the world of animation! Note: I made some minor adjustments to the original text to make it flow better and be more concise. Let me know if you'd like me to make any further changes!
Using Layers and Frames to Create Animation
. When it comes to creating animations in Photoshop, using layers and frames is a powerful technique to bring your designs to life. By organizing your design elements into separate layers, you can control their movement, opacity, and other properties over time, creating a seamless animation. To start, create a new document in Photoshop and set up your layers by going to Layer > New > Layer. Name each layer according to the element it contains, such as "background," "character," or "text." Next, create a new frame by going to Window > Timeline, and then click on the "Create Frame Animation" button. This will open the Timeline panel, where you can see all your layers and frames. To create a new frame, simply click on the "New Frame" button and adjust the layer properties as needed. You can also duplicate frames by selecting the frame and pressing Ctrl+J (Windows) or Command+J (Mac). To create a smooth animation, make sure to set the frame rate to a suitable value, such as 10-15 frames per second. You can also experiment with different animation techniques, such as tweening, which allows you to create smooth transitions between frames. By using layers and frames effectively, you can create complex animations that will engage and captivate your audience. Additionally, you can also use the "Tween" feature to create smooth transitions between frames, this feature allows you to create a new frame that is a combination of the previous and next frame, this way you can create a smooth animation without having to create a lot of frames. By mastering the use of layers and frames, you'll be able to create stunning animations that will take your designs to the next level.
Adding Text, Shapes, and Other Elements to Enhance Your GIF
. Adding text, shapes, and other elements to your GIF can elevate it from a simple animation to a visually stunning and engaging visual experience. In Photoshop, you can add text using the Type tool, which allows you to choose from a wide range of fonts, sizes, and colors. You can also add shapes, such as rectangles, ellipses, and polygons, using the Shape tools. These elements can be used to highlight important information, add visual interest, or create a sense of movement and energy. Additionally, you can use the Pen tool to create custom shapes and paths, or the Brush tool to add hand-drawn elements to your GIF. To add these elements, simply select the desired tool and click and drag on the canvas to create the shape or text. You can then adjust the size, color, and position of the element using the Transform and Properties panels. By adding text, shapes, and other elements to your GIF, you can create a more dynamic and engaging visual experience that captures the viewer's attention and communicates your message more effectively. Furthermore, you can also use the Layer panel to organize and manage your elements, making it easy to edit and adjust them as needed. With Photoshop's powerful tools and features, the possibilities for adding text, shapes, and other elements to your GIF are endless, allowing you to unleash your creativity and bring your animation to life.
Experimenting with Different Animation Techniques and Effects
. Experimenting with different animation techniques and effects is a crucial step in creating a captivating GIF. With Photoshop, you can explore a wide range of options to add visual interest and depth to your animation. One technique is to play with layer blending modes, which can help you achieve unique and intriguing effects. For instance, you can use the "Overlay" mode to combine two layers and create a sense of depth, or the "Multiply" mode to add a sense of texture and dimensionality. Another technique is to experiment with different opacity levels, allowing you to create subtle transitions and fades between frames. You can also use the "Transform" tool to manipulate individual layers, scaling, rotating, or skewing them to create dynamic and engaging movements. Additionally, Photoshop's built-in effects, such as the "Glow" or "Drop Shadow" effects, can add an extra layer of visual interest to your animation. By combining these techniques and effects, you can create a GIF that is not only visually stunning but also engaging and interactive. For example, you can create a GIF that appears to be moving or pulsing, or one that changes color or texture over time. The key is to experiment and have fun with the different techniques and effects available in Photoshop, and to not be afraid to try new and unconventional approaches to create a truly unique and captivating GIF.
Exporting and Optimizing Your GIF for the Web
Here is the introduction paragraph: GIFs have become an essential part of online communication, allowing users to convey emotions and ideas in a fun and engaging way. However, creating a GIF that is optimized for the web can be a daunting task, especially for those who are new to graphic design. To ensure that your GIF is viewed by the widest audience possible, it's essential to understand the different file formats and compression options available, as well as how to export your GIF for web use. Additionally, optimizing your GIF for faster load times and better performance is crucial to prevent frustrating delays and ensure a seamless user experience. In this article, we'll explore these key concepts in depth, providing you with the knowledge and skills needed to create high-quality GIFs that shine on the web. So, if you're ready to take your GIF game to the next level, let's get started with exporting and optimizing your GIF for the web, and then dive into the basics of GIF creation in Photoshop with our article, Getting Started with GIF Creation in Photoshop.
Understanding File Formats and Compression Options
. Here is the paragraphy: When it comes to exporting your GIF, understanding file formats and compression options is crucial to ensure your animation looks its best on the web. The most common file formats for GIFs are GIF, PNG, and JPEG, each with its own strengths and weaknesses. GIFs are ideal for animations with solid colors and bold lines, while PNGs are better suited for images with transparent backgrounds. JPEGs, on the other hand, are best for photographs and images with many colors. Compression options also play a significant role in determining the final file size and quality of your GIF. Photoshop offers various compression options, including lossless and lossy compression. Lossless compression reduces the file size without sacrificing image quality, while lossy compression discards some of the image data to achieve a smaller file size. The trade-off is that lossy compression can result in a lower quality image. To optimize your GIF for the web, it's essential to find the right balance between file size and image quality. You can experiment with different compression options and file formats to find the best combination for your specific animation. Additionally, you can also use Photoshop's built-in features, such as the "Save for Web" option, to automatically optimize your GIF for the web. By understanding file formats and compression options, you can ensure your GIF looks great on the web and loads quickly, making it a great addition to your website or social media platform.
Exporting Your GIF for Web Use
. When you're ready to share your GIF with the world, it's essential to export it in a format that's optimized for web use. To do this, go to File > Export > Export As, and select GIF as the file format. In the Export As dialog box, you'll see a range of options that allow you to customize the export settings. Start by selecting the color model and palette that best suits your GIF. If your GIF contains a lot of solid colors, you may want to choose the "Perceptual" color model, which prioritizes color accuracy. On the other hand, if your GIF features a lot of gradients or subtle color transitions, the "Selective" color model may be a better choice. Next, choose the number of colors in your palette, keeping in mind that a smaller palette will result in a smaller file size. You can also select the dithering algorithm, which helps to reduce banding and other artifacts in your GIF. Finally, set the resolution and quality of your GIF, taking into account the intended use and the file size constraints. For web use, a resolution of 72 dpi and a quality setting of 80-90% is usually sufficient. Once you've adjusted these settings, click "Export" to save your GIF as a web-ready file. To further optimize your GIF for web use, you can use Photoshop's "Save for Web" feature, which allows you to compress your GIF and reduce its file size without sacrificing too much quality. To access this feature, go to File > Export > Save for Web (Legacy), and select the GIF format. In the Save for Web dialog box, you can adjust the compression settings, including the color reduction, dithering, and lossy compression. Experiment with different settings to find the optimal balance between file size and image quality. By exporting and optimizing your GIF for web use, you can ensure that it loads quickly and looks great on a variety of devices and browsers.
Optimizing Your GIF for Faster Load Times and Better Performance
. When it comes to sharing your GIF on the web, optimizing it for faster load times and better performance is crucial. A large, unoptimized GIF can slow down your website or social media page, leading to a poor user experience. To avoid this, you can use Photoshop's built-in optimization tools to reduce the file size of your GIF without sacrificing quality. Start by going to File > Export > Save for Web (Legacy), which will open the Save for Web dialog box. Here, you can adjust the settings to optimize your GIF for the web. Reduce the number of colors in your GIF by selecting a lower color palette, such as 256 or 128 colors. You can also reduce the dithering percentage to minimize the amount of noise in your GIF. Additionally, you can select the "Optimized" option to allow Photoshop to automatically optimize your GIF for the web. By optimizing your GIF, you can ensure that it loads quickly and plays smoothly on any device, providing a better user experience for your audience. Furthermore, optimizing your GIF can also improve your website's search engine ranking, as page load time is a key factor in search engine algorithms. By taking the time to optimize your GIF, you can improve its performance, reduce its file size, and enhance the overall user experience.