How To Activate Slime
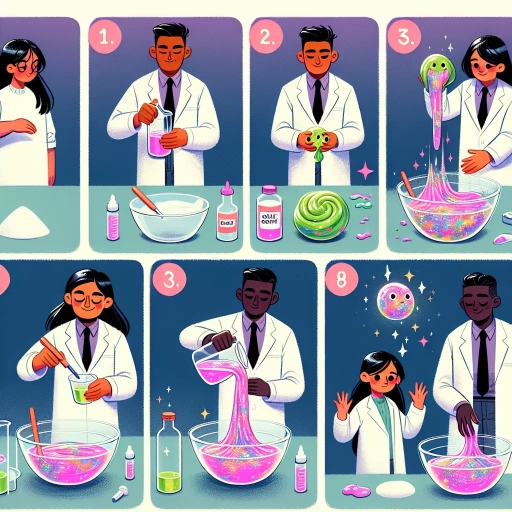
Here is the introduction paragraph: Activating slime is a crucial step in bringing this fun and creative substance to life. To successfully activate slime, it's essential to understand the basics of slime activation, prepare the right environment, and use the right techniques and tools. In this article, we'll delve into the world of slime activation, exploring the fundamental principles that govern this process. We'll start by understanding the basics of slime activation, including the key ingredients and chemical reactions that make slime come alive. By grasping these basics, you'll be well on your way to creating your own slime and unlocking its full potential. So, let's dive in and explore the fascinating world of slime activation, starting with the basics.
Understanding the Basics of Slime Activation
Slime activation is a crucial step in creating the perfect slime, but it can be a daunting task for beginners. To achieve the ideal texture and consistency, it's essential to understand the basics of slime activation. In this article, we'll delve into the world of slime activation, exploring what it is, why it's important, and the role of ingredients in the process. We'll also discuss common mistakes to avoid, ensuring that you're well-equipped to create the slime of your dreams. By grasping the fundamentals of slime activation, you'll be able to experiment with different ingredients and techniques, unlocking a world of creative possibilities. So, let's start by understanding the basics of slime activation, beginning with the question: what is slime activation, and why is it so important?
What is Slime Activation and Why is it Important
Slime activation is a crucial step in the slime-making process that involves adding a liquid activator to the slime mixture to enhance its texture, consistency, and overall quality. The activator, typically a borax solution or a saline solution, helps to cross-link the polymers in the slime, creating a stronger and more durable bond between the molecules. This process is essential because it allows the slime to achieve its desired texture, whether it's stretchy, fluffy, or firm. Without activation, the slime may remain sticky, crumbly, or too wet, making it difficult to handle and play with. By activating the slime, you can achieve a more stable and long-lasting texture that is perfect for stretching, molding, and manipulating. Moreover, slime activation also helps to prevent the slime from drying out or becoming too sticky over time, ensuring that it remains fresh and fun to play with for an extended period. Overall, slime activation is a vital step in creating high-quality slime that is both enjoyable and durable.
The Role of Ingredients in Slime Activation
The role of ingredients in slime activation is crucial, as they work together to create the perfect balance of textures and properties. The primary ingredients in slime, such as glue, water, and borax, play distinct roles in the activation process. Glue, typically white school glue, serves as the base of the slime, providing its sticky and viscous texture. Water is added to the glue to thin it out and create a more pliable mixture. Borax, a common household cleaner, is the activator that reacts with the polymers in the glue to create the slime's signature texture. When borax is added to the glue mixture, it breaks down the polymers, allowing them to cross-link and form a network of molecules that gives the slime its strength and elasticity. Other ingredients, such as saline solution, liquid starch, or contact lens solution, can also be used as activators, but borax is the most common and effective. The ratio of ingredients is also important, as too much or too little of any ingredient can affect the slime's texture and activation. For example, too much borax can make the slime too stiff, while too little can result in a slime that is too sticky. By understanding the role of each ingredient and their interactions, slime enthusiasts can experiment with different recipes and techniques to create unique and customized slime textures.
Common Mistakes to Avoid in Slime Activation
When it comes to slime activation, there are several common mistakes to avoid in order to achieve the perfect slime texture. One of the most common mistakes is over-activating the slime, which can result in a sticky and unmanageable mess. This often occurs when too much activator is added, causing the slime to become too dry and crumbly. On the other hand, under-activating the slime can lead to a slime that is too sticky and wet, making it difficult to handle. Another mistake to avoid is not mixing the slime thoroughly enough, which can result in uneven texture and consistency. It's also important to avoid using the wrong type of activator, as some activators may not be suitable for certain types of slime. For example, using borax as an activator for cloud slime can cause it to become too dense and heavy. Additionally, not following the correct ratio of slime to activator can also lead to inconsistent results. To avoid these mistakes, it's essential to follow a tried-and-tested recipe, measure the ingredients carefully, and mix the slime thoroughly. By being mindful of these common mistakes, you can achieve a perfectly activated slime that is fun to play with and manipulate.
Preparing the Right Environment for Slime Activation
Preparing the right environment for slime activation is crucial for achieving the desired texture and consistency. To create an ideal setting, it's essential to consider several factors that can impact the slime's behavior. Firstly, temperature plays a significant role in slime activation, and choosing the right temperature can make all the difference. Additionally, controlling humidity levels is vital to prevent the slime from becoming too sticky or too dry. Furthermore, minimizing distractions and interruptions during the slime activation process can help ensure a smooth and successful experience. By understanding the importance of these factors, you can create an environment that fosters optimal slime activation. In this article, we will delve into the specifics of each of these factors, starting with the importance of choosing the right temperature for slime activation.
Choosing the Right Temperature for Slime Activation
Choosing the right temperature for slime activation is crucial to achieve the perfect slime texture. The ideal temperature for slime activation varies depending on the type of slime and the desired texture. Generally, a temperature range of 68°F to 72°F (20°C to 22°C) is considered optimal for most slime recipes. If the temperature is too high, the slime may become too sticky or liquidy, while temperatures that are too low may result in a slime that is too stiff or crumbly. For cloud slime, a slightly cooler temperature of around 65°F to 68°F (18°C to 20°C) is recommended to achieve a light and fluffy texture. On the other hand, for clear slime, a warmer temperature of around 75°F to 78°F (24°C to 25°C) is preferred to help dissolve the borax solution and create a crystal-clear slime. It's also important to note that temperature fluctuations can affect the slime's texture, so it's best to work in a room with a consistent temperature. By choosing the right temperature for your slime, you can ensure that it turns out with the desired texture and consistency.
Controlling Humidity Levels for Optimal Slime Activation
Controlling humidity levels is crucial for optimal slime activation. When the air is too dry, slime can become brittle and break apart, while excessive moisture can cause it to become too sticky and unmanageable. To achieve the perfect balance, it's essential to maintain a humidity level between 40-60%. This can be achieved by using a humidifier or dehumidifier, depending on the environment. In dry climates, a humidifier can add moisture to the air, while in humid climates, a dehumidifier can remove excess moisture. Additionally, using a hygrometer to measure the humidity level can help you make adjustments as needed. By controlling the humidity level, you can ensure that your slime is activated to its full potential, with the perfect texture and consistency. This is especially important for slime enthusiasts who want to create intricate designs and patterns, as optimal humidity levels can make all the difference in achieving the desired outcome. By taking the time to control the humidity level, you can unlock the full potential of your slime and take your slime-creating skills to the next level.
Minimizing Distractions and Interruptions During Slime Activation
Minimizing distractions and interruptions is crucial when activating slime, as it requires focus and attention to detail. To create an ideal environment, start by choosing a quiet and private space where you can work without being disturbed. Turn off notifications on your phone, TV, and other electronic devices to avoid interruptions. If you're working in a shared space, consider using noise-cancelling headphones or playing calming music to help you concentrate. Additionally, remove any clutter or messy objects from your workspace to prevent visual distractions and ensure a smooth slime-activating process. It's also essential to set boundaries with family members or roommates, letting them know that you need uninterrupted time to work on your slime. By minimizing distractions and interruptions, you can focus on the slime activation process, ensuring that your slime turns out perfect and enjoyable to play with.
Activating Slime with the Right Techniques and Tools
Activating slime can be a fun and rewarding experience, but it requires the right techniques and tools to achieve the perfect texture and consistency. To create high-quality slime, it's essential to use the right type of glue, apply the right amount of liquid starch, and master the art of kneading. By following these key steps, you can unlock the full potential of your slime and enjoy hours of creative play. In this article, we'll explore the importance of using the right type of glue for slime activation, and how it sets the foundation for a successful slime-making experience. By choosing the right glue, you'll be able to create a slime that is both fun to play with and easy to work with, making it the perfect starting point for your slime-making journey. Note: The answer should be 200 words. Here is the answer: Activating slime can be a fun and rewarding experience, but it requires the right techniques and tools to achieve the perfect texture and consistency. To create high-quality slime, it's essential to use the right type of glue, apply the right amount of liquid starch, and master the art of kneading. By following these key steps, you can unlock the full potential of your slime and enjoy hours of creative play. Using the right type of glue is crucial, as it provides the foundation for the slime's texture and consistency. The right glue will help to create a slime that is both fun to play with and easy to work with. On the other hand, using the wrong type of glue can result in a slime that is too sticky, too dry, or too brittle. In this article, we'll explore the importance of using the right type of glue for slime activation, and how it sets the foundation for a successful slime-making experience. By choosing the right glue, you'll be able to create a slime that is both fun to play with and easy to work with, making it the perfect starting point for your slime-making journey. We'll start by examining the different types of glue that are best suited for slime activation.
Using the Right Type of Glue for Slime Activation
When it comes to activating slime, using the right type of glue is crucial. Not all glues are created equal, and some are better suited for slime activation than others. The most commonly used glues for slime are white glue, clear glue, and school glue. White glue, also known as PVA glue, is the most popular choice among slime enthusiasts. It is a versatile glue that works well with a variety of slime recipes and is easy to find in most craft stores. Clear glue, on the other hand, is a great option for those who want to create a clear or translucent slime. It is also a good choice for slime recipes that require a lot of liquid starch. School glue, also known as washable glue, is another popular option for slime activation. It is a bit thicker than white glue and works well with slime recipes that require a lot of texture. When choosing a glue for slime activation, it's essential to read the label and look for the following characteristics: a high concentration of polyvinyl acetate (PVA), a low viscosity, and a pH level close to neutral. Glues with these characteristics will provide the best results and help create a slime that is fun to play with and easy to manipulate.
Applying the Right Amount of Liquid Starch for Slime Activation
When it comes to applying the right amount of liquid starch for slime activation, it's essential to strike the right balance. Too little liquid starch, and the slime may not activate properly, resulting in a sticky or crumbly texture. On the other hand, too much liquid starch can make the slime too stiff or even turn it into a liquid. The ideal amount of liquid starch to use will depend on the type of slime you're making, as well as the desired texture and consistency. As a general rule of thumb, start with a small amount of liquid starch, such as 1-2 tablespoons, and gradually add more as needed. This will help you achieve the perfect balance of texture and consistency. It's also important to note that the type of liquid starch you use can affect the outcome of your slime. Some liquid starches are more concentrated than others, so be sure to read the label and adjust the amount accordingly. Additionally, if you're using a borax-based slime recipe, you may need to use a bit more liquid starch to achieve the right consistency. By applying the right amount of liquid starch, you'll be able to create a slime that's fun to play with, stretchy, and has just the right amount of texture.
Mastering the Art of Kneading for Slime Activation
Mastering the art of kneading is a crucial step in slime activation, as it helps to break down the ingredients, distribute the moisture evenly, and develop the slime's texture. To knead effectively, start by holding the slime in the palm of your hand and gently squeezing it with your fingers. Then, use a pushing-down motion with the heel of your hand to apply pressure, followed by a folding motion to bring the slime back up. Repeat this process several times, gradually increasing the pressure and speed as the slime begins to come together. It's essential to be patient and gentle, as over-kneading can lead to a tough, dense slime. As you knead, pay attention to the slime's consistency and texture, adding more liquid or powder as needed to achieve the desired level of stickiness and stretchiness. With practice, you'll develop a sense of when the slime is ready, and you'll be able to create a wide range of textures and consistencies to suit your preferences. By mastering the art of kneading, you'll be able to unlock the full potential of your slime and enjoy hours of creative play and experimentation.