How To Winterize An Rv
As the winter months approach, it's essential to prepare your RV for the cold weather to prevent damage and ensure it remains in good condition. Winterizing your RV is a crucial process that involves several steps, including pre-winterization checks, winterizing the plumbing system, and preparing the RV for storage. In this article, we will guide you through the process of winterizing your RV, starting with the essential pre-winterization checks that will help you identify any potential issues before the cold weather sets in. By following these steps, you can ensure your RV is protected from the harsh winter conditions and ready for the next camping season. So, let's begin with the pre-winterization checks to ensure your RV is ready for the winter months ahead.
Pre-Winterization Checks
As the winter season approaches, it's essential to prepare your home for the harsh weather conditions that come with it. Pre-winterization checks can help prevent costly repairs, ensure your safety, and maintain the integrity of your home. One of the most critical aspects of pre-winterization is inspecting the roof and walls for damage. This involves checking for missing or loose shingles, cracks in the walls, and signs of water damage. Additionally, it's crucial to check the tires for proper inflation and tread, especially if you live in an area with heavy snowfall. A well-maintained tire can provide better traction and control on icy roads. Furthermore, testing the plumbing system for leaks is vital to prevent frozen pipes and water damage. By addressing these issues before winter, you can avoid costly repairs and ensure a safe and warm home. To start, let's take a closer look at inspecting the roof and walls for damage.
Inspect the Roof and Walls for Damage
Inspect the roof and walls of your RV for any signs of damage, such as cracks, holes, or soft spots. Check the roof seals around vents, skylights, and other openings to ensure they are secure and not damaged. Inspect the walls for any signs of water damage, such as discoloration or warping. Check the seams and joints for any gaps or cracks, and make sure all screws and fasteners are secure. If you find any damage, make repairs before winterizing your RV to prevent further damage from cold weather and moisture. Consider applying a roof sealant to protect the roof from the elements and extend its lifespan. Additionally, inspect the exterior of your RV for any signs of pest or rodent infestation, such as holes or gnaw marks, and take steps to seal any entry points to prevent them from seeking shelter in your RV during the winter months.
Check the Tires for Proper Inflation and Tread
As part of your pre-winterization checks, it's essential to inspect your RV's tires for proper inflation and tread. Properly inflated tires are crucial for safe travel, especially during the winter months when roads can be slippery and hazardous. Underinflated tires can lead to reduced traction, increased stopping distance, and even tire failure. To check the tire pressure, use a tire pressure gauge and compare the reading to the recommended pressure listed in your RV's owner's manual or on the tire's sidewall. Make sure to check the pressure when the tires are cold, as driving can heat up the tires and affect the reading. Additionally, inspect the tread depth by inserting a penny into the tire groove with Lincoln's head facing down. If you can see the top of Lincoln's head, the tread is worn down to 2/32" or less, and the tire should be replaced. It's also important to look for signs of uneven wear, such as feathering or cupping, which can indicate improper tire inflation or misaligned wheels. By checking the tire pressure and tread, you can ensure your RV is ready for the winter season and reduce the risk of tire-related problems.
Test the Plumbing System for Leaks
Before storing your RV for the winter, it's essential to test the plumbing system for leaks to prevent water damage and costly repairs. Start by filling the freshwater tank and pressurizing the system. Then, turn on the water pump and check the connections, hoses, and fittings for any signs of moisture or water droplets. Inspect the water heater, pipes, and faucets for leaks, paying particular attention to areas around connections and joints. You can also use a pressure test kit to detect any hidden leaks. Additionally, check the drain valves and hoses for proper function and ensure they are securely connected. If you find any leaks, make the necessary repairs before winterizing the plumbing system. This simple test can save you from dealing with costly repairs and water damage when you're ready to hit the road again in the spring.
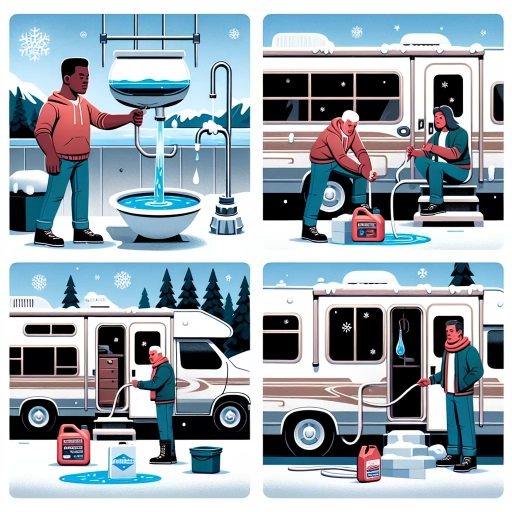
Winterizing the Plumbing System
As the winter months approach, it's essential to take proactive steps to protect your plumbing system from the harsh cold weather. Freezing temperatures can cause pipes to burst, leading to costly repairs and water damage. To prevent this, it's crucial to winterize your plumbing system. This process involves three key steps: draining the water heater and disconnecting the hoses, blowing out the water lines with compressed air, and adding antifreeze to the plumbing system. By taking these measures, you can ensure your plumbing system remains functional and safe throughout the winter. In this article, we'll explore each of these steps in detail, starting with the first crucial step: draining the water heater and disconnecting the hoses.
Drain the Water Heater and Disconnect the Hoses
Drain the water heater and disconnect the hoses to prevent damage from freezing temperatures. Start by turning off the power to the water heater at the circuit breaker or fuse box. Next, locate the drain valve at the bottom of the water heater and attach a garden hose to it. Open the valve and allow the water to drain completely. Once the water has stopped flowing, close the valve and remove the hose. Then, disconnect the hoses from the water heater, including the inlet and outlet hoses, and drain them as well. You may need to use a wrench to loosen any fittings or connections. Be sure to drain the hoses completely to prevent any water from remaining in the lines. Finally, cap the ends of the hoses to prevent debris from entering the lines. By draining the water heater and disconnecting the hoses, you can help prevent damage to the water heater and plumbing system during the winter months.
Blow Out the Water Lines with Compressed Air
To blow out the water lines with compressed air, start by locating the city water inlet and removing any hoses or connections. Next, attach a blowout adapter to the inlet, making sure it's securely connected. Then, connect a compressor hose to the adapter and set the compressor to the recommended pressure, usually between 30-40 PSI. Turn on the compressor and allow the air to flow through the system, starting with the lowest point in the plumbing system, typically the water heater. Open the drain valve on the water heater to allow the air to escape, and then move to the next lowest point, repeating the process until all the water lines have been blown out. It's essential to open all the faucets, including the shower and toilet, to allow the air to escape and ensure all the water is removed from the lines. Once the air is flowing freely through the system, and no water is present, you can turn off the compressor and remove the blowout adapter. Finally, close all the faucets and drain valves to complete the process. It's recommended to use a blowout plug to seal the city water inlet to prevent any debris or moisture from entering the system during the winter months. By following these steps, you can effectively blow out the water lines with compressed air and help protect your RV's plumbing system from freezing temperatures.
Add Antifreeze to the Plumbing System
When winterizing the plumbing system, adding antifreeze is a crucial step to prevent damage from freezing temperatures. Antifreeze, also known as RV antifreeze or propylene glycol, is a non-toxic and environmentally friendly liquid that is specifically designed for use in RV plumbing systems. To add antifreeze to the plumbing system, start by locating the water pump and turning it off. Next, open the lowest drain valve on the plumbing system, usually located near the water tank, to allow the antifreeze to flow through the system. Then, pour the recommended amount of antifreeze into the water tank, usually 1-2 gallons, depending on the size of the tank and the manufacturer's instructions. Turn the water pump back on and allow the antifreeze to circulate through the system, making sure to check for leaks and ensure that all faucets and valves are closed. It's also important to note that antifreeze should not be used in the freshwater tank, as it can contaminate the water and make it undrinkable. By adding antifreeze to the plumbing system, you can help protect your RV's pipes and fittings from freezing temperatures and ensure a safe and enjoyable camping experience.
Preparing the RV for Storage
Preparing your RV for storage is a crucial step to ensure it remains in good condition and is ready for your next adventure. When storing your RV, it's essential to take the necessary steps to protect it from the elements and prevent damage. This includes cleaning and disinfecting the interior and exterior, disconnecting the battery and storing it properly, and covering the RV with a breathable cover or tarp. By following these steps, you can help extend the life of your RV and keep it in top condition. In this article, we will explore each of these steps in more detail, starting with the importance of cleaning and disinfecting the interior and exterior of your RV.
Clean and Disinfect the Interior and Exterior
When preparing your RV for storage, it's essential to clean and disinfect both the interior and exterior to prevent the buildup of dirt, grime, and bacteria. Start by cleaning the exterior, using a mild detergent and a soft-bristled brush to remove any dirt, dust, or debris from the roof, walls, and windows. Pay particular attention to areas around vents, windows, and doors, where moisture can accumulate and create an ideal environment for mold and mildew. Use a hose to rinse the exterior, making sure to remove any soap residue. Next, dry the exterior with a microfiber towel to prevent water spots. For the interior, begin by vacuuming all surfaces, including upholstery, carpets, and mattresses. Then, use a gentle cleaning product to wipe down all surfaces, including countertops, sinks, and faucets. Don't forget to clean the refrigerator, stove, and any other appliances. Use a disinfectant to sanitize all high-touch areas, such as doorknobs, light switches, and remotes. Finally, open all windows and doors to allow fresh air to circulate and help remove any lingering moisture. By thoroughly cleaning and disinfecting your RV, you'll help prevent the growth of mold and mildew, and ensure your RV remains in good condition while in storage.
Disconnect the Battery and Store it Properly
When it comes to preparing your RV for storage, one of the most crucial steps is to disconnect the battery and store it properly. This is essential to prevent any damage to the battery, electrical system, and other components of your RV. To start, locate the battery and disconnect the negative (black) cable first, followed by the positive (red) cable. This order is important to prevent any accidental short circuits. Once the cables are disconnected, remove the battery from the RV and clean the terminals with a wire brush to remove any corrosion. Next, apply a thin layer of petroleum jelly or silicone-based lubricant to the terminals to protect them from further corrosion. Now, store the battery in a cool, dry place, away from any metal objects that could cause a short circuit. It's also a good idea to check the battery's state of charge every few months and charge it as needed to prevent sulfation. Additionally, consider using a battery maintainer or trickle charger to keep the battery in good condition while it's in storage. By following these steps, you'll be able to keep your RV's battery in good condition and ensure it's ready to go when you're ready to hit the road again.
Cover the RV with a Breathable Cover or Tarp
When storing your RV for an extended period, it's essential to protect it from the elements to prevent damage and maintain its condition. One of the most effective ways to do this is by covering the RV with a breathable cover or tarp. A breathable cover allows for airflow and moisture transfer, which helps to prevent the buildup of condensation and mildew. This is particularly important for RVs with fabric or vinyl components, as these materials can be prone to water damage and rot. Look for a cover made from a durable, water-resistant material such as polyester or nylon, and ensure it is specifically designed for RVs. A good cover should fit snugly over the RV, with elasticized hems and adjustable straps to secure it in place. Additionally, consider a cover with a UV-resistant treatment to protect the RV's exterior from the sun's damaging rays. By covering your RV with a breathable cover or tarp, you can help to protect it from the elements and ensure it remains in good condition for years to come.