How To Connect Iphone To Pc
Connecting your iPhone to a PC can be a convenient way to transfer files, sync data, and even charge your device. With the rise of wireless technology, there are now multiple ways to establish a connection between your iPhone and PC. In this article, we will explore three methods to connect your iPhone to a PC: via USB, Wi-Fi, and Bluetooth. Each method has its own advantages and disadvantages, and we will discuss the benefits and drawbacks of each. Whether you prefer a wired connection for faster data transfer or a wireless connection for greater convenience, we will guide you through the process. Let's start with the most traditional method: connecting your iPhone to a PC via USB.
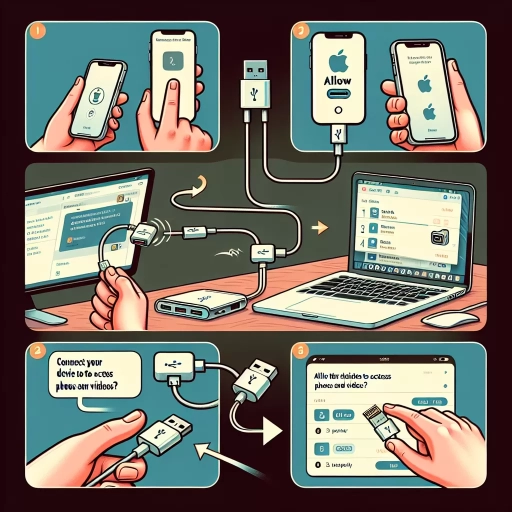
Connecting iPhone to PC via USB
Connecting your iPhone to a PC via USB is a straightforward process that allows you to transfer files, sync data, and even charge your device. To establish a successful connection, there are a few key steps to follow. First, you'll need to use a USB cable to physically link your iPhone to your PC. This will initiate the connection process and allow your PC to recognize your iPhone. Once connected, you'll need to enable trust on your iPhone, which involves confirming that you trust the computer you're connecting to. This is a security measure designed to protect your device and data. Finally, once trust is established, you'll be able to access your iPhone's content on your PC, including photos, music, and other files. By following these simple steps, you can easily connect your iPhone to your PC via USB and start transferring data or syncing your device. To get started, let's take a closer look at the first step: using a USB cable to establish a connection.
Using a USB Cable to Establish a Connection
Using a USB cable to establish a connection between your iPhone and PC is a straightforward process. To start, ensure you have a compatible USB cable, preferably the one that came with your iPhone or a certified Apple cable. Connect the smaller end of the cable to your iPhone's charging port, located at the bottom of the device. Next, plug the larger end of the cable into a free USB port on your PC. Make sure the port is not damaged or obstructed, as this can prevent a successful connection. Once the cable is securely connected to both devices, your PC should recognize your iPhone and prompt you to trust the computer. If prompted, tap "Trust" on your iPhone to establish a secure connection. Your PC may also ask you to select the type of connection you want to use, such as "File Transfer" or "Charge Only." Choose the option that best suits your needs. If your PC doesn't recognize your iPhone, try restarting both devices or updating your iPhone's software to the latest version. Additionally, ensure that your PC's USB ports are functioning properly by trying a different port or restarting your computer. By following these simple steps, you should be able to establish a reliable connection between your iPhone and PC using a USB cable.
Enabling Trust on the iPhone
When connecting your iPhone to a PC via USB, one crucial step is enabling trust on your iPhone. This process is essential to establish a secure connection between your device and the computer. To enable trust, start by connecting your iPhone to the PC using a USB cable. Once connected, a prompt will appear on your iPhone screen asking if you trust the computer. Tap "Trust" to allow the connection. If you don't see this prompt, go to your iPhone's Settings, select "General," and then "Device Management." Look for the PC's name and tap "Trust [PC's name]." If you're using a Windows PC, you might need to unlock your iPhone and tap "Trust" on the prompt that appears. On a Mac, you might need to enter your iPhone's passcode to confirm the trust. By enabling trust, you're allowing your iPhone to communicate with the PC, enabling features like file transfer, syncing, and more. It's essential to only trust computers you own or have authorized access to, as this can help prevent unauthorized access to your iPhone's data.
Accessing iPhone Content on the PC
Here is the paragraphy: Accessing iPhone content on a PC is a straightforward process once you've connected your device via USB. To start, you'll need to unlock your iPhone and tap "Trust" on the prompt that appears on your screen. This allows your PC to access your iPhone's content. Next, you can use the Windows Explorer or File Explorer to navigate to your iPhone's files. You can find your iPhone listed under "Devices" or "This PC" in the File Explorer. From here, you can access your iPhone's internal storage, where you can view and transfer files such as photos, videos, and music. You can also use the Windows Photos app to import photos and videos from your iPhone. Additionally, you can use the iTunes software to sync your iPhone's content with your PC, including music, movies, and TV shows. If you're using a Windows 10 PC, you can also use the Phone Companion app to access your iPhone's content and sync your files. Overall, accessing iPhone content on a PC is a simple process that requires minimal setup and configuration.
Connecting iPhone to PC via Wi-Fi
Connecting your iPhone to your PC via Wi-Fi is a convenient and efficient way to transfer files, sync data, and access your device's content without the need for cables. To achieve this, you'll need to set up Wi-Fi syncing on your iPhone, connect both devices to the same Wi-Fi network on your PC, and use AirDrop or iCloud to transfer files. By following these steps, you can easily share files, photos, and other data between your iPhone and PC. In this article, we'll explore the process of connecting your iPhone to your PC via Wi-Fi, starting with the first step: setting up Wi-Fi syncing on your iPhone.
Setting Up Wi-Fi Syncing on the iPhone
Setting up Wi-Fi syncing on your iPhone is a convenient way to keep your device connected to your computer without the need for cables. To start, make sure your iPhone and computer are connected to the same Wi-Fi network. Then, go to your iPhone's Settings app and tap on "General." From there, select "iTunes Wi-Fi Sync" and toggle the switch to the "On" position. Next, open iTunes on your computer and select your iPhone from the top left corner of the screen. Click on "Summary" and then check the box next to "Sync with this iPhone over Wi-Fi." You will then be prompted to enter your iPhone's passcode to confirm the connection. Once you've done this, your iPhone will be synced with your computer over Wi-Fi, allowing you to transfer files, music, and other data between the two devices without the need for a physical connection. Additionally, you can also set up automatic syncing by selecting the "Sync Now" option, which will sync your iPhone with your computer whenever it's connected to the same Wi-Fi network. This feature is especially useful for keeping your iPhone backed up and up-to-date, as it will automatically sync your device whenever it's in range of your computer's Wi-Fi signal.
Connecting to the Same Wi-Fi Network on the PC
To connect your iPhone to your PC via Wi-Fi, both devices must be connected to the same Wi-Fi network. This is a crucial step, as it allows your PC to recognize and communicate with your iPhone. To ensure you're connected to the same network, follow these steps: On your PC, click on the Wi-Fi icon in the system tray, usually located at the bottom right corner of the screen. This will open a list of available Wi-Fi networks. Select the network you want to connect to from the list, and enter the password if prompted. Once connected, make sure your iPhone is also connected to the same network. Go to your iPhone's Settings app, tap on Wi-Fi, and select the same network you connected to on your PC. If you're not sure which network you're connected to, you can check the network name on your PC and match it with the one on your iPhone. By connecting both devices to the same Wi-Fi network, you'll be able to establish a stable and secure connection between your iPhone and PC, allowing you to transfer files, share data, and more.
Using AirDrop or iCloud to Transfer Files
To transfer files between your iPhone and PC wirelessly, you can use AirDrop or iCloud. AirDrop is a convenient feature that allows you to share files between Apple devices, including iPhones and Macs, as long as they are connected to the same Wi-Fi network. To use AirDrop, make sure both devices are connected to the same network, then go to the Control Center on your iPhone, tap on AirDrop, and select "Everyone" or "Contacts Only" to set your visibility. On your PC, you can access AirDrop by opening the File Explorer, clicking on "Network" on the left sidebar, and looking for your iPhone's name under "Media Devices." You can then drag and drop files between your iPhone and PC. Alternatively, you can use iCloud to transfer files between your iPhone and PC. To do this, go to the iCloud website on your PC, sign in with your Apple ID, and select the files you want to transfer. You can also use the iCloud Drive app on your iPhone to upload files to iCloud, which can then be accessed on your PC. Additionally, you can use the iCloud Photo Library to transfer photos and videos between your iPhone and PC. By using AirDrop or iCloud, you can easily transfer files between your iPhone and PC without the need for cables or complicated setup.
Connecting iPhone to PC via Bluetooth
Connecting your iPhone to your PC via Bluetooth can be a convenient way to transfer files, share internet connections, and more. To establish a successful Bluetooth connection, there are several steps you need to follow. First, you need to enable Bluetooth on both your iPhone and PC, ensuring that both devices are discoverable and ready to pair. Once Bluetooth is enabled, you can proceed to pair your iPhone with your PC, which involves searching for available devices and selecting your iPhone from the list. After pairing, you can transfer files between your iPhone and PC via Bluetooth, allowing you to share photos, documents, and other data easily. In this article, we will guide you through the process of connecting your iPhone to your PC via Bluetooth, starting with the first step: enabling Bluetooth on both devices.
Enabling Bluetooth on Both the iPhone and PC
To enable Bluetooth on both your iPhone and PC, follow these straightforward steps. On your iPhone, go to the Settings app, which is usually found on the home screen. Tap on the "Bluetooth" option, and then toggle the switch next to it to the right. This will turn Bluetooth on, and your iPhone will start searching for available devices. On your PC, the process is slightly different depending on the operating system you're using. If you're using Windows 10, click on the Start button, then select the Settings icon, which looks like a gear. From there, click on "Devices" and then select "Bluetooth & other devices" from the left menu. Make sure the Bluetooth switch is turned on. If you're using a Mac, click on the Apple menu, then select "System Preferences," followed by "Bluetooth." Ensure that the Bluetooth status is set to "On." Once Bluetooth is enabled on both devices, your iPhone should appear in the list of available devices on your PC. Select your iPhone's name to initiate the pairing process. You may be prompted to enter a code or confirm the pairing on both devices. Once paired, you can transfer files, share internet connections, and use other Bluetooth features between your iPhone and PC.
Pairing the iPhone with the PC
Here is the paragraphy: When it comes to pairing your iPhone with your PC, there are several methods you can use, depending on your specific needs and preferences. One popular option is to use Bluetooth, which allows you to connect your iPhone to your PC wirelessly. To do this, you'll need to make sure that both your iPhone and PC have Bluetooth capabilities, and then follow the steps to pair the two devices. This will allow you to transfer files, make hands-free phone calls, and even use your iPhone as a remote control for your PC. Another option is to use a USB cable to connect your iPhone to your PC, which can be faster and more reliable than Bluetooth. You can also use a cloud-based service like iCloud or Google Drive to transfer files between your iPhone and PC, or use a third-party app like AirDroid to manage your iPhone from your PC. Regardless of which method you choose, pairing your iPhone with your PC can help you to streamline your workflow, access your files and data from multiple devices, and get more done on the go.
Transferring Files via Bluetooth
Here is the paragraphy: Transferring files via Bluetooth is a convenient and wireless way to share data between devices. To transfer files from your iPhone to a PC via Bluetooth, you'll need to ensure that both devices are Bluetooth-enabled and in close proximity to each other. First, make sure Bluetooth is turned on on both your iPhone and PC. On your iPhone, go to Settings > Bluetooth, and on your PC, go to Settings > Devices > Bluetooth & other devices. Once Bluetooth is enabled, your iPhone should be discoverable by your PC. On your PC, click on "Add a device" and select your iPhone from the list of available devices. You may be prompted to enter a passcode on your iPhone to confirm the connection. Once connected, you can transfer files from your iPhone to your PC by selecting the files you want to transfer and choosing the "Share" option. You can also use the "AirDrop" feature on your iPhone to transfer files to your PC, but this requires both devices to be connected to the same Wi-Fi network. Alternatively, you can use a third-party app, such as Shareit or Xender, to transfer files between your iPhone and PC via Bluetooth. These apps often offer additional features, such as faster transfer speeds and the ability to transfer larger files. However, be aware that using third-party apps may require you to create an account or pay a subscription fee. Overall, transferring files via Bluetooth is a convenient and wireless way to share data between your iPhone and PC, and can be a useful alternative to using a cable or cloud storage service.