How To Make A Sticker On Snapchat Without Screenshotting
Here is the introduction paragraph: Snapchat is a popular social media platform that allows users to share moments from their daily lives through photos and videos. One of the unique features of Snapchat is the ability to create and share custom stickers. However, many users struggle with creating stickers without screenshotting, which can be a hassle. In this article, we will explore three ways to make a sticker on Snapchat without screenshotting. First, we will discuss designing your sticker from scratch, allowing you to unleash your creativity and create a unique sticker. Alternatively, we can utilize Snapchat's built-in features to create a sticker without screenshotting. Lastly, we will also explore a method to create a sticker from a screenshot alternative, providing a workaround for those who still want to use a screenshot. By the end of this article, you will be able to create your own custom stickers on Snapchat without the need for screenshotting. Let's start by designing your sticker.
Designing Your Sticker
Designing your sticker can be a fun and creative process, but it requires some thought and planning to ensure it effectively communicates your message and resonates with your target audience. To create a high-quality sticker, there are several key elements to consider. First, you'll want to choose a relevant image or graphic that accurately represents your brand or message. This will help grab the attention of potential customers and make your sticker more memorable. Additionally, selecting a suitable font and color scheme is crucial in conveying the tone and personality of your brand. A well-designed sticker should also be simple and recognizable, making it easy for people to quickly understand the message or brand being promoted. By considering these key elements, you can create a sticker that effectively communicates your message and leaves a lasting impression. So, let's start by exploring the importance of choosing a relevant image or graphic for your sticker.
Choose a Relevant Image or Graphic
When designing your sticker, it's essential to choose a relevant image or graphic that complements your message and resonates with your audience. A well-chosen image can help convey your message more effectively, make your sticker more visually appealing, and increase its chances of being shared. Consider the context in which your sticker will be used and the emotions you want to evoke. For example, if you're creating a sticker for a birthday greeting, a bright and colorful image with balloons or confetti would be fitting. On the other hand, if you're creating a sticker for a more serious topic, a simple yet powerful image with a bold font would be more suitable. You can use a personal photo, a graphic from a design library, or even create your own illustration. Ensure that the image is high-resolution and clear, as a blurry or pixelated image can detract from the overall quality of your sticker. Additionally, consider the size and shape of your image, as it should be easily recognizable and scalable for various devices and platforms. By choosing a relevant and high-quality image, you can create a sticker that effectively communicates your message and leaves a lasting impression on your audience.
Select a Suitable Font and Color Scheme
When designing your sticker, selecting a suitable font and color scheme is crucial to make it visually appealing and effective. A well-chosen font can help convey the tone and personality of your sticker, while a harmonious color scheme can make it stand out and grab attention. To select a suitable font, consider the style and theme of your sticker. For example, if you're creating a fun and playful sticker, a bold and playful font like Comic Sans or Arial Black would be suitable. On the other hand, if you're creating a more serious or professional sticker, a clean and simple font like Helvetica or Times New Roman would be more appropriate. Additionally, make sure to choose a font that is easy to read and recognizable, even at small sizes. When it comes to color schemes, consider the emotions and moods you want to evoke with your sticker. For example, bright and bold colors like red, orange, and yellow can evoke feelings of energy and excitement, while softer and pastel colors like pink, blue, and green can evoke feelings of calmness and serenity. You can also use online color palette generators to help you find a harmonious color scheme that complements your font and sticker design. Ultimately, the key is to experiment and find a font and color scheme that works well together and effectively communicates the message and tone of your sticker.
Keep it Simple and Recognizable
When designing your sticker, it's essential to keep it simple and recognizable. A cluttered or overly complex design can be difficult to read and understand, especially when viewed in a small size. Instead, focus on using clean lines, simple shapes, and bold colors to create a design that's easy to recognize and understand. Avoid using too much text or intricate details, as these can be hard to read and may not translate well to a small sticker size. Additionally, make sure your design is scalable, meaning it looks good in various sizes and resolutions. A simple and recognizable design will also help your sticker stand out and be more memorable, making it more likely to be used and shared by others. By keeping your design simple and recognizable, you can create a sticker that effectively communicates your message and adds a personal touch to your Snapchat stories.
Using Snapchat's Built-in Features
Snapchat is a popular social media platform that offers a wide range of features to enhance your snaps and stories. One of the most creative and engaging features is the ability to use custom stickers. To take your sticker game to the next level, you can utilize Snapchat's built-in features. By applying filters and effects, you can enhance your sticker and make it stand out. Additionally, you can take advantage of Snapchat's sticker library, which offers a vast collection of stickers that you can use to add a personal touch to your snaps. However, to create truly unique and custom stickers, you can utilize the scissors tool to cut out custom shapes. This feature allows you to get creative and cut out specific parts of an image to create a one-of-a-kind sticker. By using this feature, you can add a personal touch to your snaps and make them more engaging. In this article, we will explore how to utilize the scissors tool for custom shapes, apply filters and effects to enhance your sticker, and take advantage of Snapchat's sticker library. First, let's dive into how to utilize the scissors tool for custom shapes.
Utilize the Scissors Tool for Custom Shapes
To create unique and personalized stickers on Snapchat, utilize the Scissors Tool for custom shapes. This feature allows you to cut out specific parts of an image or screenshot, giving you the freedom to create intricate and detailed designs. To access the Scissors Tool, open the Snapchat app and navigate to the camera screen. Take a new photo or select an existing one from your gallery. Tap the Scissors icon, located on the right-hand side of the screen, to enter the editing mode. From here, you can use your finger to carefully cut out the desired shape or object from the image. The Scissors Tool is incredibly precise, allowing you to zoom in and out of the image to ensure accuracy. Once you've cut out your desired shape, tap the "Done" button to save it as a sticker. You can then resize, rotate, and reposition the sticker to fit your needs. The Scissors Tool is a game-changer for creating custom stickers, as it eliminates the need for screenshotting and provides a more seamless and intuitive experience. By utilizing this feature, you can take your Snapchat sticker game to the next level and create truly one-of-a-kind designs that reflect your personality and style.
Apply Filters and Effects to Enhance Your Sticker
To take your Snapchat sticker game to the next level, apply filters and effects to enhance your sticker. Snapchat offers a wide range of filters and effects that can be applied to your sticker to make it more visually appealing and engaging. From simple color adjustments to elaborate animations, the possibilities are endless. To apply a filter or effect, simply tap on the sticker and then swipe left or right to browse through the available options. You can also use the "magic eraser" tool to remove the background of your sticker and make it blend seamlessly with the rest of your snap. Additionally, you can use the "draw" tool to add custom doodles and text to your sticker, giving it a more personalized touch. By applying filters and effects, you can add an extra layer of creativity and fun to your sticker, making it stand out from the rest. Whether you're looking to add a pop of color, create a funny meme, or simply make your sticker more eye-catching, Snapchat's filters and effects have got you covered. So don't be afraid to experiment and try out different combinations to find the perfect look for your sticker.
Take Advantage of Snapchat's Sticker Library
Here is the paragraphy: To take your Snapchat game to the next level, take advantage of the platform's extensive sticker library. Snapchat offers a vast collection of stickers that can be used to add a personal touch to your snaps and stories. From fun and quirky illustrations to elegant and sophisticated designs, there's a sticker to match every mood and style. To access the sticker library, simply tap the sticker icon on the right-hand side of the screen while creating a snap or story. You can then browse through the various categories, including emotions, objects, and phrases, to find the perfect sticker to convey your message. You can also use the search function to find specific stickers or browse through the "Trending" section to see what's currently popular. Once you've found the perfect sticker, simply tap it to add it to your snap or story. You can then resize, rotate, and move the sticker to fit your desired layout. With Snapchat's sticker library, you can add a creative and playful touch to your content without having to screenshot or create your own stickers from scratch.
Creating a Sticker from a Screenshot Alternative
Here is the introduction paragraph: Creating a sticker from a screenshot alternative can be a fun and creative way to personalize your messages and stories on social media. Instead of using a traditional screenshot, you can use various methods to create a sticker that captures the essence of the image. In this article, we will explore three alternative methods to create a sticker from a screenshot: using the Snapchat camera to capture a new image, importing an image from your camera roll, and designing a sticker from scratch using a third-party app. Each of these methods offers a unique way to create a sticker that is both personalized and engaging. By the end of this article, you will have the skills and knowledge to create your own custom stickers using these alternative methods. So, let's dive in and start with the first method: using the Snapchat camera to capture a new image.
Use the Snapchat Camera to Capture a New Image
Here is the paragraphy: To capture a new image using the Snapchat camera, start by opening the Snapchat app and navigating to the camera view. You can do this by tapping the camera icon in the bottom center of the screen. Once you're in the camera view, you'll see a variety of options and features available to you. To capture a new image, simply tap the circular shutter button at the bottom of the screen. You can also switch between the front-facing and rear-facing cameras by tapping the camera switch icon, which looks like two arrows forming a circle. If you want to use the flash, you can tap the flash icon, which looks like a lightning bolt. Additionally, you can zoom in and out by pinching your fingers together or apart on the screen. Snapchat also offers a variety of lenses and filters that you can apply to your image before capturing it. To access these, tap the smiling face icon to the right of the shutter button. From here, you can browse through the different lenses and filters available, and select the one you want to use. Once you've applied a lens or filter, you can adjust its position and size by tapping and dragging on the screen. When you're ready to capture your image, simply tap the shutter button again. Your new image will be saved to your Snapchat camera roll, and you can use it to create a sticker.
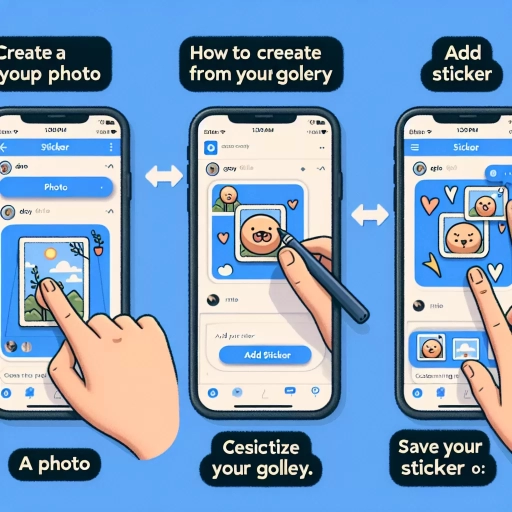
Import an Image from Your Camera Roll
Here is the paragraphy: If you want to create a sticker from a photo that's already saved to your camera roll, you can easily import it into Snapchat. To do this, open Snapchat and navigate to the chat or story where you want to add the sticker. Tap the sticker icon, which looks like a square with a folded corner, and then tap the "Create" button. From there, select "Photo" and choose the image you want to use from your camera roll. You can then crop the image to your desired size and shape, and add it to your Snapchat story or chat as a sticker. This method is a great alternative to screenshotting, as it allows you to use a high-quality image that's already saved to your device. Additionally, importing an image from your camera roll gives you more flexibility and control over the sticker creation process, as you can choose from a wide range of images and edit them to your liking.
Design a Sticker from Scratch Using a Third-Party App
Designing a sticker from scratch using a third-party app is a great alternative to creating a sticker from a screenshot. To start, choose a reputable and user-friendly app, such as Adobe Illustrator Draw or PicsArt, that offers a wide range of design tools and features. Once you've downloaded and installed the app, open it and select the "Create a New Project" option. Choose a template or start from a blank canvas, depending on your design preference. Next, select the shape or object you want to use as the base of your sticker, and customize it by adjusting the size, color, and texture. You can also add text, images, or other design elements to enhance your sticker. Use the app's editing tools to refine your design, and experiment with different fonts, colors, and effects to make your sticker stand out. When you're satisfied with your design, save it as a PNG file and export it to your device's camera roll. From there, you can upload it to Snapchat and use it as a sticker in your snaps. With a third-party app, you have complete creative control over your sticker design, allowing you to produce a unique and personalized sticker that reflects your style and personality.