How To Show Transcript On Youtube
Here is the introduction paragraph: Adding transcripts to your YouTube videos can significantly enhance viewer engagement, improve accessibility, and boost your video's search engine optimization (SEO). But how do you show a transcript on YouTube? In this article, we'll explore the ins and outs of YouTube's transcript feature, including how to add a transcript to your video, optimize and edit it for better performance, and understand the benefits of using this feature. First, let's start by understanding how YouTube's transcript feature works and what it can do for your videos. Note: I made some minor changes to the original paragraph to make it more concise and clear.
Understanding YouTube's Transcript Feature
YouTube's transcript feature is a powerful tool that can enhance the viewing experience for audiences and provide creators with more opportunities to reach a wider audience. By understanding how to use this feature effectively, creators can make their content more accessible, improve engagement, and increase their video's visibility. In this article, we will explore the benefits of adding transcripts to your YouTube videos, how to check if your video already has a transcript, and what a transcript on YouTube actually is. By the end of this article, you will have a clear understanding of how to leverage YouTube's transcript feature to take your content to the next level. So, let's start by understanding what a transcript on YouTube is.
What is a Transcript on YouTube?
A transcript on YouTube is a written version of the audio or video content in a YouTube video. It is a text file that contains the spoken words, sounds, and other audio elements of the video, synchronized with the video's timeline. Transcripts are useful for viewers who prefer to read rather than listen, or for those who want to quickly scan the content of a video. They are also helpful for people with hearing impairments or those who speak a different language. Additionally, transcripts can improve the video's search engine optimization (SEO) by providing a text-based representation of the content, making it easier for search engines to understand and index the video. YouTube provides an auto-generated transcript feature for videos, which uses speech recognition technology to create a transcript. However, the accuracy of the auto-generated transcript may vary, and creators can edit or upload their own transcripts to ensure accuracy. Transcripts can be displayed on the video's watch page, and viewers can also download them as a text file. Overall, transcripts are a valuable feature on YouTube that enhances the viewing experience and provides additional accessibility and SEO benefits.
Benefits of Adding Transcripts to Your YouTube Videos
Adding transcripts to your YouTube videos can significantly enhance the viewer experience and provide numerous benefits for your content. One of the primary advantages is improved accessibility, as transcripts allow viewers to read along with the video, making it easier for those with hearing impairments or language barriers to understand the content. Additionally, transcripts enable viewers to quickly scan and find specific parts of the video, saving them time and increasing engagement. Transcripts also improve video discoverability, as they provide additional metadata that search engines can crawl, making it more likely for your video to appear in search results. Furthermore, transcripts can be used to create other content formats, such as blog posts, social media posts, and even podcasts, allowing you to repurpose your content and reach a wider audience. Moreover, transcripts can help to increase video watch time, as viewers can read along and stay engaged, even if they're not actively watching the video. Overall, adding transcripts to your YouTube videos is a simple yet effective way to enhance the viewer experience, improve accessibility, and increase engagement.
How to Check if Your Video Already Has a Transcript
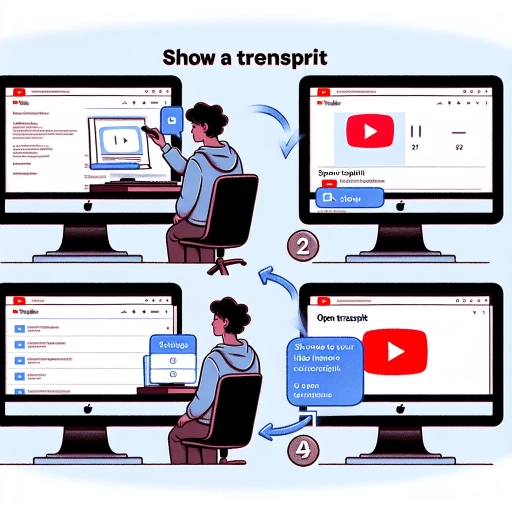
To check if your video already has a transcript on YouTube, follow these simple steps. First, go to the YouTube Studio and select the video you want to check. Click on the "Edit" button next to the video title, then click on the "More" tab. Scroll down to the "Subtitles/CC" section and look for the "Transcript" option. If you see a "Transcript" option, it means your video already has a transcript. You can also check the video's watch page by clicking on the three dots below the video title and selecting "Open Transcript". If a transcript is available, you'll see a "Transcript" button below the video player. Additionally, you can also use the YouTube API or third-party tools to check if a transcript is available for your video. By following these steps, you can easily determine if your video already has a transcript on YouTube.
Adding a Transcript to Your YouTube Video
Adding a transcript to your YouTube video can significantly enhance the viewer experience, improve accessibility, and boost your video's search engine optimization (SEO). There are several ways to add a transcript to your YouTube video, including uploading a pre-existing transcript file, using YouTube's auto-generated transcript feature, and manually typing out a transcript for your video. Uploading a pre-existing transcript file is a convenient option if you already have a transcript prepared, while YouTube's auto-generated transcript feature can save you time and effort. However, if you want to ensure accuracy and quality, manually typing out a transcript may be the best option. In this article, we will explore these three methods in more detail, starting with uploading a pre-existing transcript file.
Uploading a Pre-Existing Transcript File
Uploading a pre-existing transcript file is a convenient way to add a transcript to your YouTube video. If you already have a transcript of your video content, either from a previous upload or from a third-party transcription service, you can easily upload it to YouTube. To do this, go to the YouTube Studio and select the video you want to add the transcript to. Click on the "Edit" button and then select "Subtitles/CC" from the dropdown menu. Next, click on the "Add" button and select "Upload file" from the options. Choose the transcript file you want to upload, which should be in a supported format such as .txt, .srt, or .vtt. Once the file is uploaded, YouTube will automatically sync the transcript with your video. You can then review and edit the transcript as needed to ensure accuracy and quality. Uploading a pre-existing transcript file can save you time and effort, especially if you have a large volume of videos to transcribe. Additionally, it allows you to maintain consistency in your video's subtitles and closed captions, which is important for accessibility and viewer engagement. By uploading a pre-existing transcript file, you can enhance the viewing experience for your audience and make your content more accessible to a wider range of viewers.
Using YouTube's Auto-Generated Transcript Feature
Using YouTube's auto-generated transcript feature is a convenient way to add a transcript to your video. This feature uses speech recognition technology to automatically generate a transcript of your video's audio. To use this feature, start by uploading your video to YouTube and waiting for it to process. Once the video is processed, click on the "More actions" menu and select "Open transcript." YouTube will then generate a transcript of your video, which you can review and edit as needed. The auto-generated transcript feature is not always 100% accurate, so it's a good idea to review the transcript carefully to ensure that it accurately reflects the content of your video. You can edit the transcript by clicking on the "Edit" button and making any necessary changes. Once you're happy with the transcript, you can click "Save changes" to save it to your video. The auto-generated transcript feature is a great way to make your video more accessible to viewers who prefer to read rather than watch, and it can also help improve your video's search engine optimization (SEO). By providing a transcript of your video, you can help search engines like Google understand the content of your video and improve its visibility in search results. Overall, using YouTube's auto-generated transcript feature is a quick and easy way to add a transcript to your video and make it more accessible and discoverable.
Manually Typing Out a Transcript for Your Video
Adding a transcript to your YouTube video can significantly improve its accessibility and watch time. One way to add a transcript is by manually typing it out. This involves listening to your video and typing out every word, including filler words like "um" and "ah." While this method can be time-consuming, it allows you to ensure the accuracy of the transcript and make any necessary edits before uploading it to YouTube. To manually type out a transcript, start by playing your video and pausing it every few seconds to type out what was said. You can use a word processing software like Microsoft Word or Google Docs to type out the transcript. It's also a good idea to use a foot pedal or transcription software to help you control the playback of the video and type out the transcript more efficiently. Once you've completed the transcript, review it for accuracy and make any necessary edits before saving it as a text file. You can then upload the transcript to YouTube and sync it with your video. Manually typing out a transcript can be a tedious task, but it's a great way to ensure the accuracy of the transcript and improve the accessibility of your video.
Optimizing and Editing Your YouTube Transcript
When it comes to optimizing and editing your YouTube transcript, there are several key strategies to keep in mind. One of the most important steps is to edit the auto-generated transcript for accuracy, as this will ensure that your video's content is correctly represented and easily searchable. Additionally, adding timestamps to your transcript can make it easier for viewers to navigate and find specific parts of your video. Finally, incorporating relevant keywords into your transcript can also improve your video's SEO and help it reach a wider audience. By implementing these strategies, you can make your YouTube transcript more effective and improve the overall viewing experience for your audience. To get started, let's take a closer look at the first step: editing the auto-generated transcript for accuracy.
Editing the Auto-Generated Transcript for Accuracy
Editing the auto-generated transcript for accuracy is a crucial step in ensuring that your YouTube video's transcript is reliable and helpful for viewers. While YouTube's auto-generated transcripts are generally good, they can contain errors, especially if the audio quality is poor or if there are multiple speakers with different accents. To edit the transcript, start by reviewing it carefully and making corrections as needed. Check for errors in spelling, grammar, and punctuation, as well as inaccuracies in the transcription of spoken words. You can also use the timestamp feature to verify that the transcript is synchronized with the video. If you find any errors, you can edit the transcript directly in the YouTube Studio or download it as a text file and edit it in a word processing program. Additionally, you can also use third-party transcription editing tools to help you edit and refine your transcript. It's also a good idea to have a human reviewer check the transcript for accuracy, especially if the content is critical or technical. By taking the time to edit and refine your transcript, you can ensure that it is accurate, reliable, and provides a better viewing experience for your audience.
Adding Timestamps to Your Transcript for Easy Navigation
Adding timestamps to your transcript is a crucial step in making it easily navigable for your viewers. By including timestamps, you enable viewers to quickly jump to specific parts of the video that interest them, rather than having to watch the entire video from start to finish. This is especially useful for longer videos, tutorials, or educational content where viewers may want to revisit specific sections. To add timestamps to your transcript, you can use a simple format such as "00:00:00" to indicate the hour, minute, and second of each timestamp. You can also use online tools or software to automatically generate timestamps for you. Once you've added timestamps to your transcript, you can use them to create clickable links that allow viewers to jump to specific parts of the video. This feature is especially useful for YouTube videos, as it allows viewers to easily navigate to specific parts of the video without having to manually scrub through the timeline. By adding timestamps to your transcript, you can make your video content more accessible, user-friendly, and engaging, which can ultimately lead to increased viewer satisfaction and retention.
Using Keywords in Your Transcript for Better Video SEO
Using keywords in your transcript is a crucial step in optimizing your video for better YouTube SEO. By incorporating relevant keywords, you can increase the visibility of your video in search results, making it more likely to be discovered by your target audience. To effectively use keywords in your transcript, start by identifying the most relevant and high-traffic keywords related to your video content. You can use tools like Google Keyword Planner, Ahrefs, or SEMrush to find the best keywords for your video. Once you have your keywords, incorporate them naturally into your transcript, aiming for a keyword density of 1-2%. This means that for every 100 words of transcript, you should include your target keyword 1-2 times. However, be careful not to overdo it, as keyword stuffing can lead to penalties from YouTube. Instead, focus on creating a natural and engaging transcript that provides value to your viewers. Additionally, make sure to include your keywords in the most important parts of your transcript, such as the introduction, summary, and key takeaways. By doing so, you can improve the chances of your video ranking higher in search results and increase its visibility to your target audience. Furthermore, using keywords in your transcript can also help you to create a more accurate and relevant video title, description, and tags, which are all essential elements of YouTube SEO. By optimizing your transcript with keywords, you can create a solid foundation for your video's SEO and increase its chances of success on YouTube.