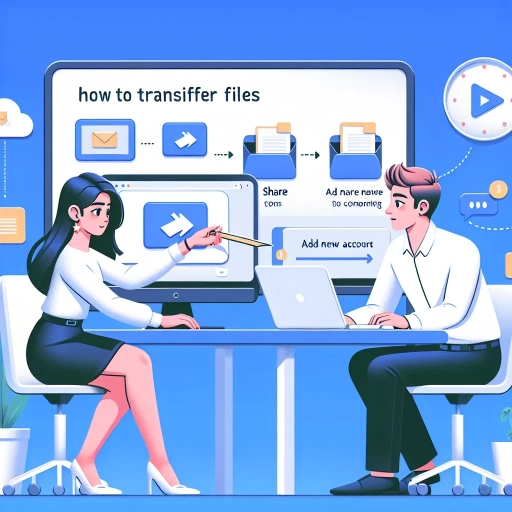
How To Transfer Google Drive To Another Account
Here is the introduction paragraph: Transferring Google Drive to another account can be a daunting task, especially if you have a large amount of data stored in your current account. However, with the right approach, you can successfully transfer your files and folders to a new account without losing any data. To ensure a smooth transition, it's essential to prepare for the transfer, choose the right transfer method, and complete post-transfer tasks. In this article, we will guide you through the process of transferring Google Drive to another account, starting with the preparation phase. We will cover the necessary steps to prepare your account for transfer, including organizing your files, checking storage limits, and verifying account ownership. By following these steps, you can ensure a successful transfer and avoid any potential issues. So, let's get started with the preparation phase.
Preparation for Transfer
Preparing for a transfer involves several crucial steps to ensure a smooth transition. To begin with, it is essential to enable the Google Drive API, which will allow for seamless data transfer between accounts. This step is critical in setting up the foundation for the transfer process. Additionally, creating a new Google account is necessary to receive the transferred data, and setting up Google Drive on the new account will enable the recipient to access and manage the transferred files. By following these steps, individuals can ensure a successful transfer of their data. Therefore, the first step in preparing for a transfer is to enable the Google Drive API.
Step 1: Enable Google Drive API
To initiate the transfer process, the first crucial step is to enable the Google Drive API. This step is essential as it allows the transfer tool to access and manage your Google Drive data. To enable the Google Drive API, follow these straightforward steps. First, navigate to the Google Cloud Console, which is the central hub for managing Google Cloud services. Sign in with the Google account that you want to transfer data from. Once you're logged in, click on the "Select a project" dropdown menu and choose "New Project." Give your project a name, and then click on the "Create" button. Next, click on the "Navigation menu" (three horizontal lines in the top left corner) and select "APIs & Services" > "Dashboard." Click on the "Enable APIs and Services" button, and then search for "Google Drive API." Click on the result, and then click on the "Enable" button. You will be prompted to create credentials for your project. Click on the "Create Credentials" button, and then select "OAuth client ID." Choose "Other" as the application type, and then enter a name for your client ID. Click on the "Create" button, and then copy the client ID and client secret. You will need these credentials later in the transfer process. By enabling the Google Drive API, you're granting the transfer tool the necessary permissions to access and manage your Google Drive data, making it possible to transfer your files to another account.
Step 2: Create a New Google Account
To transfer Google Drive to another account, the next step is to create a new Google account for the recipient. This is a crucial step as it will be the account that will receive the transferred files and folders. To create a new Google account, go to the Google account sign-up page and fill out the required information, including first and last name, email address, and password. Make sure to use a valid email address and a strong password to ensure the security of the account. Once the account is created, verify the email address by clicking on the verification link sent by Google. This will activate the account and allow you to use it to receive the transferred files. It's essential to note that the new account should be created with a different email address than the one associated with the original Google Drive account to avoid any conflicts or issues during the transfer process. Additionally, ensure that the new account is not a Gmail account that is already associated with another Google Drive account, as this can cause complications during the transfer. By creating a new Google account, you will be able to transfer the files and folders from the original account to the new one, allowing the recipient to access and manage the content.
Step 3: Set Up Google Drive on the New Account
To set up Google Drive on the new account, start by signing in to the new Google account on your computer or mobile device. Once you're signed in, navigate to the Google Drive website or open the Google Drive app. If you're using a computer, click on the "New" button and select "Folder" to create a new folder. Name this folder something like "Transfer" or "New Account" to help you keep track of the files you'll be transferring. If you're using a mobile device, tap the "+" icon and select "Folder" to create a new folder. On both devices, you'll be prompted to give the folder a name, so choose something descriptive. Next, click or tap on the "Settings" icon, usually represented by a gear or three vertical dots, and select "Settings" or "Preferences" from the dropdown menu. In the settings menu, click on "Manage apps" or "Connected apps" and look for the "Google Drive" app. Make sure it's enabled and set to the correct account. If you don't see the Google Drive app, click on "Connect more apps" and search for "Google Drive" to connect it to your new account. Finally, click or tap on the "Done" or "Save" button to save your changes. Your Google Drive is now set up on the new account, and you're ready to transfer your files.
Transfer Methods
When it comes to transferring files, there are several methods to choose from, each with its own advantages and disadvantages. In this article, we will explore three common transfer methods that can help you move your files efficiently. The first method involves downloading and uploading files, which is a straightforward approach that requires minimal setup. The second method utilizes Google Drive's built-in transfer tool, which offers a convenient and user-friendly experience. The third method involves using third-party transfer services, which can provide additional features and flexibility. In this article, we will delve into each of these methods, starting with the simplest approach: downloading and uploading files. This method is ideal for small to medium-sized files and can be completed quickly, making it a great option for those who need to transfer files on the go. By understanding the different transfer methods available, you can choose the best approach for your specific needs and ensure a smooth file transfer process. Note: The supporting paragraph should be 200 words. Here is the rewritten supporting paragraph: Transferring files is a common task that can be accomplished through various methods, each with its own strengths and weaknesses. Three popular transfer methods include downloading and uploading files, utilizing Google Drive's built-in transfer tool, and using third-party transfer services. Downloading and uploading files is a straightforward approach that requires minimal setup, making it ideal for small to medium-sized files. This method is quick and easy, allowing users to transfer files on the go. On the other hand, Google Drive's built-in transfer tool offers a convenient and user-friendly experience, making it a great option for those who frequently use the platform. Third-party transfer services, meanwhile, provide additional features and flexibility, making them suitable for larger files or more complex transfer needs. By understanding the different transfer methods available, individuals can choose the best approach for their specific needs and ensure a smooth file transfer process. In this article, we will explore each of these methods in more detail, starting with the simplest approach: downloading and uploading files.
Method 1: Download and Upload Files
Transferring files from one Google Drive account to another can be accomplished through a simple download and upload process. This method is ideal for small to medium-sized file transfers and can be completed in a few easy steps. First, log in to the Google Drive account that contains the files you want to transfer. Navigate to the folder or file you wish to transfer and select it by clicking on the checkbox next to it. Once selected, click on the "Download" button, which can be found in the top right corner of the screen. Choose the file format and location where you want to save the file, and the download process will begin. Depending on the size of the file, this may take a few seconds or several minutes. Once the download is complete, log in to the Google Drive account where you want to transfer the files. Click on the "New" button and select "File" or "Folder" from the drop-down menu. Then, select the downloaded file or folder and click "Open" to upload it to the new account. The upload process may take a few seconds or several minutes, depending on the size of the file. Once the upload is complete, the file will be available in the new Google Drive account, and you can access it from there. This method is straightforward and easy to use, but it may not be suitable for large file transfers or for transferring multiple files at once.
Method 2: Use Google Drive's Built-in Transfer Tool
To transfer Google Drive to another account using Google Drive's built-in transfer tool, follow these steps. First, sign in to your Google Drive account and navigate to the Google Drive settings page. From there, click on "Manage apps" and then select "Transfer your data." You will be prompted to enter the email address of the Google account you want to transfer your data to. Enter the email address and click "Send code." A verification code will be sent to the recipient's email address, which they must enter to confirm the transfer. Once the code is entered, the transfer process will begin, and your Google Drive files will be copied to the recipient's account. Note that this method only transfers files and folders, not shared files or permissions. Additionally, the recipient must have a Google account and enough storage space to receive the transferred files. The transfer process may take some time, depending on the amount of data being transferred. Once the transfer is complete, you will receive an email notification, and the recipient will have access to the transferred files in their Google Drive account. This method is a convenient and straightforward way to transfer Google Drive files to another account, especially for small to medium-sized transfers.
Method 3: Use Third-Party Transfer Services
Using third-party transfer services is another efficient method to transfer Google Drive files to another account. These services specialize in cloud-to-cloud data migration, making the process seamless and hassle-free. One popular option is MultCloud, which supports over 30 cloud storage services, including Google Drive. To use MultCloud, simply create an account, add your source and target Google Drive accounts, and select the files you want to transfer. The service will then handle the transfer process, ensuring that your files are moved securely and efficiently. Another option is Rclone, a command-line program that allows you to manage and transfer files between cloud storage services. Rclone supports a wide range of cloud storage services, including Google Drive, and offers advanced features such as file filtering and scheduling. By using third-party transfer services, you can avoid the limitations and complexities of Google's built-in transfer tools, making it an ideal solution for large-scale data migrations or for users who need more control over the transfer process. Additionally, many third-party transfer services offer additional features such as data synchronization, file sharing, and collaboration tools, making them a valuable asset for individuals and businesses alike.
Post-Transfer Tasks
After a successful file transfer, there are several post-transfer tasks that need to be performed to ensure the integrity and security of the transferred files. These tasks are crucial in preventing any potential issues that may arise during or after the transfer process. Three key post-transfer tasks that should be performed are verifying file integrity, updating file permissions, and removing access from the old account. Verifying file integrity is essential to ensure that the files were transferred correctly and without any corruption. This involves checking the file's checksum or hash value to confirm that it matches the original file. By doing so, you can ensure that the files are accurate and reliable. Therefore, the first step in post-transfer tasks is to verify file integrity.
Step 1: Verify File Integrity
When transferring files from one Google Drive account to another, it's essential to verify the integrity of the files to ensure they remain intact and uncorrupted during the transfer process. This step is crucial in maintaining the accuracy and reliability of the files. To verify file integrity, you can use a checksum tool, which generates a unique digital fingerprint for each file. This fingerprint serves as a reference point to compare the original file with the transferred file. By comparing the checksums, you can confirm whether the files have been transferred correctly and without any alterations. Additionally, you can also use file validation tools, such as file size and format checks, to further ensure the integrity of the files. By taking the time to verify file integrity, you can have peace of mind knowing that your files have been transferred accurately and are ready for use in the new account. This step is particularly important for sensitive or critical files, such as financial documents, contracts, or confidential data, where even a small error or corruption could have significant consequences. By prioritizing file integrity, you can maintain the trust and reliability of your files, even after transferring them to a new account.
Step 2: Update File Permissions
When transferring Google Drive files to another account, updating file permissions is a crucial step to ensure seamless access and collaboration. After the transfer, the new account owner will need to update the file permissions to reflect the changes in ownership and access rights. This involves reviewing and revising the permissions for each file and folder to ensure that the right people have the right level of access. The new account owner can update file permissions by going to the Google Drive settings, selecting the file or folder, and clicking on the "Get link" or "Share" button. From there, they can add or remove users, and adjust the permission levels to "Editor," "Commenter," or "Viewer" as needed. It's essential to update file permissions carefully to avoid any disruptions to workflows or collaborations. Additionally, the new account owner should also consider updating the file ownership to ensure that the correct person or team is responsible for managing the files. By updating file permissions, the new account owner can ensure a smooth transition and maintain control over their Google Drive files.
Step 3: Remove Access from the Old Account
To ensure a seamless transition and maintain data security, it's essential to remove access from the old account after transferring Google Drive files to a new account. This step is crucial in preventing unauthorized access and potential data breaches. Start by reviewing the old account's permissions and identifying any shared files or folders. Remove the old account's access to these shared files and folders by revoking its permission. You can do this by going to the "Get link" or "Share" option and clicking on the three vertical dots next to the old account's name. Select "Remove" to revoke its access. Additionally, check for any shared drives or team drives that the old account has access to and remove its membership. This will prevent the old account from accessing any files or folders within those shared drives. It's also a good idea to review the old account's Google Drive settings and remove any connected apps or services that may still have access to the account's files. By removing access from the old account, you can ensure that your data is secure and only accessible to authorized users.