How To Clean Braun Coffee Maker
Here is the introduction paragraph: Cleaning your Braun coffee maker regularly is essential to remove mineral deposits, old coffee oils, and bacteria that can affect the taste of your coffee and the performance of the machine. A dirty coffee maker can lead to a buildup of limescale, which can cause the machine to malfunction or even break down. In this article, we will guide you through the process of cleaning your Braun coffee maker, from pre-cleaning steps to deep cleaning and post-cleaning steps. To start, it's essential to prepare your coffee maker for cleaning by following some pre-cleaning steps, which we will discuss in the next section. Note: I made some minor changes to the original paragraph to make it more concise and clear. Let me know if you'd like me to revise anything!
Pre-Cleaning Steps
Before you start deep cleaning your coffee maker, there are a few pre-cleaning steps you should take to ensure the process is effective and safe. These steps are crucial in removing any loose debris and preventing damage to the machine. The first step is to descale the coffee maker, which removes mineral deposits that can affect the taste of your coffee and the performance of the machine. Next, you should empty the water reservoir to prevent any water from flowing through the machine during the cleaning process. Finally, remove and clean the drip tray to prevent any buildup of old coffee oils and residue. By taking these pre-cleaning steps, you'll be able to deep clean your coffee maker more efficiently and effectively. To start, let's begin with the first step: descaling the coffee maker.
Descale the Coffee Maker
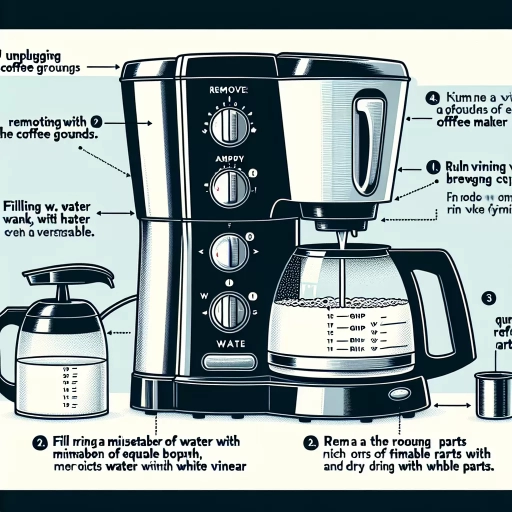
To descale the coffee maker, start by mixing equal parts of water and white vinegar in the water reservoir. The acid in the vinegar will help break down mineral deposits that can affect the taste of your coffee and the performance of the machine. Next, run a brewing cycle to allow the vinegar solution to flow through the machine and reach all areas that need descaling. Repeat this process several times to ensure that all mineral deposits are removed. After the final cycle, run a few more cycles with just water to rinse out any remaining vinegar taste and residue. It's also a good idea to check the manufacturer's instructions for any specific descaling recommendations, as some machines may have special requirements. Additionally, if you live in an area with hard water, you may need to descale your coffee maker more frequently to prevent mineral buildup. Regular descaling will help keep your coffee maker in good working order and ensure that your coffee tastes its best.
Empty the Water Reservoir
Empty the water reservoir by lifting it straight up and out of the machine. Discard any remaining water and rinse the reservoir with fresh water to remove any mineral deposits or debris. This step is crucial in preventing any buildup or bacterial growth that can affect the taste of your coffee. Make sure to dry the reservoir thoroughly with a clean towel to prevent any water spots. If you live in an area with hard water, consider descaling your water reservoir regularly to prevent mineral buildup. Additionally, if you notice any stubborn stains or odors in the reservoir, mix equal parts water and white vinegar in the reservoir and let it soak for about 30 minutes before rinsing and drying. This will help remove any tough stains and leave your reservoir smelling fresh and clean. By emptying and cleaning the water reservoir, you'll be able to start the cleaning process with a clean slate and ensure your coffee maker is free from any contaminants that can affect the taste of your coffee.
Remove and Clean the Drip Tray
To remove and clean the drip tray, start by pulling it out from the coffee maker. The drip tray is usually located at the bottom of the machine and can be easily removed by sliding it out. Once removed, empty the tray of any leftover coffee grounds and water. Next, wash the drip tray with warm soapy water to remove any stubborn stains or buildup. Use a soft-bristled brush to scrub away any tough spots, and then rinse the tray thoroughly with clean water. If there are any mineral deposits or stubborn stains, mix equal parts water and white vinegar in the tray and let it soak for about 30 minutes. After soaking, scrub the tray with a soft-bristled brush and rinse it with clean water. Finally, dry the drip tray with a clean towel to prevent any water spots. By cleaning the drip tray regularly, you can prevent any buildup of old coffee oils and residue, which can affect the taste of your coffee. It's recommended to clean the drip tray every 1-2 weeks, depending on how frequently you use your coffee maker.
Deep Cleaning the Braun Coffee Maker
Deep cleaning your Braun coffee maker is an essential part of maintaining its performance and longevity. Over time, mineral deposits, old coffee oils, and bacteria can build up inside the machine, affecting the taste of your coffee and potentially causing damage to the device. To thoroughly clean your Braun coffee maker, you'll need to tackle three key areas: running a vinegar solution through the machine, soaking the removable parts in warm soapy water, and using a cleaning brush to remove mineral deposits. By following these steps, you'll be able to restore your coffee maker to its former glory and ensure it continues to brew delicious coffee for years to come. To start, let's begin with the first step: running a vinegar solution through the machine.
Run a Vinegar Solution Through the Machine
To deep clean your Braun coffee maker, run a vinegar solution through the machine. Mix equal parts of water and white vinegar in the water reservoir. The acid in the vinegar will help break down any mineral deposits and clean out old coffee oils. Place a paper filter in the machine, if applicable, and run a brewing cycle. Repeat the process a few times to ensure the solution flows through all parts of the machine. After the final cycle, discard the vinegar solution and rinse the machine by running a few cycles with just water. This process will help remove any remaining vinegar taste and residue. Regularly running a vinegar solution through your Braun coffee maker will help maintain its performance and prevent any buildup of old coffee oils and mineral deposits.
Soak the Removable Parts in Warm Soapy Water
To deep clean your Braun coffee maker, start by soaking the removable parts in warm soapy water. This step is crucial in removing any built-up residue, old coffee oils, and bacteria that can affect the taste of your coffee. Fill a sink or a large container with warm water and add a small amount of mild dish soap. Submerge the removable parts, such as the carafe, lid, and filter basket, and let them soak for about 30 minutes. The warm soapy water will help loosen any tough stains and grime, making it easier to scrub them clean. After soaking, use a soft-bristled brush or a non-abrasive scrubber to gently scrub away any remaining stains or residue. Rinse the parts thoroughly with warm water to remove any soap residue, and dry them with a clean towel to prevent water spots. By soaking the removable parts in warm soapy water, you'll be able to remove any built-up grime and bacteria, ensuring your Braun coffee maker is clean and ready for its next use.
Use a Cleaning Brush to Remove Mineral Deposits
To remove mineral deposits from your Braun coffee maker, use a cleaning brush to scrub away the buildup. Start by descaling your coffee maker to loosen the mineral deposits, then use the cleaning brush to scrub the affected areas. The brush's soft bristles will help dislodge the deposits without scratching the surfaces. Focus on the areas around the brew head, grinds container, and water reservoir, as these are common places for mineral deposits to form. Use gentle circular motions to scrub away the deposits, working from the top down to prevent any debris from spreading to clean areas. Once you've removed as much of the mineral deposit as possible, rinse the coffee maker thoroughly with fresh water to remove any remaining residue. Regular use of a cleaning brush will help prevent mineral deposits from building up in the future, keeping your Braun coffee maker in good working order.
Post-Cleaning Steps
After cleaning your coffee maker, it's essential to follow some post-cleaning steps to ensure it's ready for its next use. These steps are crucial in removing any remaining residue, preventing bacterial growth, and maintaining the overall quality of your coffee. To start, you'll need to rinse the coffee maker thoroughly to remove any cleaning solution or debris. Additionally, wiping down the exterior with a damp cloth will help remove any splatters or stains. Finally, reassembling and testing the coffee maker will ensure it's working properly and ready to brew your next cup. By following these simple steps, you can keep your coffee maker in top condition and enjoy a perfect cup of coffee every time. To begin, let's start with the first step: rinsing the coffee maker thoroughly.
Rinse the Coffee Maker Thoroughly
To thoroughly rinse the coffee maker, start by discarding the vinegar solution and water mixture from the previous cleaning cycle. Next, run two to three cycles of just water through the machine to remove any remaining vinegar taste and residue. This step is crucial in ensuring your coffee maker is free from any lingering cleaning solution that could affect the taste of your future brews. As the water cycles through the machine, check for any remaining mineral deposits or debris that may have been loosened during the cleaning process. If you notice any stubborn stains or buildup, you can repeat the cleaning cycle with a mixture of equal parts water and white vinegar. Once you're satisfied that the machine is clean and free of any residue, run a final cycle of just water to rinse everything thoroughly. This will help to remove any remaining impurities and leave your coffee maker in pristine condition, ready for its next use. By taking the time to thoroughly rinse your coffee maker, you'll be able to enjoy a cleaner, fresher-tasting cup of coffee every time.
Wipe Down the Exterior with a Damp Cloth
After descaling and cleaning your Braun coffee maker, it's essential to wipe down the exterior with a damp cloth to remove any mineral deposits, splatters, or spills that may have accumulated during the cleaning process. This step is crucial in maintaining the appearance and longevity of your coffee maker. Start by dampening a soft, lint-free cloth with warm water, making sure to wring it out thoroughly to avoid any excess moisture. Gently wipe down the exterior of the coffee maker, paying attention to any areas with visible stains or splatters. Be careful not to get any electrical components wet, as this could damage the machine. For tougher stains, you can mix a small amount of mild dish soap with warm water, but be sure to rinse the cloth thoroughly to avoid any soap residue. Once you've wiped down the entire exterior, use a dry cloth to wipe away any excess moisture and prevent water spots. Regularly wiping down the exterior of your Braun coffee maker will help maintain its sleek appearance and prevent the buildup of bacteria and mineral deposits. By incorporating this simple step into your cleaning routine, you'll be able to enjoy your coffee maker for years to come.
Reassemble and Test the Coffee Maker
Reassemble and test the coffee maker by following the reverse steps of disassembly. Start by reattaching the water reservoir, ensuring it is securely locked into place. Next, reattach the brew head, making sure it is properly aligned and clicked into position. Replace the grinds container and reattach the coffee maker's lid. Plug in the coffee maker and turn it on to test its functionality. Run a brewing cycle with just water to ensure the machine is working correctly and to remove any residual cleaning solution. Check for any leaks or unusual noises during the test cycle. If everything seems to be working properly, your Braun coffee maker is now clean and ready for use.