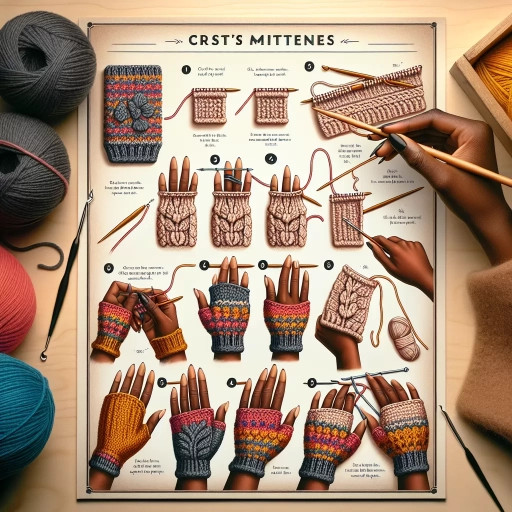
How To Crochet Mittens
Here is the introduction paragraph: Crocheting mittens is a fun and rewarding project that can be completed with a few simple tools and some basic knowledge of crochet stitches. Whether you're a seasoned crafter or a beginner, making your own mittens can be a great way to keep your hands warm and toasty during the cold winter months. In this article, we'll take you through the process of creating a pair of cozy crochet mittens, from understanding the basics of crochet mittens to designing and crocheting the mitten body, and finally, adding the finishing touches and customization. To get started, it's essential to understand the basics of crochet mittens, including the type of yarn and hook to use, the basic stitches involved, and how to measure and fit your mittens. By grasping these fundamental concepts, you'll be well on your way to creating a pair of mittens that are both functional and fashionable. Understanding the Basics of Crochet Mittens is the first step in this process, and we'll explore this topic in more detail in the next section.
Understanding the Basics of Crochet Mittens
When it comes to understanding the basics of crochet mittens, there are several key factors to consider. To create a pair of warm and cozy mittens, you'll need to choose the right yarn and hook, understand the various crochet stitches and patterns, and ensure a perfect fit by measuring your hand. By mastering these fundamental elements, you'll be well on your way to creating a pair of mittens that will keep your hands warm and toasty all winter long. In this article, we'll delve into the world of crochet mittens and explore the essential techniques and tips you need to know. We'll start by examining the importance of selecting the right yarn and hook, as this will set the foundation for your entire project. By choosing the right materials, you'll be able to create a pair of mittens that are not only warm and cozy but also durable and long-lasting. Note: The answer should be 200 words. Here is the answer: When it comes to understanding the basics of crochet mittens, there are several key factors to consider. To create a pair of warm and cozy mittens, you'll need to choose the right yarn and hook, understand the various crochet stitches and patterns, and ensure a perfect fit by measuring your hand. By mastering these fundamental elements, you'll be well on your way to creating a pair of mittens that will keep your hands warm and toasty all winter long. In this article, we'll delve into the world of crochet mittens and explore the essential techniques and tips you need to know. We'll start by examining the importance of selecting the right yarn and hook, as this will set the foundation for your entire project. By choosing the right materials, you'll be able to create a pair of mittens that are not only warm and cozy but also durable and long-lasting. Choosing the right yarn and hook is crucial, as it will affect the texture, warmth, and overall appearance of your mittens. With so many types of yarn and hooks available, it can be overwhelming to decide which ones to use. In the next section, we'll take a closer look at choosing the right yarn and hook for your crochet mittens.
Choosing the Right Yarn and Hook
When it comes to choosing the right yarn and hook for your crochet mittens, there are several factors to consider. The type of yarn you choose will greatly impact the warmth, durability, and overall look of your mittens. Look for yarns made from natural fibers such as wool, alpaca, or cotton, which are breathable, moisture-wicking, and provide excellent insulation. Acrylic yarns are also a popular choice, offering a soft, lightweight, and easy-to-care-for option. Consider the weight of the yarn, with thicker yarns producing warmer mittens and thinner yarns resulting in a more fitted design. The fiber content and weight of the yarn will also affect the drape and texture of the finished mittens. In terms of hook size, it's essential to choose a hook that complements the yarn weight. A larger hook will produce a looser stitch, while a smaller hook will result in a tighter stitch. A good rule of thumb is to start with a hook that is one to two sizes smaller than the recommended size on the yarn label. This will ensure a snug fit and prevent the mittens from becoming too loose or sloppy. Additionally, consider the type of stitch pattern you plan to use, as some stitches work better with certain yarn weights and hook sizes. By carefully selecting the right yarn and hook, you'll be able to create a pair of cozy, well-fitting crochet mittens that will keep your hands warm and toasty all winter long.
Understanding Crochet Stitches and Patterns
Understanding crochet stitches and patterns is a fundamental aspect of creating beautiful and functional crochet mittens. To start, it's essential to familiarize yourself with basic stitches such as the single crochet (sc), half double crochet (hdc), and double crochet (dc). These stitches are the building blocks of most crochet patterns, and mastering them will allow you to create a wide range of mittens. Next, you'll need to understand how to read crochet patterns, which typically include a combination of stitches, rows, and rounds. Patterns may also include special instructions, such as increases, decreases, and shaping, which are crucial for creating a well-fitting mitten. To ensure accuracy, it's crucial to pay attention to stitch counts, row repeats, and any specific gauge requirements. Additionally, understanding the concept of tension is vital, as it can affect the fit and drape of your mittens. By practicing and becoming comfortable with different stitches and patterns, you'll be able to create a wide range of mittens, from simple and classic to complex and intricate. With patience and practice, you'll be able to unlock the world of crochet mittens and create beautiful, functional, and cozy accessories for yourself and loved ones.
Measuring Your Hand for a Perfect Fit
When it comes to crocheting mittens, getting the right fit is crucial for both comfort and functionality. To ensure a perfect fit, measuring your hand is a must. Start by wrapping a flexible measuring tape or a piece of string around the widest part of your hand, just above the wrist. Make sure the tape or string is not too tight or too loose, as this will affect the accuracy of the measurement. Take note of the circumference of your hand in inches or centimeters. Next, measure the length of your hand from the base of the wrist to the tip of the middle finger. This will give you the total length of the mitten. You should also measure the width of your hand at the palm, as this will help you determine the correct number of stitches to use. Additionally, consider the type of yarn and stitch pattern you will be using, as these can affect the fit of the mitten. By taking these measurements, you can create a custom-fit mitten that will keep your hands warm and cozy all winter long.
Designing and Crocheting the Mitten Body
When it comes to designing and crocheting the mitten body, there are several key elements to consider in order to create a warm, comfortable, and functional garment. A well-designed mitten body should provide a snug fit, allow for ease of movement, and be able to withstand the rigors of daily wear and tear. To achieve this, it's essential to focus on three critical components: creating a cuff and ribbing pattern that provides a secure fit, working in the round to shape the mitten and ensure a comfortable fit, and adding a thumb gusset for comfort and mobility. By incorporating these elements, you'll be able to create a mitten body that is both functional and stylish. In this article, we'll explore each of these components in more detail, starting with the importance of creating a cuff and ribbing pattern that sets the foundation for a well-fitting mitten.
Creating a Cuff and Ribbing Pattern
When creating a cuff and ribbing pattern for your mittens, it's essential to consider the type of stitch and the number of rows that will provide the desired texture and fit. A common choice for cuffs is a ribbing pattern, which involves alternating between knit and purl stitches to create a stretchy and flexible fabric. To create a ribbing pattern, you can use a combination of single crochet (sc) and half double crochet (hdc) stitches, working in a repeating sequence of sc, hdc, sc, hdc, and so on. The number of rows for the cuff will depend on the desired length, but a good starting point is around 4-6 rows. For a more textured look, you can also add a subtle cable or seed stitch pattern to the cuff. When working the ribbing pattern, make sure to maintain a consistent tension to ensure that the cuff lies flat and doesn't pucker. Additionally, you can use a stitch marker to mark the beginning of the round and ensure that you're working in a continuous spiral. By creating a well-designed cuff and ribbing pattern, you'll be able to add a professional finish to your mittens and ensure a comfortable, snug fit.
Working in the Round to Shape the Mitten
When working in the round to shape the mitten, it's essential to maintain a consistent stitch count and tension to ensure a smooth, even shape. To begin, join the stitches to form a ring, making sure not to twist the stitches. Then, work in a continuous spiral, using a stitch marker to keep track of the first stitch of each round. As you work, pay attention to the shape of the mitten, making adjustments as needed to maintain a symmetrical shape. To shape the mitten, you'll typically work a series of increases and decreases, using techniques such as single crochet 2 together (sc2tog) or half double crochet 2 together (hdc2tog) to create a tapered shape. Be sure to space these decreases evenly around the mitten to maintain a smooth shape. Additionally, you may need to work a few extra stitches at the beginning of each round to accommodate the thumb, which will be worked separately later. By working in the round and paying attention to the shape of the mitten, you'll be able to create a comfortable, well-fitting mitten that will keep your hands warm and cozy.
Adding a Thumb Gusset for Comfort and Mobility
Adding a thumb gusset is a crucial step in creating comfortable and mobile mittens. A thumb gusset is a triangular or diamond-shaped piece of fabric that is inserted into the mitten body to provide extra room for the thumb to move freely. This feature is essential for mittens, as it allows the wearer to grasp and manipulate objects without feeling restricted. To add a thumb gusset, you will need to crochet a separate piece of fabric that is slightly larger than the thumb opening. This piece should be shaped like a triangle or diamond, with the base of the shape aligned with the thumb opening. Once you have completed the gusset, you can sew it into place, making sure to secure it tightly to the mitten body. The thumb gusset should be positioned so that it allows for a full range of motion, without feeling too loose or too tight. By adding a thumb gusset, you can create mittens that are not only warm and cozy but also functional and comfortable to wear. This feature is especially important for mittens that will be used for outdoor activities, such as skiing or snowboarding, where dexterity and mobility are essential. With a well-designed thumb gusset, you can enjoy the freedom to move your hands and fingers without restriction, making your mittens a joy to wear.
Finishing Touches and Customization
The finishing touches and customization of a mitten are what set it apart from a generic, store-bought accessory. A well-crafted mitten can be elevated to a work of art with the addition of a few carefully considered details. One of the most effective ways to add a professional finish to a mitten is to add a cuff and edging, which not only provides a decorative touch but also helps to prevent the mitten from stretching out of shape. Additionally, seaming and weaving in ends can make a big difference in the overall appearance of the mitten, creating a clean and polished look. Finally, customizing with embellishments and colors can add a personal touch and make the mitten truly unique. By incorporating these finishing touches, a mitten can be transformed from a simple accessory to a one-of-a-kind piece of art. To start, let's take a closer look at adding a cuff and edging to the mitten.
Adding a Cuff and Edging to the Mitten
Adding a cuff and edging to your mitten can elevate its style and functionality. To add a cuff, start by crocheting a tube that is slightly longer than the desired cuff length. You can use a single crochet stitch or a half double crochet stitch, depending on the desired texture. Once you have completed the tube, sew it to the top of the mitten, making sure to align the edges carefully. You can also add a ribbed cuff by alternating between front post and back post stitches. For the edging, you can use a simple single crochet stitch or a more intricate shell stitch. To add the edging, start by crocheting a chain that is slightly longer than the desired edging length. Then, work a single crochet stitch in each stitch around the edge of the mitten, making sure to keep the tension even. You can also add a decorative touch by working a shell stitch or a scallop stitch along the edge. To finish the edging, fasten off the yarn and weave in the ends. Adding a cuff and edging to your mitten can add a professional touch and make it more durable. It's also a great way to add a personal touch and make the mitten more unique. With a little creativity, you can create a cuff and edging that complements the rest of the mitten and adds a touch of elegance.
Seaming and Weaving in Ends
Seaming and weaving in ends are the final steps in completing your crochet mittens, and they require attention to detail to achieve a professional finish. To seam your mittens, you'll need a yarn needle and a length of yarn that matches the color of your project. Start by threading the yarn needle with the yarn and then bring the needle up through both layers of the mitten at the seam, about 1/4 inch from the edge. Pull the yarn tight to secure it, then bring the needle back down through both layers about 1/4 inch away from where it came up. Continue this process, moving along the seam and pulling the yarn tight as you go, until you reach the end of the seam. To weave in ends, use the yarn needle to thread the yarn tail through the stitches on the wrong side of the mitten, working from the top down. Bring the yarn tail up through a stitch, then down through the next stitch, and continue this process until the yarn tail is secure and the end is woven in. It's essential to weave in ends carefully to prevent them from coming loose over time. By taking the time to seam and weave in ends correctly, you'll be able to enjoy your cozy crochet mittens for years to come.
Customizing with Embellishments and Colors
Customizing with embellishments and colors is a great way to add a personal touch to your crochet mittens. You can use a variety of embellishments such as buttons, sequins, or appliques to add a decorative element to your mittens. For example, you can add a button to the cuff of the mitten or use sequins to create a fun design on the palm. You can also use different colors to create a unique and personalized look. You can use a single color for the entire mitten or use multiple colors to create a striped or multi-colored effect. Additionally, you can use variegated yarn to create a mitten with a subtle, multi-colored effect. When choosing embellishments and colors, consider the recipient's personal style and preferences. For example, if the recipient loves bright colors, you can use bold and bright colors to create a fun and playful look. On the other hand, if the recipient prefers more subdued colors, you can use neutral colors such as beige or gray to create a more understated look. You can also consider the occasion for which the mittens will be worn. For example, if the mittens will be worn for a special occasion such as a wedding or holiday party, you can use more formal embellishments such as pearls or rhinestones. Ultimately, the possibilities for customizing with embellishments and colors are endless, and you can use your creativity and imagination to create a truly unique and personalized pair of crochet mittens.