How To Screen Record On Ipad
 Today's digital world makes it easier than ever to capture and share information. Among the most popular devices for doing so is the iPad. But how do you maximize its capabilities, such as screen recording, to truly seize its potential? This article will uncover the secrets and simplify the process for you. We start by delving into the essentials of screen recording on an iPad – understanding the importance and the tech behind it. Next, we offer a comprehensive step-by-step guide to ensure that even beginners can start recording their screens effortlessly. Finally, we provide insightful methods to optimize your screen recordings, enhancing both their visual and informational quality. Now, let's embark on this insightful journey and unravel the layers to understand the essentials of screen recording on your iPad.
Understanding the Essentials of Screen Recording on iPad
Understanding the essentials of screen recording on iPad is crucial in the modern digital era, where capturing and sharing content has become an integral part of our routine. This procedure is largely straightforward, but to gain a comprehensive grasp, one must delve into three cardinal aspects: conceptualizing screen recording, the benefits it provides specifically on iPad, and the tools available to perform it effectively. Conceptualizing screen recording is the first step, wherein we explore its basic premise, purpose, and procedure. This involves understanding what screen recording is, how it works, and why it is essential. From capturing video tutorials to displaying interactive graphic illustrations, screen recording serves myriad purposes and knowing its functionality will give us a solid foundation to utilize this feature effectively. Next, we dive into the various benefits of screen recording on iPad, discussing how it enriches user experience, aids in interactive learning, and promotes efficient content sharing. The iOS environment provides users with multiple advantages including superior resolution, ease of use, and optimal performance, enhancing the screen recording experience significantly. Lastly, we focus on the different tools available that enable successful screen recording on iPad. From in-built iOS functions to high-functioning third-party apps, these tools can cater to diverse content creation needs. Embracing these core principles will help us grasp the nuances of screen recording on iPad, allowing us to attract, educate, and engage our audience more effectively. Now, let's start by conceptualizing screen recording and understanding its role in our digital journey.
Conceptualizing Screen Recording
Conceptualizing Screen Recording When you think about capturing moments or presenting information, various forms have probably crossed your mind— photographs, written text, and sound recordings. However, there's another method that's gaining traction because of its efficiency and versatility — screen recording. Screen recording is literally what it sounds like— recording whatever is happening on your device's screen. It is capable of capturing anything from a fleeting moment during a video chat to engaging, step-by-step tutorials for a tech product. In the realm of portable devices, screen recording on an iPad offers a unique proposition. This feature transforms the iPad from a mere consumption device to one where creation becomes a focal point. The process merges the power of visual content with the convenience of handheld technology. It empowers users to create high-quality digital content — may it be a demonstration on how to use an app, a record of gameplay, or an interactive lecture for remote learning. Screen recording on an iPad isn't just about capturing the content, but also about grasping the context, the user experience. It provides a firsthand view into the interactions occurring on the screen. Unlike regular video footage, screen recordings expose the interface, clicks, swipes, and typing — every action that led to a particular result. This transparency creates a deeper level of understanding and engagement, essential in an era where digital experiences are becoming the norm. Conceptualizing screen recording, specifically on an iPad, also requires understanding its potential applications. Entrepreneurs might use it to display their app's features and usability; educators can leverage it to make lessons more interactive; gamers can share their strategies and achievements. It can even aid designers and developers in optimizing user interfaces by capturing user experiences. Recognizing the value of screen recording and its multifaceted applications underlines its critical role in the digital age. Its capabilities not only facilitate the capturing and sharing of digital content but also redefine the methods of connection, communication, and learning. Understanding the essentials of screen recording on an iPad, thus broadens the horizon of digital storytelling possibilities in one's hands.
Benefits of Screen Recording on iPad
Screen recording on iPad offers an array of substantial benefits that contribute to an enriching digital experience. It serves as a cutting-edge feature offered by Apple, ensuring a seamless journey between the virtual and real world to understand various functionalities, resolve technical glitches, and learn innovative aspects. From capturing high-quality videos or gameplays to guiding someone else through a complex process, it has manifold uses and advantages that warrant its prominence. One of the most noteworthy benefits of screen recording on an iPad is its capacity for effective communication and demonstration. Visual content is far more digestible and compelling than written instructions or verbal explanations alone; hence, screen recordings make conveying complex ideas simple and straightforward. Whether you are an instructor showing students how to navigate a new application, a business showing customers how to use a product, or an individual trying to demonstrate a process or issue for troubleshooting, screen recordings substantiate the message and make comprehension easier. The feature is fundamental for app developers and testers since it provides an efficient way to detect glitches and gives intricate insights into user interaction. Instead of painstakingly trying to replicate a problem reported by a user, developers use recordings to visualize the issue, making it quicker and easier to identify the problem and fix it. Furthermore, for gamers and artists, screen recording on iPad has reached paramount importance. Gamers can record their gameplay showcasing their skills, strategies, and achievements, and share them on social media or use them as a feedback tool to improve their game. Artists, on the other hand, can record their creation process in real-time, providing depth to their work, and connecting more profoundly with their audience. Screen recording also paves the way for personalized content, enhancing the experience of consumer engagement. It can be a potent tool in personalized marketing or customer support strategy, influencing customer loyalty and satisfaction. Moreover, this feature increases productivity by fostering learning and development. It compensates for the distance in remote learning or work settings, supporting the delivery of instructions and receiving feedback, thereby actuating improved performance. To sum up, the significance of screen recording on the iPad lies in its versatility and convenience. It's a significant enhancement that allows users to communicate, demonstrate, and capture content effectively, bridging gaps between comprehension and application. This useful tool, thus, plays a pivotal role in furnishing a holistic and enriching user experience that is in sync with the evolving digital terrain.
Tools Available for Screen Recording on iPad
Screen recording on iPad can unlock a range of possibilities, providing users with the ability to create vivid, interactive content, document processes, and share messages in a more engaging manner. There are several advanced tools available for this task, adding a degree of versatility to the iPad's native screen recording feature. Tools such as TechSmith's Snagit, a fully fledged screen capture and recording software, can be employed for crafting high-quality recordings on the move. It comes with an easy-to-use interface and a myriad of editing options, permitting users to highlight specific areas, add annotations, or integrate audio commentaries with ease. Another outstanding tool is the DU Recorder, offering a range of features such as live streaming, video editing, and even a GIF maker. It stands out with its capability to record video calls and gameplays in stellar quality, making it an invaluable tool for content creators across different niches. Taking the utility up a notch is Record It!, with its unique feature of face cam reaction inclusion, enhancing the engagement factor of screen recordings. The Screencast-O-Matic app also deserves a mention, particularly for educators and students, as it supports both screen and webcam recording which is beneficial for creating tutorial videos and virtual presentations. Another highlight is its simple to manoeuvre video editor, effective for annotating or adding overlays. Utilizing these screen recording tools on your iPad can truly elevate the quality and coherence of your digital content, infusing it with a dynamic, interactive edge designed to captivate your audience. These tools, with their varied features, can cater to diverse needs making the task of screen recording on iPad seamless and efficient. The best part? Most of these tools offer free versions, enabling users to try them out and discover which ones fit their specific requirements the best. Investing some time in understanding these tools can reap substantial benefits in the long run, boosting the impact and reach of the digital content you produce. Irrespective of whether you’re an educator, content creator, or a casual user, the iPad, supplemented with these power-packed screen recording tools, can become a potent toolset for communication, instruction, and digital storytelling. Just like mastering any new tool, it may take a bit of exploration and practice, but the resulting high-quality screen recordings will be well worth the effort. Harnessing the potential of these tools can indeed help users to share, engage, and instruct with greater effectiveness using their iPads.
Step-by-Step Guide on How to Screen Record on iPad
Embarking on a journey with your iPad through the world of screen recording can look daunting, but with the right guide, it's a breeze. In this comprehensive step-by-step guide, the focus is to usher you through the process efficiently and effectively. This article is divided into three main sections that ensure a well-rounded understanding: Preparation before starting screen recording, the actual process of screen recording, and how to effectively use the screen recording features on your iPad. Firstly, just like any other task, preparation is key to an excellent outcome. In 'Preparation Before Starting Screen Recording', you'll learn how to set your iPad ready for the process. We'll discuss arranging the settings, choosing the right screen recording app, deciding on what to record, and a rundown of some vital pointers to remember before you dive into recording. At the end of this section, your iPad and you will be fully prepared and ready to embark on this exciting recording journey. Stay tuned and let's set the stage.
Preparation Before Starting Screen Recording
Before diving into the step-by-step guide on How to Screen Record on iPad, there's a crucial stage of preparation to ensure your recording is seamless and professional. Correct preparation before initiating the screen recording process is as essential as the recording process itself. Begin with the basics; ensure your iPad is sufficiently charged to prevent battery-related interruptions. Determine the specific area of your screen that you wish to record. Knowing precisely what you plan to capture will guide you in managing your on-screen activities. Next, audition your sound settings. Screen recording on an iPad might involve capturing sound, be it ambient noise or direct vocal instructions. Hence, ascertain the sound quality and adjust the volume levels appropriately. Check for any distracting background noises that could mar the quality of your recording and consequently, the viewer's experience. Plan your activities carefully to steer your recording process. If you're making a tutorial, write a script or at least outline the main points to cover. This preparation guarantees a seamless and cohesive representation of information. It ensures clarity, eliminates redundancy, and maintains viewer engagement. Tidy up your screen. Clear any unnecessary icons, close redundant applications and mute notifications to avoid distractions during the recording process. This preparation not only makes your screen appear more professional, but it also ensures the viewer’s concentration remains solely on the content provided, thereby enhancing comprehension and retention. Finally, stay up-to-date. Ensure your iPad OS and the application to be captured are at their newest versions. Updates usually fix bugs and improve quality, ensuring better output. Additionally, they might even introduce new features that can enrich your recording process. In conclusion, adequate preparation before starting screen recording can spell the difference between a professional output and a mediocre one. It helps maintain a clean and focused approach, makes the process more relaxed, reduces post-processing work, and eventually provides a better viewing experience. Therefore, before you hit that 'record' button, ensure you've checked off each item in this preparation list. Your viewers will thank you for it.
Actual Process of Screen Recording
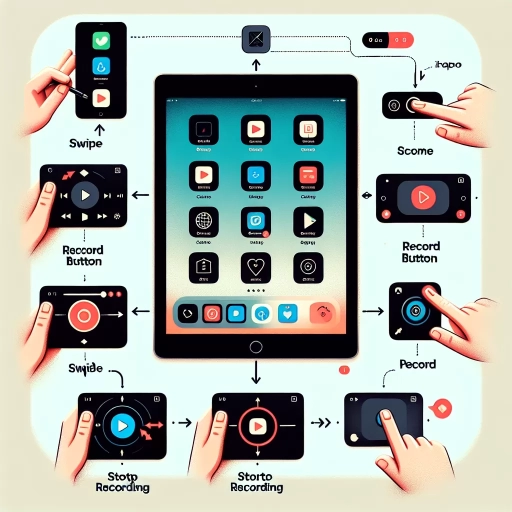
The actual process of screen recording on an iPad is a relatively straightforward and user-friendly feature, designed conveniently to cater to a diverse range of users. To begin with, locate the control center on your device. Made to comply with user-friendliness, the user interface of most iPads has its control center swiped down from the top right corner of the screen, easily accessible at any time. Within this control center, you'll find an array of shortcut features. Among them is the iconic icon of two nested circles. This icon represents the screen recording feature. Tap this icon, and a countdown begins, notifying the user that the screen recording feature is about to start. This pre-recording countdown is an essential element of the screen recording process as it gives the user ample time to prepare. The countdown lasts for three seconds, which is just enough to close the control center and open the desired application you want to record. Once the countdown ends, screen recording begins. Here's where it gets interesting: everything you do on the screen of your iPad will be recorded, every swipe, touch, and rotate. It also means that every open app, received notification, or any action on your screen will be captured as part of the recording. This characteristic of screen recording emphasizes the necessity of careful planning and preparation before activating this feature. To stop the recording, tap the red time indicator at the top of the screen, then tap "Stop". The recording will automatically be saved in your Photos app. Note that screen recording on an iPad also records the audio, which can be an incredibly useful feature for creating tutorials or capturing live action moments. This innate feature of the iPad is an efficient, powerful tool that allows the user to capture, store, and share their on-screen activities. Whether you're a teacher creating a step by-step instructional video, a gamer sharing a thrilling moment from your latest game, or a professional showcasing a demo, the screen recording feature on an iPad can be your ideal partner. Remember, though, that responsible usage is key. Be aware of privacy concerns and always ensure you have permission to record when necessary. And with this understanding and consideration, the actual process of using the screen recording feature on an iPad can open doors to a world of digital expression and storytelling.
Effective Use Screen Recording Features
The effective use of screen recording features is a vital step in creating informational or educational content using your iPad. To appropriately utilize this feature, it is imperative to understand how it works and the potential it provides. Screen recording does not merely capture content but it enhances your digital storytelling method which ultimately boosts engagement. When demonstrating a step-by-step process on your iPad, screen recording offers a clear, detailed, and hands-on approach, which connects well with visual learners. This feature allows for capturing of live, in-action footage of your screen, which can be invaluable when highlighting a detailed or complex process. Similarly, this feature can help you demonstrate applications, websites, or systems that might typically be difficult to explain in writing alone. Screen recording yields videos which can be paused, rewound, or fast-forwarded, giving your audience the flexibility to move at their own pace. This paves the way for easier comprehension and retention of the information conveyed. Furthermore, you can accentuate your explanatory approach by using the audio recording feature. By narratively guiding your audience while displaying the process, you create a comprehensive learning experience. Moreover, it is possible to annotate your screen recordings, adding visual cues to directed actions, like tapping on and swiping across the screen. This helps to draw the viewer's attention to specific areas of the screen, reinforcing essential steps or elements. Hence, meticulous utilization of screen recording features can result in engaging, effective, and efficient learning materials. In essence, capabilities such as live capture, audio recording, and screen annotation deliver more than simple recordings; they open the doorway to more dynamic, engaging, and detailed demonstrations, ultimately enriching the user's learning experience. Consequently, understanding and effectively using the screen recording features on iPad can not only augment digital storytelling but also enhance the overall tutorial, strengthening its impact and value.
Ways to Optimize Your Screen Recordings on iPad
Your iPad offers a wealth of functions that enable you to engage with digital content in versatile ways. One valuable but often underused feature is its ability to record your screen, which can be a great tool for teaching, presenting, or demonstrating a digital process. However, getting the most out of your screen recording requires understanding three vital steps of this process. The first step is fine-tuning the captured content through meticulous editing, which ensures that the final product is clear and comprehensible. Subsequently, mastering the art of sharing and saving these recordings can help you get your presentations to your audience whenever needed. Finally, familiarizing yourself with some tips and tricks for optimal screen recording helps in capturing high-quality videos without the typical glitches we encounter during screen-recordings. Therefore, whether you're a seasoned user or a newbie exploring the iPad's screen recording function, this informative guide will walk you through the process for generating high-quality, engaging, and useful screen recordings. In the following sections, we will dive into the specifics on how to make the necessary edits on your screen recordings for a smoother, more professional output. This process is pivotal in delivering a seamless and comprehensive video that effectively communicates your intended message.
Editing your Screen Recordings
Editing your screen recordings effectively after successfully capturing them on your iPad is an essential part of optimizing your screen recordings. This is not only advantageous for video content creators and digital storytellers but also for entrepreneurs, educators, or anyone interested in providing comprehensive and high-quality digital tutorials, presentations, or demonstrations using screen-recorded materials. The first step in editing your screen recordings is to decide on the purpose of your video. Understanding this will help guide your editing process. The second step is to trim unnecessary footage that does not contribute to your purpose. Trimming reduces your video's length, making it easier for your audience to digest and encouraging higher viewer engagement. In-app editing tool on your iPad, such as iMovie, allows you to trim and cut your screen recordings smoothly. You can also add texts, transitions, voiceovers and background music, increasing the overall appeal and effectiveness of your content. It's also worth mentioning that the the clip speed plays a significant role; speeding up long, monotonous processes helps retain your viewers' attention. Subtitles and captions are other crucial aspects to consider while editing your screen recordings. Not only do they make your content more accessible, but captions also improve your SEO ranking. Google cannot watch or listen to videos, but it can read text. Well-written and keyword-optimized captions can feed more information to search engines, result in better visibility. Moreover, a well-designed thumbnail and a compelling title are highly influential for your video's success. They are the first thing your potential viewers see and can make a difference in the viewer's decision to click on your video or not. Lastly, always remember to end your video with a strong call-to-action (CTA). A CTA compels your viewers to act preferably in line with your content's goal, which could be subscribing to your channel, liking your video, or even purchasing a product. In conclusion, editing is a critical stage in the process of optimizing your iPad screen recordings. It involves trimming, enhancing video appeal, adding subtitles or captions, designing attention-grabbing thumbnails and titles, and including a striking CTA. Each feature contributes to a polished, engaging, and high-ranking digital content, improving your overall audience experience and online visibility.
Sharing and Saving Screen Recordings
Sharing and saving screen recordings can be a critical facet to optimize your screen recordings on the iPad. The ability to seamlessly share and save your recordings allows for efficient dissemination of information and a wealth of recorded content at your disposal. Both these elements are vital in several contexts, right from educational videos demonstrating step-by-step instructions, to businesses outlining their latest product offerings, and even gamers recording their high-score gameplay to be shared on a platform of their choice. When it comes to sharing, make sure your video format is compatible with the intended platform. For instance, if you're planning to share on a social media platform, MP4 is the most universally consumed format. It's also crucial to embed relevant metadata within your recordings. This includes title, description, and tags corresponding to the content of the video, upscaling search engine visibility. Remember, these little optimizations have a significant impact on SEO rankings, making your video easier to discover by the target audience. Saving screen recordings is another essential part extra from the screen recording itself. You need to create a system to save your videos properly, which could be as simple as a well-organized folder in your cloud storage. Consistently backing up your files ensures you don’t lose any valuable data, thus preserving your digital storytelling efforts. You can even categorize your videos based on topic, date, or target audience for easy navigation. Another saving method is offloading your screen recordings to an external drive, this physical separation ensures the safety of data against any unforeseeable online threats. Furthermore, note that video files tend to be large and might slow down device performance or take up valuable space. Compression, a technique that reduces video file size without significant loss of quality, can be your ally in this scenario. In essence, optimizing in the context of sharing and saving includes ensuring easy discoverability, safekeeping of data, and effective management of disk space. This optimization not only makes screen recording a hassle-free experience on your iPad but also ensures the content longevity and reaching the desired audience, all the while engaging them effectively.
Tips for Better Screen Recordings on iPad
With the astounding growth in technology, screen recordings on your iPad have never been easier or more efficient. To elevate the quality of your screen recordings significantly and ensure they're serving the purpose intended, there are a few tips you may want to consider. First, plan your recording thoroughly. Just like a well-designed oliterary piece, every recording should be well thought out. Identify what you want to achieve, sketch out a storyboard or a loose script and pinpoint key moments. This provides direction and ensures the recording process is smooth and the final edit is easy to understand. Second, clean up your iPad screen before recording. Ensuring that you have a clear, uncluttered home screen goes a long way towards producing a professional-looking video. Close unnecessary apps, arrange your icons neatly, and consider changing your wallpaper to something neutral. This will prevent viewers from being distracted and keep their focus on what you're demonstrating. Third, use the built-in screen recording function but don't settle for only what Apple offers. Embrace apps like TechSmith Capture for further editing and smoothing out the rough edges. It helps provide useful tools such as annotations and transitions which can help articulate your points clearly and concisely. Fourth, remember to explain your actions throughout the recording. Sometimes, screen recordings can be hard to follow, especially if the viewer isn't tech-savvy. Reveal what you're about to do before doing it and explain why. Auditory or textual instructions could serve to significantly enhance the clarity and comprehensibility of your recording. Finally, don't rush through the steps. No matter how familiar they may seem to you, remember that your viewer might be learning it for the first time. Screen recordings on iPad offer a valuable opportunity to offer step-by-step instructions, and taking the time to walk through each stage of the process will result in an engaging and value-packed recording. Following these tips, your screen recordings would be on another level, catalyzing a more enhanced understanding for your viewers. In conclusion, creating high-quality, instructive, and engaging iPad screen recordings essentially involves a good understanding of not just the device but the audience and the key message you're seeking to pass across. Keep your viewer's perspective in mind because at the end of the day, they're the consumers of the content you're creating. All these elements, when synergized, result in screen recordings that command attention, drive engagement, and serve their intended informative purpose.