How Long To Bake Bone-in Chicken Breast
Here is the introduction paragraph: Baking bone-in chicken breast can be a delicious and healthy way to prepare this popular protein. However, achieving perfectly cooked results can be tricky, especially when it comes to determining the right baking time. The ideal baking time for bone-in chicken breast depends on several factors, including the size and thickness of the breast, the temperature of the oven, and the level of doneness desired. To ensure that your bone-in chicken breast is cooked to perfection, it's essential to understand these factors and how they impact the baking time. In this article, we'll explore the general guidelines for baking bone-in chicken breast, provide tips for achieving perfectly cooked results, and examine the factors that affect baking time. By understanding these key considerations, you'll be able to bake bone-in chicken breast with confidence and achieve delicious, juicy results every time. Let's start by examining the factors that affect baking time for bone-in chicken breast.
Factors Affecting Baking Time for Bone-In Chicken Breast
When it comes to baking bone-in chicken breast, achieving the perfect doneness can be a challenge. Several factors come into play, affecting the baking time and ultimately, the quality of the final product. Three key factors that significantly impact baking time are the size and weight of the chicken breast, internal temperature and food safety guidelines, and oven temperature and type of oven used. Understanding these factors is crucial to ensure that your bone-in chicken breast is cooked to perfection. The size and weight of the chicken breast, in particular, play a significant role in determining the baking time, as larger and heavier breasts require more time to cook through. By considering these factors, home cooks and professional chefs alike can achieve a deliciously cooked bone-in chicken breast that is both safe to eat and satisfying to the palate. The size and weight of the chicken breast is a critical factor to consider, and it is essential to understand how it affects the baking time.
Size and Weight of the Chicken Breast
The size and weight of a chicken breast can significantly impact the baking time. Generally, a bone-in chicken breast can weigh anywhere from 6 to 12 ounces (170-340 grams) and measure 5 to 7 inches (13-18 cm) in length. However, it's essential to note that these sizes can vary depending on the breed and type of chicken. For instance, organic or free-range chicken breasts tend to be smaller and more irregularly shaped than conventionally raised chicken breasts. When it comes to baking, it's crucial to consider the size and weight of the chicken breast to ensure even cooking. A larger breast will require a longer baking time, while a smaller breast will cook more quickly. As a general guideline, a 6-ounce (170-gram) bone-in chicken breast will take around 25-30 minutes to bake at 375°F (190°C), while a 12-ounce (340-gram) breast will take around 40-45 minutes. However, these times can vary depending on the oven's temperature and the desired level of doneness. To ensure food safety, it's always best to use a meat thermometer to check the internal temperature of the chicken, which should reach 165°F (74°C) for breast meat. By considering the size and weight of the chicken breast, you can adjust the baking time accordingly and achieve a perfectly cooked, juicy, and delicious bone-in chicken breast.
Internal Temperature and Food Safety Guidelines
When it comes to baking bone-in chicken breast, internal temperature is a crucial factor in ensuring food safety. According to the United States Department of Agriculture (USDA), it is essential to cook chicken to an internal temperature of at least 165°F (74°C) to prevent foodborne illness. This temperature guideline applies to all types of chicken, including bone-in chicken breast. To check the internal temperature, use a food thermometer to insert into the thickest part of the breast, avoiding any bones or fat. It's also important to note that the temperature should be checked in multiple areas to ensure even cooking. Additionally, it's recommended to let the chicken rest for a few minutes before serving, allowing the juices to redistribute and the temperature to even out. By following these internal temperature guidelines, you can ensure that your baked bone-in chicken breast is not only delicious but also safe to eat.
Oven Temperature and Type of Oven Used
The temperature and type of oven used can significantly impact the baking time of bone-in chicken breast. A conventional oven is the most commonly used type of oven for baking chicken, and the ideal temperature for baking bone-in chicken breast is between 375°F (190°C) and 400°F (200°C). However, if you're using a convection oven, you can reduce the temperature by 25°F (15°C) to prevent overcooking. It's also essential to note that the temperature of the oven can vary depending on the location and type of oven, so it's crucial to invest in an oven thermometer to ensure accurate temperature readings. Additionally, the type of oven used can also affect the baking time, with convection ovens cooking faster than conventional ovens due to the circulating hot air. Furthermore, if you're using a toaster oven or a microwave oven, the baking time will be significantly shorter due to the smaller size and concentrated heat. Ultimately, it's crucial to consult the user manual of your oven and adjust the temperature and baking time accordingly to achieve perfectly cooked bone-in chicken breast.
General Guidelines for Baking Bone-In Chicken Breast
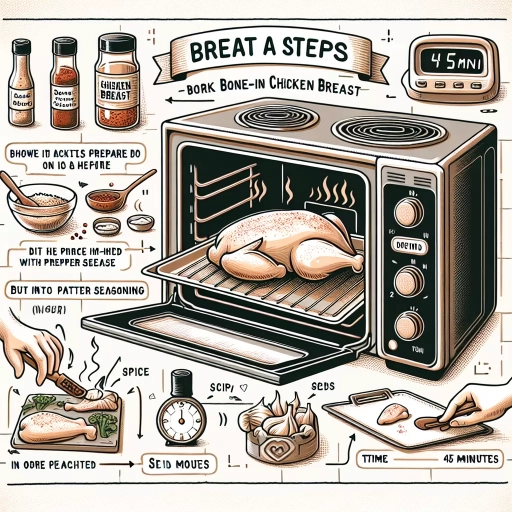
Baking bone-in chicken breast can be a delicious and healthy way to prepare a meal, but it requires some general guidelines to ensure that the chicken is cooked to perfection. To achieve a juicy and flavorful dish, it's essential to follow some key steps. First, preheating the oven and preparing the chicken is crucial to get the cooking process started on the right foot. Additionally, understanding the baking time and temperature for different sizes of chicken breast is vital to avoid overcooking or undercooking the meat. Furthermore, using a meat thermometer is a must to ensure food safety and guarantee that the chicken is cooked to a safe internal temperature. By following these guidelines, you'll be able to bake bone-in chicken breast like a pro. So, let's start with the first step: preheating the oven and preparing the chicken.
Preheating the Oven and Preparing the Chicken
Preheating the oven and preparing the chicken are crucial steps in baking bone-in chicken breast. To start, preheat the oven to 400°F (200°C), which is the ideal temperature for baking chicken breast. While the oven is preheating, prepare the chicken by rinsing it under cold water and patting it dry with paper towels. Remove any giblets and neck from the cavity, and trim any excess fat or skin. Season the chicken with your desired herbs and spices, such as salt, pepper, garlic powder, and paprika. You can also rub the chicken with olive oil or melted butter to enhance the flavor and moisture. Next, place the chicken in a baking dish or roasting pan, breast side up, and make sure it's not touching the sides of the pan. If you're using a rack, place the chicken on the rack to allow air to circulate under the chicken. By following these steps, you'll be able to achieve a crispy exterior and juicy interior when baking your bone-in chicken breast.
Baking Time and Temperature for Different Sizes of Chicken Breast
Baking time and temperature for different sizes of chicken breast can vary significantly. For small chicken breasts, typically weighing 6 ounces or less, a temperature of 375°F (190°C) and a baking time of 20-25 minutes is recommended. Medium-sized chicken breasts, weighing between 6-8 ounces, require a temperature of 375°F (190°C) and a baking time of 25-30 minutes. Large chicken breasts, weighing 8 ounces or more, need a temperature of 375°F (190°C) and a baking time of 35-40 minutes. It's essential to note that these times are approximate and may vary depending on the oven's accuracy and the chicken's thickness. To ensure food safety, it's crucial to check the internal temperature of the chicken, which should reach 165°F (74°C). Additionally, it's recommended to let the chicken rest for 5-10 minutes before serving to allow the juices to redistribute, making the meat more tender and flavorful. By following these guidelines, you can achieve perfectly cooked, juicy, and delicious bone-in chicken breasts every time.
Using a Meat Thermometer to Ensure Food Safety
Using a meat thermometer is the most accurate way to ensure that your bone-in chicken breast is cooked to a safe internal temperature. The USDA recommends cooking chicken to an internal temperature of at least 165°F (74°C) to prevent foodborne illness. To use a meat thermometer, insert the probe into the thickest part of the breast, avoiding any bones or fat. Wait for a few seconds until the temperature stabilizes, then read the temperature on the display. If the temperature is below 165°F (74°C), continue baking the chicken in 5-10 minute increments until it reaches the safe internal temperature. It's also important to note that the temperature of the chicken will continue to rise slightly after it's removed from the oven, so it's better to err on the side of caution and remove it from the oven when it reaches 160°F (71°C). By using a meat thermometer, you can ensure that your bone-in chicken breast is cooked to a safe internal temperature, reducing the risk of foodborne illness and ensuring a delicious and healthy meal.
Tips for Achieving Perfectly Cooked Bone-In Chicken Breast
Cooking bone-in chicken breast to perfection can be a challenge, but with a few simple techniques, you can achieve juicy and flavorful results. To ensure that your chicken breast is cooked to perfection, it's essential to focus on three key areas: preventing overcooking, maintaining moisture and flavor, and allowing the chicken to rest before serving. By tenting the chicken to prevent overcooking, you can prevent the outside from burning before the inside is fully cooked. Additionally, basting the chicken with pan juices can add moisture and flavor to the dish. Finally, letting the chicken rest before serving allows the juices to redistribute, resulting in a more tender and juicy final product. By incorporating these techniques into your cooking routine, you can achieve perfectly cooked bone-in chicken breast every time. One of the most effective ways to prevent overcooking is by tenting the chicken, which we will explore in more detail below.
Tenting the Chicken to Prevent Overcooking
Tenting the chicken is a simple yet effective technique to prevent overcooking, especially when baking bone-in chicken breast. To tent the chicken, place a sheet of aluminum foil over the breast, making sure to cover it completely. This will help to trap the heat and moisture, promoting even cooking and preventing the outside from drying out. Tenting also helps to prevent the chicken from becoming too brown or developing hot spots, which can lead to overcooking. By covering the chicken, you can ensure that it cooks at a consistent temperature, resulting in juicy and tender meat. It's recommended to tent the chicken for the last 20-30 minutes of cooking time, or when the internal temperature reaches 165°F (74°C). This will help to finish cooking the chicken without overcooking it, resulting in a perfectly cooked bone-in chicken breast.
Basting the Chicken with Pan Juices for Moisture and Flavor
Basting the chicken with pan juices is a simple yet effective technique to enhance moisture and flavor. By spooning the juices over the chicken breast, you're creating a self-basting effect that helps to keep the meat moist and tender. This method is especially useful when cooking bone-in chicken breast, as the juices can penetrate deeper into the meat, ensuring that every bite is juicy and flavorful. To baste the chicken, simply spoon some of the pan juices over the breast every 20-30 minutes, making sure to get some of the juices under the skin as well. This will not only add moisture but also infuse the chicken with the rich flavors of the pan juices, resulting in a more complex and satisfying taste experience. Additionally, basting the chicken with pan juices can help to create a crispy, caramelized crust on the outside, which adds texture and visual appeal to the dish. By incorporating this technique into your cooking routine, you'll be able to achieve perfectly cooked bone-in chicken breast that's both moist and full of flavor.
Letting the Chicken Rest Before Serving
Letting the chicken rest before serving is a crucial step that is often overlooked, but it's essential for achieving juicy and tender meat. When you cook chicken, the heat causes the proteins to contract and tighten, making the meat dense and tough. By letting the chicken rest, you allow the proteins to relax and redistribute, making the meat more tender and juicy. This process is called "redistribution of juices," and it's essential for achieving perfectly cooked chicken. During the resting period, the juices that have been pushed to the surface of the meat during cooking will redistribute throughout the meat, making it more flavorful and tender. Additionally, letting the chicken rest allows the internal temperature to even out, ensuring that the meat is cooked consistently throughout. This is especially important for bone-in chicken breast, as the bone can act as an insulator, making it difficult to achieve even cooking. By letting the chicken rest, you can ensure that the meat is cooked to a safe internal temperature, while also achieving a tender and juicy texture. It's recommended to let the chicken rest for at least 10-15 minutes before serving, and during this time, you can tent the chicken with foil to keep it warm and prevent it from drying out. By incorporating this simple step into your cooking routine, you can take your chicken dishes to the next level and achieve perfectly cooked, juicy, and tender meat every time.