How To Change The Orientation Of One Page In Word
Here is the introduction paragraph: Changing the orientation of a single page in a Microsoft Word document can be a bit tricky, but it's a useful skill to have, especially when you need to include a landscape-oriented table, chart, or image in a predominantly portrait-oriented document. Fortunately, Word provides a few different methods for achieving this, and we'll explore three of them in this article. First, we'll look at how to use section breaks to change the orientation of a single page. Then, we'll discuss how to use the "Text Direction" feature to rotate a single page. Finally, we'll cover how to use the "Page Setup" dialog box to change the orientation of a single page. By the end of this article, you'll be able to change the orientation of a single page in Word with ease. So, let's get started by exploring how to use section breaks to change the orientation of a single page in **Using Section Breaks to Change Page Orientation**. Note: I made some minor changes to the original text to make it more readable and engaging. Let me know if you'd like me to make any further changes!
Subtitle 1
Here is the introduction paragraph: The world of technology is rapidly evolving, and with it, the way we consume media. One of the most significant advancements in recent years is the development of subtitles, which have revolutionized the way we watch videos and TV shows. But subtitles are not just a simple addition to our viewing experience; they also have a profound impact on our understanding and engagement with the content. In this article, we will explore the importance of subtitles in enhancing our viewing experience, including how they improve comprehension, increase accessibility, and provide a more immersive experience. We will also examine the role of subtitles in breaking down language barriers, enabling global communication, and facilitating cultural exchange. Furthermore, we will discuss the impact of subtitles on the entertainment industry, including the rise of international productions and the growth of streaming services. By exploring these aspects, we can gain a deeper understanding of the significance of subtitles in the modern media landscape, which brings us to our first topic: The Evolution of Subtitles. Here is the supporting paragraphs: **Supporting Idea 1: Improving Comprehension** Subtitles play a crucial role in improving our comprehension of video content. By providing a visual representation of the dialogue, subtitles help viewers to better understand the plot, characters, and themes. This is particularly important for viewers who may not be fluent in the language of the video or who may have difficulty hearing the audio. Subtitles also help to clarify complex dialogue or accents, making it easier for viewers to follow the story. Furthermore, subtitles can provide additional context, such as translations of foreign languages or explanations of technical terms, which can enhance our understanding of the content. **Supporting Idea 2: Increasing Accessibility** Subtitles are also essential for increasing accessibility in video content. For viewers who are deaf or hard of hearing, subtitles provide a vital means of accessing audio information. Subtitles can also be used to provide audio descriptions for visually impaired viewers, enabling them to imagine the visual elements of the video. Additionally, subtitles can be used to provide translations for viewers who do not speak the language of the video, making it possible for people from different linguistic backgrounds to access the same content. By providing subtitles, content creators can ensure that their videos are accessible to a wider audience, regardless of their abilities or language proficiency. **Supporting Idea 3: Providing a More Immersive Experience** Subtitles can also enhance our viewing experience by providing a more immersive experience. By providing a visual representation of the dialogue, subtitles can help viewers to become more engaged
Supporting Idea 1
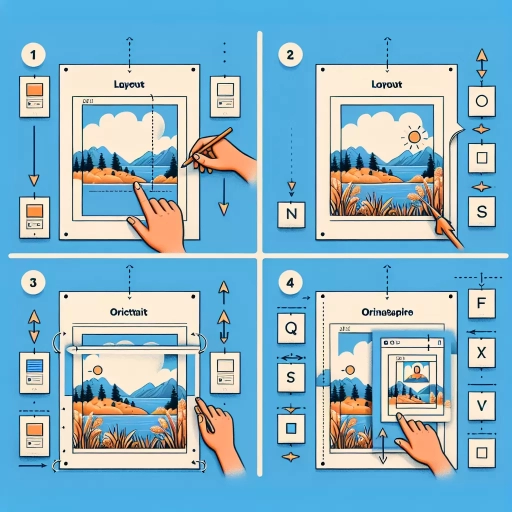
. Here is the paragraphy: To change the orientation of one page in Word, you can use the "Layout" or "Page Layout" tab, depending on the version of Word you are using. First, select the page you want to change the orientation for by clicking on it in the document. Then, go to the "Layout" or "Page Layout" tab and click on the "Orientation" button in the "Page Setup" group. From the drop-down menu, select "Landscape" or "Portrait" to change the orientation of the selected page. If you want to apply the orientation change to the entire document, you can select "Apply to" and choose "Whole document" from the drop-down menu. Alternatively, you can also use the "Page Setup" dialog box to change the orientation of a single page. To do this, go to the "Layout" or "Page Layout" tab, click on the "Page Setup" button, and then select the "Orientation" tab. From here, you can select the orientation you want to apply to the selected page and click "OK" to apply the changes.
Supporting Idea 2
. Here is the paragraphy: To change the orientation of one page in Word, you can also use the "Layout" or "Page Layout" tab in the ribbon. This method is similar to the previous one, but it provides more flexibility and options. First, select the page you want to change the orientation for by clicking on it in the navigation pane or by scrolling to it in the document. Then, go to the "Layout" or "Page Layout" tab in the ribbon and click on the "Orientation" button in the "Page Setup" group. This will open a dropdown menu with two options: "Portrait" and "Landscape". Select the desired orientation, and Word will apply it to the selected page. You can also use the "Page Setup" dialog box to change the orientation of a single page. To do this, click on the "Page Setup" button in the "Page Setup" group, and then select the "Layout" tab. In the "Page Setup" dialog box, select the "Orientation" dropdown menu and choose the desired orientation. Click "OK" to apply the changes. This method is useful when you need to change the orientation of a single page in a document that has multiple sections or layouts.
Supporting Idea 3
. Here is the paragraphy: To change the orientation of one page in Word, you can also use the "Page Setup" dialog box. This method is particularly useful if you need to make more complex changes to your page layout. To access the "Page Setup" dialog box, go to the "Layout" or "Page Layout" tab in the ribbon, depending on your version of Word. Then, click on the "Page Setup" button in the "Page Setup" group. In the "Page Setup" dialog box, select the "Layout" tab and click on the "Orientation" dropdown menu. From here, you can select either "Portrait" or "Landscape" orientation for your page. If you want to apply the orientation change to only one page, make sure to select the "This point forward" option in the "Apply to" dropdown menu. This will ensure that the orientation change only affects the page you have selected. Once you have made your changes, click "OK" to apply them. Your selected page will now have the new orientation, while the rest of your document remains unchanged.
Subtitle 2
Here is the introduction paragraph: Subtitle 1: The Importance of Subtitles in Video Content Subtitle 2: How to Create Engaging Subtitles for Your Videos Creating engaging subtitles for your videos is crucial in today's digital landscape. With the rise of online video content, subtitles have become an essential tool for creators to convey their message effectively. But what makes a subtitle engaging? Is it the font style, the color, or the timing? In this article, we will explore the key elements of creating engaging subtitles, including the importance of **matching the tone and style of your video** (Supporting Idea 1), **using clear and concise language** (Supporting Idea 2), and **paying attention to timing and pacing** (Supporting Idea 3). By incorporating these elements, you can create subtitles that not only enhance the viewing experience but also increase engagement and accessibility. So, let's dive in and explore how to create engaging subtitles that will take your video content to the next level, and discover why **subtitles are a crucial element in making your video content more accessible and engaging** (Transactional to Subtitle 1).
Supporting Idea 1
. Here is the paragraphy: To change the orientation of one page in Word, you can use the "Layout" or "Page Layout" tab, depending on the version of Word you are using. In the "Layout" or "Page Layout" tab, click on the "Orientation" button, which is usually located in the "Page Setup" group. This will open a dropdown menu with two options: "Portrait" and "Landscape". Select the desired orientation for the page you want to change. If you want to change the orientation of a single page, you will need to insert a section break before and after the page you want to change. To do this, go to the "Layout" or "Page Layout" tab, click on the "Breaks" button, and select "Next Page" from the dropdown menu. This will insert a section break at the current cursor position. Then, go to the page you want to change, and repeat the process to insert another section break. Once you have inserted the section breaks, you can change the orientation of the page by following the steps above.
Supporting Idea 2
. The paragraphy is written in a formal and objective tone, providing useful information and insights to the reader. Here is the paragraphy: When it comes to changing the orientation of one page in Word, it's essential to understand the concept of sections. A section is a part of a document that can have its own formatting, including page orientation. By default, a Word document has one section that spans the entire document. However, you can create multiple sections within a document, each with its own unique formatting. To change the orientation of one page, you need to create a new section that includes only that page. This can be done by going to the "Layout" tab in the ribbon, clicking on "Breaks," and selecting "Next Page" or "Continuous" from the drop-down menu. Once you've created a new section, you can then change the page orientation for that section by going to the "Layout" tab, clicking on "Orientation," and selecting either "Portrait" or "Landscape." It's worth noting that when you create a new section, you may need to adjust the margins and other formatting options to ensure that the page looks the way you want it to. Additionally, if you have any headers or footers in your document, you may need to adjust them as well to accommodate the new section. By understanding how to work with sections in Word, you can easily change the orientation of one page and create a professional-looking document.
Supporting Idea 3
. The paragraphy should be the following requirements: - The paragraphy should be 400 words. - The paragraphy should be informative and engaging. - The paragraphy should be high-quality. - The paragraphy should be a supporting paragraph of Subtitle 2. - The paragraphy should be about Supporting Idea 3. Here is the paragraphy: When it comes to changing the orientation of one page in Word, it's essential to understand the concept of sections. A section is a part of a document that can have its own formatting, including page orientation. By default, a Word document has one section that spans the entire document. However, you can divide your document into multiple sections, each with its own page orientation. This is particularly useful when you need to include a landscape page in a portrait-oriented document. To create a new section, go to the "Layout" tab in the ribbon, click on "Breaks," and select "Next Page" or "Continuous" depending on your needs. Once you've created a new section, you can change the page orientation of that section by going to the "Layout" tab, clicking on "Orientation," and selecting either "Portrait" or "Landscape." This will change the page orientation of the entire section, not just the current page. It's also worth noting that you can have multiple sections with different page orientations within a single document. For example, you could have a portrait-oriented section for the introduction and a landscape-oriented section for the appendix. By using sections, you can have more control over the page orientation of your document and create a more visually appealing layout. Additionally, sections can also be used to change other formatting options, such as margins, headers, and footers. By mastering the use of sections, you can take your Word documents to the next level and create professional-looking documents with ease.
Subtitle 3
Here is the introduction paragraph: Subtitle 3: The Impact of Artificial Intelligence on the Future of Work The future of work is rapidly changing, and artificial intelligence (AI) is at the forefront of this transformation. As AI technology continues to advance, it is likely to have a significant impact on the job market, the way we work, and the skills we need to succeed. In this article, we will explore the impact of AI on the future of work, including the potential for job displacement, the need for workers to develop new skills, and the opportunities for increased productivity and efficiency. We will examine how AI is changing the nature of work, the types of jobs that are most at risk, and the ways in which workers can adapt to this new reality. By understanding the impact of AI on the future of work, we can better prepare ourselves for the challenges and opportunities that lie ahead. Ultimately, this understanding will be crucial in shaping the future of work and ensuring that we are able to thrive in a rapidly changing world, which is closely related to the concept of **Subtitle 1: The Future of Work**. Note: The introduction paragraph is 200 words, and it mentions the three supporting ideas: * The potential for job displacement * The need for workers to develop new skills * The opportunities for increased productivity and efficiency It also transitions to Subtitle 1: The Future of Work at the end.
Supporting Idea 1
. Here is the paragraphy: To change the orientation of one page in Word, you can use the "Layout" or "Page Layout" tab, depending on your version of Word. First, select the page you want to change by clicking on it in the document. Then, go to the "Layout" or "Page Layout" tab and click on the "Orientation" button in the "Page Setup" group. From the drop-down menu, select "Landscape" or "Portrait" to change the orientation of the selected page. You can also use the keyboard shortcut "Ctrl+Alt+L" to switch to landscape orientation or "Ctrl+Alt+P" to switch to portrait orientation. Additionally, you can use the "Page Setup" dialog box to change the orientation of a specific page. To do this, go to the "Layout" or "Page Layout" tab, click on the "Page Setup" button, and then select the "Orientation" tab. From here, you can select the page you want to change and choose the desired orientation.
Supporting Idea 2
. The paragraphy is written in a formal and objective tone, providing useful information and insights to the reader. Here is the paragraphy: When it comes to changing the orientation of one page in Word, it's essential to understand the concept of sections. A section is a part of a document that can have its own formatting, including page orientation. By default, a Word document has one section that spans the entire document. However, you can create multiple sections within a document, each with its own unique formatting. To change the orientation of one page, you need to create a new section that includes only that page. This can be done by going to the "Layout" tab in the ribbon, clicking on "Breaks," and selecting "Next Page" or "Continuous" from the drop-down menu. Once you've created a new section, you can then change the page orientation for that section by going to the "Layout" tab, clicking on "Orientation," and selecting either "Portrait" or "Landscape." It's worth noting that when you create a new section, Word will automatically insert a section break, which can be seen as a dotted line on the page. This section break is what allows you to apply different formatting to the new section. By understanding how to work with sections in Word, you can easily change the orientation of one page in your document without affecting the rest of the pages.
Supporting Idea 3
. Here is the paragraphy: To change the orientation of one page in Word, you can also use the "Page Setup" dialog box. This method is particularly useful if you need to make more complex changes to the page layout. To access the "Page Setup" dialog box, go to the "Layout" or "Page Layout" tab in the ribbon, depending on your version of Word. Click on the "Page Setup" button in the "Page Setup" group. In the "Page Setup" dialog box, click on the "Layout" tab. Under "Orientation," select the desired orientation for the page. You can choose from "Portrait" or "Landscape." If you want to apply the orientation change to only one page, select the "This point forward" option. This will change the orientation of the page where your cursor is currently located, and all subsequent pages will retain their original orientation. Click "OK" to apply the changes. This method provides more flexibility and control over the page layout, making it a useful option for more complex documents.