How To Open Paint Can
Here is the introduction paragraph: Opening a paint can may seem like a straightforward task, but it requires attention to detail and a few simple precautions to ensure a smooth and safe experience. Whether you're a seasoned DIY enthusiast or a professional painter, understanding the proper techniques for opening a paint can is essential to avoid accidents and achieve professional-looking results. In this article, we will guide you through the process of opening a paint can, from preparation to post-opening precautions. To start, it's crucial to prepare yourself and your workspace before attempting to open the can. This involves gathering the necessary tools, protecting your surroundings, and understanding the potential hazards associated with paint. By doing so, you'll be able to approach the task with confidence and avoid any potential pitfalls. Preparation is Key, and in the next section, we'll explore the essential steps to take before opening your paint can.
Preparation is Key
Preparation is key to a successful project. Whether you're a DIY enthusiast or a professional contractor, having the right tools and equipment is crucial to getting the job done efficiently and effectively. However, preparation goes beyond just having the right tools. It's also about creating a safe working environment and taking necessary precautions to avoid accidents. In this article, we'll discuss the importance of preparation and provide tips on how to prepare for a project. We'll cover the importance of choosing the right tool for the job, wearing protective gear to prevent injuries, and working in a well-ventilated area to avoid health hazards. By following these tips, you'll be well-prepared to tackle any project that comes your way. So, let's start with the first step in preparation: choosing the right tool.
Choose the Right Tool
Choosing the right tool is essential when it comes to opening a paint can. The most common tool used for this purpose is a flathead screwdriver or a paint can opener. A flathead screwdriver is a versatile tool that can be used for a variety of tasks, including prying open paint cans. However, it's essential to use a screwdriver with a flat, broad head to avoid slipping and damaging the can. A paint can opener, on the other hand, is a specialized tool designed specifically for opening paint cans. It typically has a curved or angled blade that allows for easy prying and a comfortable grip for leverage. When choosing between a flathead screwdriver and a paint can opener, consider the size and type of paint can you're working with. For smaller cans, a flathead screwdriver may be sufficient, while larger cans may require the extra leverage and control of a paint can opener. Additionally, if you plan on opening multiple paint cans, a paint can opener may be a worthwhile investment to save time and effort. Ultimately, the right tool will make the process of opening a paint can safer, easier, and more efficient.
Wear Protective Gear
Wearing protective gear is a crucial step in preparing to open a paint can. This gear includes gloves, safety glasses, and a mask. The gloves will protect your hands from the paint and any sharp edges on the can, while the safety glasses will shield your eyes from any splatters or spills. The mask will prevent you from inhaling any fumes or particles that may be released when you open the can. Additionally, consider wearing old clothes or an apron to protect your clothing from stains. By wearing protective gear, you can ensure a safe and successful paint can opening experience.
Work in a Well-Ventilated Area
When working with paint, it's essential to work in a well-ventilated area to prevent inhaling harmful fumes and particles. Paints, thinners, and other chemicals can release volatile organic compounds (VOCs) that can cause respiratory problems, headaches, and dizziness. Inhaling these fumes can also lead to long-term health issues, such as lung damage and cancer. To ensure a safe working environment, open windows and doors to provide good airflow, and consider using a fan to circulate the air. If you're working in a confined space, consider using a respirator or mask to filter out the fumes. Additionally, keep the area clean and free of clutter to prevent tripping hazards and ensure that you can move around safely. By working in a well-ventilated area, you can minimize the risks associated with painting and ensure a successful and healthy project.
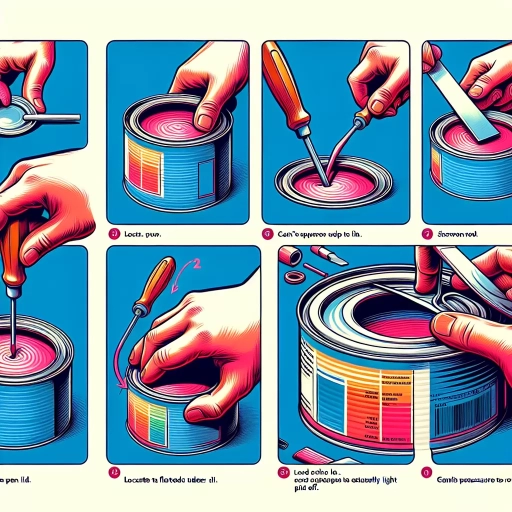
Opening the Paint Can
Opening a paint can can be a daunting task, especially if you're not familiar with the process. However, with the right techniques and tools, it can be done safely and efficiently. There are several methods to open a paint can, including using a paint can opener, applying heat to loosen the lid, and using a hammer and chisel for stubborn lids. In this article, we will explore these methods in more detail, starting with the most recommended approach: using a paint can opener. This tool is specifically designed to pry open paint cans without causing damage to the lid or the can itself, making it the safest and most convenient option. By using a paint can opener, you can avoid the risk of spills and injuries, and get started on your painting project quickly and easily.
Use a Paint Can Opener
To use a paint can opener, start by placing the opener on the edge of the paint can's lid, aligning it with the slight indentation or groove that runs along the lid's edge. Gently press down on the opener's handle, allowing the cutting wheel to penetrate the lid and create a small gap. Continue to apply gentle pressure, slowly rotating the opener around the lid's edge as the cutting wheel scores the metal. As you rotate the opener, the lid will begin to separate from the can, creating a small opening. Once the lid is partially removed, use a screwdriver or other tool to pry it off completely, taking care not to spill any paint. It's essential to be patient and gentle when using a paint can opener, as excessive force can cause the lid to become bent or the paint to spill. By following these steps, you can safely and effectively open your paint can using a paint can opener.
Apply Heat to Loosen the Lid
If the lid is still stubborn, apply heat to loosen it. You can use a hair dryer or a heat gun to warm the lid and the surrounding area. Be careful not to apply too much heat, as this can damage the paint or the can. Hold the heat source about 6 inches away from the lid and move it slowly back and forth. This will help to loosen the lid without applying too much pressure. As the lid starts to loosen, use a cloth or a rubber grip to protect your hands from the heat and to get a better grip on the lid. Continue to apply heat until the lid comes off easily. If the lid is still stuck, you can also try soaking the can in warm water for a few minutes to loosen the lid.
Use a Hammer and Chisel for Stubborn Lids
When dealing with stubborn lids, a hammer and chisel can be a useful combination to help loosen and remove them. To use this method, start by placing the chisel on the edge of the lid, positioning it at a 45-degree angle. Gently tap the chisel with a hammer, working your way around the lid to loosen the seal. Be careful not to apply too much pressure, as this can damage the can or the surrounding surface. As you continue to tap and chisel, the lid should begin to loosen, allowing you to remove it safely. It's essential to be patient and gentle when using this method, as excessive force can lead to accidents or damage. Additionally, make sure to wear protective gloves and safety glasses to prevent injury from flying debris. By using a hammer and chisel, you can effectively remove stubborn lids and access the contents of the paint can.
Post-Opening Precautions
When opening a can of paint, it's essential to take certain precautions to ensure the paint remains usable and safe. One of the most critical steps is to stir the paint thoroughly before use. This is because paint can separate over time, with the heavier particles settling at the bottom of the can. If the paint is not stirred properly, it can lead to uneven color and texture. Additionally, it's crucial to check for contamination, such as dust, dirt, or moisture, which can affect the paint's quality and performance. Furthermore, it's vital to close the can properly when not in use to prevent air from entering and causing the paint to dry out. By following these simple precautions, you can ensure your paint remains in good condition and ready for use. To start, let's take a closer look at the importance of stirring the paint thoroughly.
Stir the Paint Thoroughly
Stir the paint thoroughly before use. This is a crucial step that many people often overlook, but it's essential to ensure the paint is well-mixed and ready for application. When you open a can of paint, the contents may have separated, with the heavier pigments settling at the bottom. If you don't stir the paint, you may end up with uneven color and texture, which can affect the overall finish of your project. To stir the paint thoroughly, use a paint stirrer or a wooden spoon to mix the contents in a circular motion, starting from the bottom of the can and working your way up. Make sure to scrape the sides and bottom of the can to incorporate all the pigments and additives. Continue stirring until the paint is smooth and uniform in color. This may take a few minutes, depending on the type of paint and the size of the can. It's also a good idea to stir the paint occasionally during use, especially if you're working on a large project or using a paint with a high pigment load. This will help maintain the paint's consistency and prevent settling. By taking the time to stir the paint thoroughly, you'll ensure a professional-looking finish and avoid costly mistakes. So, don't skip this important step – stir the paint thoroughly before use to achieve the best results.
Check for Contamination
When opening a paint can, it's essential to check for contamination to ensure the paint's quality and safety. Contamination can occur when the can is not properly sealed, or when foreign particles enter the can during storage or transportation. To check for contamination, start by inspecting the can's exterior for any signs of damage, rust, or corrosion. Next, carefully remove the lid and inspect the paint's surface for any visible debris, such as dust, dirt, or water spots. If you notice any contamination, it's best to err on the side of caution and discard the paint. Additionally, always check the paint's color and consistency to ensure it matches the original color and texture. If the paint appears to be separated or has an unusual odor, it may be contaminated and should not be used. By taking the time to check for contamination, you can ensure a successful painting project and avoid any potential health risks associated with using contaminated paint.
Close the Can Properly When Not in Use
When not in use, it's essential to close the paint can properly to prevent spills, contamination, and drying out of the paint. To do this, start by wiping the rim of the can with a clean cloth or paper towel to remove any excess paint. This will help create a tight seal when the lid is closed. Next, place the lid back onto the can, ensuring it's centered and aligned with the rim. Press the lid down firmly, making sure it's securely closed. You can also use a rubber mallet or a hammer to tap the lid gently, ensuring it's tightly sealed. Additionally, consider using a paint can lid clip or a rubber band to keep the lid in place, especially if you're storing the can for an extended period. By closing the paint can properly, you'll prevent paint from drying out, reduce the risk of spills, and keep the paint fresh for future use.