How To Use An Airtag
Here is the introduction paragraph: Apple's AirTag is a small, sleek device that can be attached to your keys, wallet, or any other item you want to keep track of. With its advanced Bluetooth technology and seamless integration with your iPhone, the AirTag makes it easy to locate your belongings and keep them safe. But how do you get started with using an AirTag? In this article, we'll take you through the process of setting up your AirTag, using it to track your belongings, and troubleshooting any issues that may arise. We'll start by walking you through the simple steps of setting up your AirTag, including pairing it with your iPhone and registering it with your Apple ID. By the end of this article, you'll be able to confidently use your AirTag to keep your valuables safe and secure. So, let's get started with setting up your AirTag.
Setting Up Your AirTag
Setting up your AirTag is a straightforward process that can be completed in a few simple steps. To get started, you'll need to download and install the Find My app, which is the central hub for managing your AirTag and other Apple devices. Once you've installed the app, you can pair your AirTag with your iPhone, which will allow you to track its location and receive notifications when it's moved or goes out of range. Additionally, you'll want to set up your AirTag's battery and notification preferences to ensure that you're getting the most out of your device. In this article, we'll walk you through each of these steps in detail, starting with the first and most important one: downloading and installing the Find My app.
Downloading and Installing the Find My App
To download and install the Find My app, start by opening the App Store on your iPhone or iPad. Tap on the Search tab at the bottom of the screen and type "Find My" in the search bar. Select the "Find My" app from the search results, which should be the first option. Tap the "Get" button next to the app icon, and then tap "Install" to begin the download process. If prompted, enter your Apple ID password or use Touch ID or Face ID to authenticate the download. Once the app is installed, tap "Open" to launch it. If you already have the Find My app installed on your device, make sure it's updated to the latest version by going to the App Store, tapping your profile icon in the top right corner, and selecting "Purchased" or "My Purchases." Find the Find My app in the list and tap "Update" if an update is available. With the Find My app installed and updated, you're ready to set up your AirTag and start using it to track your belongings.
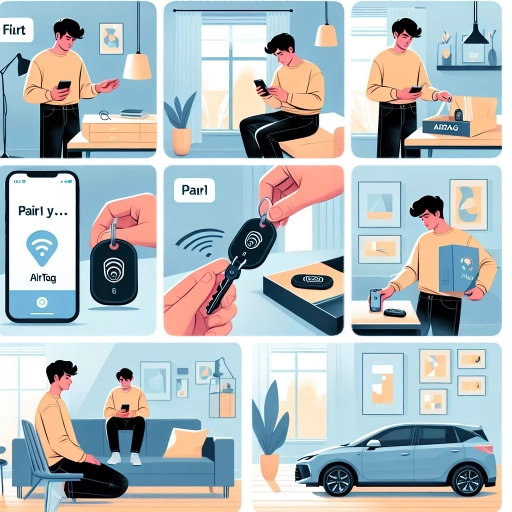
Pairing Your AirTag with Your iPhone
Pairing your AirTag with your iPhone is a straightforward process that requires a few simple steps. To start, make sure your iPhone is running iOS 14.5 or later, as this is the minimum software requirement for AirTag compatibility. Next, open the Find My app on your iPhone, which is where you'll manage your AirTag and track its location. With the Find My app open, bring your AirTag close to your iPhone and you'll see a prompt to connect the two devices. Tap "Connect" to initiate the pairing process, and your iPhone will automatically detect and pair with your AirTag. You'll then be asked to assign a name to your AirTag, such as "Keys" or "Wallet," which will help you identify it in the Find My app. Once you've named your AirTag, you'll see it appear in the Items tab of the Find My app, where you can view its location on a map and receive notifications if it becomes separated from you. Throughout the pairing process, your iPhone will guide you through each step with on-screen instructions, making it easy to get your AirTag up and running quickly.
Setting Up Your AirTag's Battery and Notification Preferences
Setting up your AirTag's battery and notification preferences is a crucial step in ensuring you get the most out of your device. To start, you'll need to insert the battery into your AirTag, which is a simple process that requires you to twist the stainless steel cover counterclockwise and pull it off. Once the cover is removed, you'll see the battery compartment, where you can insert the CR2032 battery provided with your AirTag. Make sure to insert the battery with the positive side facing up, and then replace the cover by twisting it clockwise until it clicks into place. Next, you'll need to set up your notification preferences, which can be done through the Find My app on your iPhone or iPad. To do this, open the Find My app and select the AirTag you want to set up, then tap on "Notifications" and choose the types of notifications you want to receive, such as when your AirTag is moved or when it's out of range. You can also set up custom notifications, such as receiving a notification when your AirTag is moved from a specific location. Additionally, you can also set up your AirTag to play a sound when it's moved, which can be helpful in locating it if it's lost. By setting up your AirTag's battery and notification preferences, you'll be able to keep track of your device and receive important updates, ensuring you stay connected to your belongings.
Using Your AirTag to Track Your Belongings
Here is the introduction paragraph: Losing your belongings can be frustrating and stressful, especially if they hold sentimental value or are essential to your daily life. Fortunately, Apple's AirTag provides a convenient and effective solution to this problem. By attaching an AirTag to your keys, wallet, or other items, you can easily track their location using the Find My app. This feature allows you to locate your AirTag on a map, receive notifications when it's moved or separated from you, and even play a sound to help you find it. In this article, we'll explore how to use your AirTag to track your belongings, starting with the first step: attaching your AirTag to your keys, wallet, or other items.
Attaching Your AirTag to Your Keys, Wallet, or Other Items
Attaching your AirTag to your keys, wallet, or other items is a straightforward process that requires a few simple steps. First, make sure you have the AirTag and the item you want to attach it to. Next, locate the small hole on the AirTag, which is designed for attaching it to keys or other objects. You can use a keyring or a small clip to attach the AirTag to your keys or wallet. Alternatively, you can use an AirTag accessory, such as an AirTag case or a leather strap, to attach the AirTag to your item. Once you've attached the AirTag, make sure it's securely fastened to prevent it from coming loose. You can then use the Find My app to track the location of your AirTag and the item it's attached to. It's also a good idea to test the AirTag to make sure it's working properly and that you can see its location on the map. By attaching your AirTag to your keys, wallet, or other items, you can enjoy peace of mind knowing that you can track their location and find them if they become lost.
Using the Find My App to Locate Your AirTag on a Map
Using the Find My App to Locate Your AirTag on a Map To locate your AirTag on a map, open the Find My app on your iPhone or iPad. Tap on the "Items" tab at the bottom of the screen, then select your AirTag from the list of devices. If your AirTag is nearby, you'll see its location on the map, along with its distance from you. If it's not nearby, you can use the "Play Sound" feature to help you locate it. The AirTag will emit a sound that gets louder as you get closer to it. You can also use the "Directions" feature to get turn-by-turn directions to your AirTag's location. If your AirTag is with someone else, you can share its location with them using the "Share My Location" feature. Additionally, you can mark your AirTag as "Lost" to activate Lost Mode, which will send you notifications when someone finds it and scans it with their iPhone. The Find My app will also display the AirTag's battery level, so you can keep an eye on when it needs to be replaced. By using the Find My app, you can easily locate your AirTag on a map and keep track of your belongings.
Receiving Notifications When Your AirTag is Moved or Separated from You
When your AirTag is moved or separated from you, you can receive notifications to help you stay connected to your belongings. To enable this feature, open the Find My app, select the AirTag you want to track, and tap on "Notifications." From there, you can choose to receive notifications when your AirTag is left behind, moved, or separated from you. You can also customize the notification settings to fit your needs, such as setting a specific distance or time frame for when you want to receive notifications. For example, you can set your AirTag to notify you if it's moved more than 1 mile away from you or if it's been separated from you for more than 30 minutes. Additionally, you can also set up notifications for when your AirTag is found, so you can be alerted when it's been located. By receiving notifications when your AirTag is moved or separated from you, you can stay on top of your belongings and ensure they're always within reach.
Troubleshooting and Managing Your AirTag
Apple's AirTag is a convenient and innovative tracking device that helps you keep tabs on your belongings. However, like any electronic device, it's not immune to issues. When problems arise, it's essential to know how to troubleshoot and manage your AirTag effectively. This article will guide you through the process of resolving common issues, ensuring you get the most out of your device. We'll cover three key areas: resolving connectivity issues and error messages, updating your AirTag's firmware and software, and disabling or removing your AirTag when it's no longer needed. By following these steps, you'll be able to overcome obstacles and enjoy a seamless tracking experience. If your AirTag is not connecting or displaying error messages, don't worry – we'll start by exploring ways to resolve these connectivity issues and get your device up and running smoothly.
Resolving Connectivity Issues and Error Messages
When you encounter connectivity issues or error messages with your AirTag, there are several steps you can take to resolve the problem. First, ensure that your AirTag is properly paired with your iPhone or iPad by going to the Find My app and checking that it is listed under "Items." If it's not listed, try restarting your AirTag by removing the battery and then reinserting it. If you're still having trouble, check that your device is running the latest version of iOS or iPadOS, as outdated software can cause connectivity issues. Additionally, make sure that Bluetooth is enabled on your device and that you're in range of your AirTag. If you're receiving error messages, try resetting your AirTag by pressing and holding the battery until you hear a sound, then releasing it. You can also try resetting your device's network settings by going to Settings > General > Reset > Reset Network Settings. If none of these steps resolve the issue, you may need to contact Apple support for further assistance. It's also a good idea to check for any physical obstructions or interference that may be affecting the connection between your AirTag and device. By following these steps, you should be able to resolve connectivity issues and error messages with your AirTag.
Updating Your AirTag's Firmware and Software
Updating your AirTag's firmware and software is a straightforward process that ensures you have the latest features and security patches. To update your AirTag, start by making sure it's connected to your iPhone or iPad via Bluetooth. Then, open the Find My app, select the AirTag you want to update, and tap on "Details." If an update is available, you'll see a prompt to update the firmware. Tap on "Update" to begin the process. The update will download and install automatically, and you'll receive a notification when it's complete. It's essential to keep your AirTag's firmware and software up to date to ensure it functions correctly and securely. Regular updates often include new features, bug fixes, and security patches that protect your device from potential vulnerabilities. Additionally, updating your AirTag's firmware and software can also improve its performance and battery life. If you're experiencing any issues with your AirTag, such as connectivity problems or inaccurate location tracking, updating the firmware and software may resolve the issue. It's also a good idea to update your AirTag's firmware and software before traveling or using it in a new location to ensure it's working correctly. By keeping your AirTag's firmware and software up to date, you can ensure it continues to provide accurate location tracking and remains a reliable tool for keeping track of your belongings.
Disabling or Removing Your AirTag When No Longer Needed
When you no longer need your AirTag, it's essential to disable or remove it to prevent any potential security risks or unwanted tracking. To disable your AirTag, open the Find My app on your iPhone or iPad, select the AirTag you want to disable, and tap "Remove Item." This will disconnect the AirTag from your Apple ID and prevent it from sending any further location updates. If you want to completely remove the AirTag, you can also reset it by pressing the battery cover down for 3 seconds until you hear a sound, then releasing it. This will reset the AirTag to its factory settings, and it will no longer be connected to your Apple ID. Additionally, you can also remove the battery from the AirTag to completely disable it. It's worth noting that if you're selling or giving away your AirTag, you should also remove any personal data associated with it, such as your name and contact information, to protect your privacy. By disabling or removing your AirTag when it's no longer needed, you can ensure that your personal data remains secure and prevent any potential security risks.