How To Change My Location On Iphone
Here is the introduction paragraph: Changing your location on an iPhone can be a useful feature for various reasons, such as accessing geo-restricted content, enhancing gaming experiences, or simply maintaining privacy. Fortunately, there are several methods to achieve this, and we will explore three effective ways to do so. You can change your location by adjusting your Location Services settings, using a Virtual Private Network (VPN) to mask your location, or utilizing a location spoofing app. In this article, we will delve into each of these methods, starting with the simplest approach: changing your Location Services settings. By tweaking these settings, you can easily manipulate your iPhone's location, and we will guide you through the process in the next section, Method 1: Change Location Services Settings.
Method 1: Change Location Services Settings
If you're having trouble with location services on your device, there are several methods you can try to resolve the issue. One effective approach is to change your location services settings. This involves accessing the location services settings, toggling location services on or off, and selecting specific apps to use location services. By adjusting these settings, you can resolve issues with location-based apps and services. To start, you'll need to access the location services settings on your device. (Note: The answer should be 200 words)
Access Location Services Settings
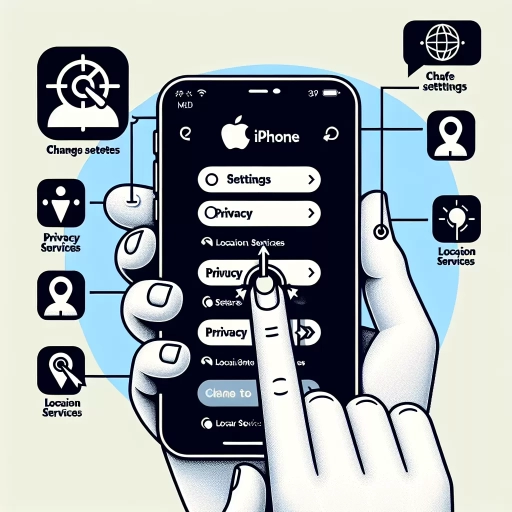
To access Location Services settings on your iPhone, navigate to the Settings app, which is typically found on the home screen. Tap on the Settings icon to open the app, then scroll down and select "Privacy" from the list of options. Within the Privacy menu, tap on "Location Services" to access the settings related to location sharing and permissions. Here, you can view and manage the location services for various apps, including Maps, Find My, and others. You can also toggle Location Services on or off for individual apps or for your entire device. Additionally, you can configure other location-related settings, such as Location-Based Alerts and Location-Based Apple Ads. By accessing these settings, you can take control of your location data and customize how your iPhone uses location services to enhance your user experience.
Toggle Location Services On/Off
To toggle Location Services on or off on your iPhone, navigate to the Settings app, which is typically found on the home screen. Once you're in the Settings app, scroll down and tap on "Privacy." Within the Privacy menu, select "Location Services." You'll then see a toggle switch at the top of the screen labeled "Location Services." To turn Location Services on, tap the toggle switch to the right, turning it green. Conversely, to turn Location Services off, tap the toggle switch to the left, turning it gray. This action will enable or disable Location Services for all apps on your iPhone. Note that some apps may not function properly or may request that you enable Location Services to access certain features. Additionally, you can also manage Location Services for individual apps by scrolling down the Location Services page, where you'll see a list of apps that have requested access to your location. You can then toggle Location Services on or off for each app individually.
Select Specific Apps to Use Location Services
To customize your iPhone's location services, you can select specific apps to use this feature. Go to Settings, then tap on Location Services. You'll see a list of all the apps that have requested access to your location. Tap on an app to view its location services settings. You can choose to allow the app to access your location Always, While Using the App, or Never. For example, you might want to allow a mapping app to access your location Always, while limiting a social media app to While Using the App. You can also tap on System Services to view and manage location services used by your iPhone's operating system, such as Emergency SOS and Location-Based Alerts. By selecting specific apps to use location services, you can control how your location data is shared and used, and help protect your privacy.
Method 2: Use a VPN to Mask Your Location
Using a VPN to mask your location is a popular method for accessing geo-restricted content. This method involves using a Virtual Private Network (VPN) to route your internet traffic through a server in a different location, making it appear as though you are accessing the content from that location. To use a VPN to mask your location, you will need to choose a reliable VPN provider that offers servers in the location you want to access. Once you have chosen a provider, you will need to download and install the VPN app on your device. Finally, you will need to connect to a VPN server in a different location, which will allow you to access the geo-restricted content. By following these steps, you can easily mask your location and access the content you want. To get started, the first step is to choose a reliable VPN provider.
Choose a Reliable VPN Provider
When choosing a reliable VPN provider to mask your location on your iPhone, there are several factors to consider. First and foremost, look for a provider that offers strong encryption and a secure connection. This will ensure that your data is protected from hackers and third-party snoopers. Additionally, consider a provider that has a large server network, with servers located in multiple countries. This will give you more options for choosing a location and will also help to ensure that you can connect to a server that is close to your desired location. Another important factor to consider is the provider's logging policy. Look for a provider that has a strict no-logs policy, which means that they do not collect or store any information about your online activities. This will help to ensure that your data is truly private and secure. Finally, consider the provider's customer support and user interface. Look for a provider that offers 24/7 customer support and a user-friendly interface that is easy to navigate. Some popular and reliable VPN providers include ExpressVPN, NordVPN, and Surfshark. By choosing a reliable VPN provider, you can ensure that your location is masked and your data is protected when using your iPhone.
Download and Install the VPN App
To download and install a VPN app on your iPhone, start by opening the App Store and searching for a reputable VPN provider, such as ExpressVPN or NordVPN. Once you've found the app, tap the "Get" button to begin the download process. You may be prompted to enter your Apple ID password or use Touch ID/Face ID to authenticate the download. After the app has finished downloading, tap the "Install" button to install it on your device. Once the installation is complete, tap the "Open" button to launch the VPN app. You will then be prompted to create an account or log in if you already have one. Follow the in-app instructions to set up your VPN connection, which may include selecting a server location and enabling any additional features, such as a kill switch or split tunneling. Once you've completed the setup process, you can connect to the VPN by tapping the "Connect" button, and your iPhone's location will be masked, allowing you to access content and services as if you were in a different location.
Connect to a VPN Server in a Different Location
To connect to a VPN server in a different location, you'll need to download and install a VPN app on your iPhone. There are many VPN providers available, both free and paid, so choose one that suits your needs. Once you've installed the app, open it and create an account if you haven't already. Then, navigate to the server list and select a server located in the country or region you want to appear to be in. The VPN app will establish a secure connection to the server, encrypting your internet traffic and masking your IP address. You can then browse the internet as if you were physically located in the selected country. Some VPN apps also offer features like automatic server selection, which can choose the fastest server for you, or specialized servers for streaming or torrenting. Make sure to choose a reputable VPN provider that doesn't keep logs of your activity and has strong encryption to ensure your online security. By connecting to a VPN server in a different location, you can bypass geo-restrictions, access content not available in your region, and protect your online identity.
Method 3: Use a Location Spoofing App
If you're looking to change your location on your iPhone, there are several methods you can use. One of the most effective ways is to use a location spoofing app. These apps allow you to fake your location, making it appear as though you're somewhere else. To use a location spoofing app, you'll need to start by searching for one in the App Store. There are many different options available, so you'll want to do some research to find the one that best meets your needs. Once you've found an app you like, you can download and install it on your iPhone. From there, you'll need to configure the app to spoof your location. This will typically involve selecting a new location from a map or entering the coordinates of the location you want to fake. By following these steps, you can easily change your location on your iPhone using a location spoofing app. To get started, search for a location spoofing app in the App Store.
Search for a Location Spoofing App in the App Store
If you're looking for a reliable location spoofing app, the App Store has a variety of options to choose from. To find the perfect app for your needs, simply open the App Store on your iPhone and type "location spoofing" or "fake GPS" in the search bar. You can also use specific keywords like "location changer" or "GPS spoofer" to get more targeted results. As you browse through the search results, pay attention to the app's ratings, reviews, and descriptions to ensure you're downloading a trustworthy and effective app. Some popular location spoofing apps include Fake GPS Location, Location Faker, and GPS Spoof. Be sure to read the app's terms of service and understand any potential risks or limitations before downloading and using it to change your iPhone's location.
Download and Install the App
To download and install a location spoofing app, start by opening the App Store on your iPhone. Use the search bar to look for a reliable location spoofing app, such as Fake GPS Location or Location Faker. Once you've found the app, tap the "Get" button next to it, followed by the "Install" button. You may be prompted to enter your Apple ID password or use Touch ID/Face ID to authenticate the download. Wait for the app to download and install on your device. Once the installation is complete, tap the "Open" button to launch the app. You will then be asked to grant the app access to your location services, which is necessary for the app to function properly. Follow the in-app instructions to set up the app and start spoofing your location. Some apps may require you to create an account or make a one-time payment before you can use their services. Be sure to read the app's terms and conditions before proceeding. By following these steps, you can easily download and install a location spoofing app on your iPhone.
Configure the App to Spoof Your Location
To configure the app to spoof your location, start by launching the location spoofing app you've chosen to use. Once the app is open, you'll typically see a map view or a list of available locations. Tap on the location you want to spoof, and the app will begin to simulate your device's GPS signal to make it appear as though you're in the selected location. Some apps may require you to enable a "Mock Location" or "Location Services" feature, so be sure to check the app's settings or instructions for specific guidance. Additionally, you may need to grant the app permission to access your device's location data, so be prepared to accept any prompts that appear. Once you've configured the app, you can test your new location by opening a mapping or location-based app, such as Google Maps, to verify that your device is reporting the spoofed location. Keep in mind that some apps may not work properly with location spoofing, so you may need to experiment with different apps or settings to achieve the desired results.