How To Remove Pine Sap From Car
 We've all experienced it. One day you park under what seems to be the harmless shelter of a friendly pine tree, and the next thing you know, your car is covered in sticky, stubborn sap. This sap can cause considerable damage to your car’s paintwork if not addressed promptly and appropriately. This article presents proven and efficient strategies for pine sap removal, keeping your car looking immaculate. Preparing for the task is as essential as the actual removal, thus our first subheading tackles how to gear up for this task, 'Preparation is Key'. Next, we navigate through the solvent-based method of removal, a technique using chemicals to break down the stubborn sap. For those who prefer a potentially less abrasive but equally effective method, we also offer a non-solvent-based approach. By the end of this article, you'll be well equipped to battle against the sticky foe that is pine sap. So, let's get started with the key to success: Preparation.
Preparation is Key
Preparation is an indispensable element when it comes to ensuring a job is done right, especially when dealing with stubborn substances like pine sap. It is not enough to simply tackle the task head-on without the correct measures in place. Firstly, the right cleaning solution must be chosen, as it is fundamental in effectively removing sap without causing any damage. Secondly, it is important to take precautionary steps to protect the surrounding areas to prevent any unwanted damage or additional cleaning caused during the sap removal process. Lastly, it's wise to remove the excess pine sap, this will help in the overall cleanliness and make the job a whole lot easier. These three supporting ideas of choosing the perfect cleaning solution, safeguarding the surrounding area, and excess pine sap removal form the basis of success and efficiency in sap cleaning. Let's begin by understanding why choosing the right cleaning solution is important to the outcome of your job.
Choosing the Right Cleaning Solution
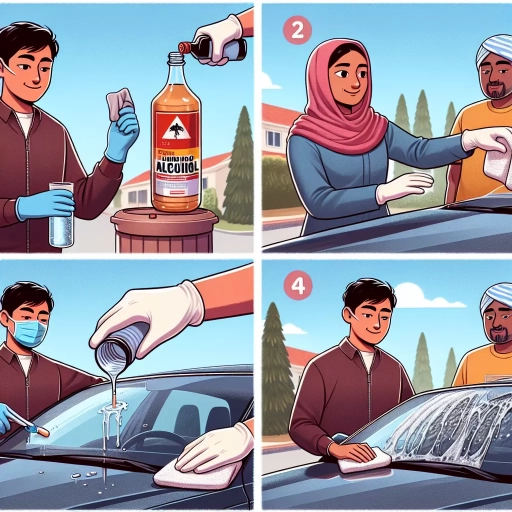
Choosing the right cleaning solution isn't just about buying the most potent or aggressive cleaner. Rather, it requires careful consideration of the surface you're cleaning and the nature of the stains. Pine sap, tough as it may seem, can more easily be removed with the right cleaning formula. When preparing to clean pine sap off your car, you need to choose a cleaner that is strong enough to dissolve the sap, but gentle enough to not damage your car's paint job. Firstly, remember that not all cleaning products are formulated equal. Some are more abrasive and could scratch or dull your car’s paint finish. The pine sap removal process should not introduce additional problems to your vehicle. Therefore, consider products that are specifically designed to remove tree sap from cars. Such products have been manufactured with the understanding that car surfaces require a delicate balance of toughness and gentleness. Secondly, consider the potential impacts on the environment. We all have a responsibility to protect our environment for future generations. Thus, opt for environmentally-friendly cleaning solutions. These are not only effective but also safe, as they do not release toxic pollutants. Finally, it's worth noting that you might not even need a commercial cleaner. Home remedies like rubbing alcohol or hand sanitizer can also be effective in removing pine sap. Just remember to test these solutions on a small, unnoticeable part of your car first to ensure they don't cause damage. In summation, carefully consider your choice of cleaning solution. It can make the removal process either quite straightforward or needlessly difficult. Whether you decide on a commercial cleaner or a home remedy, ensure that the solution will effectively remove the pine sap without causing any damage to your car's paint job. Preparation indeed is key to a sap-free, spotlessly clean, and undamaged vehicle.
Protecting the Surrounding Area
Protecting the surrounding area is a crucial supporting point under the subtitle Preparation is Key, in our article on how to remove pine sap from a car. Starting a procedure without appropriate preparation can sometimes invite more harm than good. This is specifically true when you're dealing with removing pine sap from a car. A car is more than just a mode of conveyance; it is also an investment that requires proper care and maintenance. When you find yourself in the sticky situation of having to remove pine sap, you need to prepare properly and this includes protecting the surrounding areas. Firstly, there needs to be a clear understanding of the exact location of the sap. Pine sap can spread easily, and can be quite challenging to remove once it has hardened. Therefore, it’s beneficial to pinpoint the direct area that has been affected to minimize the scope of work required. Once the affected area has been identified, proper care must be taken to shield the adjoining areas to prevent unintentional damage. Some substances that are effective for removing pine sap can potentially harm the paint or finish of your car. Hence, it’s safe to apply some protective layers, such as masking tape or a sacrificial cloth on the bordering areas. These protective barriers can shield the other parts from being scratched or stained in the removal process. Secondly, it's important to recognize that pine sap removal is not a rushed task. Scouring the area harshly or quickly can do more harm than good, particularly if you’re not protecting the surrounding areas. Take the time to properly prepare the area by first washing the car thoroughly. This will remove any loose sap or dirt that may inadvertently scratch the car’s paint during the major sap removal process. Finally, the selected cleaning agent should be carefully considered. Some commercial pine sap removers have strong chemical ingredients that can stain or discolor areas where they are accidentally applied. It’s recommended to use a gentle cleaning agent, particularly for cars with a darker paint finish. Using a soft cloth, apply the cleaner gently and gradually, ensuring the substance doesn't go beyond the protective measures set in place. Proper preparation and protection of the surrounding area when removing pine sap from a car ensures you maintain the appearance and condition of your car. This is not simply a cosmetic concern, but also affects the reselling value of the car. Consistently paying attention to such details will keep one step ahead in maintaining your vehicle in a perfect condition. This holistic and considerate approach not only protects your vehicle, but also serves to cultivate a valuable automotive care skillset.
Removing Excess Pine Sap
When it comes to removing excess pine sap from cars, preparation is often the key. First and foremost, it's crucial to always work on a cool, thoroughly washed, and dried surface. Heat can make sap even more stubborn, and dirt or dust trapped under the sap during the cleaning process could scratch the paintwork. Invest in a top-quality bug and tar remover, a highly recommended and efficient product for sap removal. These removers are designed to break down stubborn deposits without damaging the car's finish. Always remember to read the instructions provided by the manufacturer, as each product will have its specific usage guidelines. Before you start with the removal process, try to remove as much sap as possible manually. For this purpose, plastic razor blades can be handy, plastic being the key so you won't risk scratching the car's surface. However, this method is only advisable if the sap is in a globular form and not smeared into the paintwork. After you have manually removed as much sap as possible, spray the affected area with the bug and tar remover. Allow the solution to soak as directed on the product's label, often just a few minutes. The soaking will help soften the harder, dried-on sap, making it much easier to remove. Finally, use a microfiber cloth to gently wipe away the loosened sap. Rinse the area with warm water and mild soap, and then dry it off to avoid any water spots. Remember to never scrub aggressively at the sap, as this could lead to scratches on your car's surface. Instead, be patient and allow the removal product to do its job. For chronic or stubborn sap spots, it might be necessary to repeat the process a few times. After the sap is thoroughly removed, consider applying a coat of high-quality car wax to the area to protect it from future sap incidents. Wax forms a barrier between your car's surface and the environment, making it less likely that sap will adhere in the future. Remember, different types of sap can require different cleaning methods. It's always good to have a basic understanding of the type of sap you're dealing with. Grey or red pine sap is much stickier and harder than other types and thus may require extra effort. Ultimately, the key to removing excess pine sap effectively is thorough preparation - the correct tools, careful process, and patience. With all these in hand, you can successfully remove that stubborn sap and maintain the glossy, spotless appearance of your car.
Method 1: Solvent-Based Removal
There are numerous methods to remove that stubborn pine sap, with solvent-based removal presenting an efficient, tried-and-tested way. This article offers a comprehensive walkthrough of leveraging solvent-based removal, employing foolproof steps. Firstly, using mineral spirits or paint thinner, which are readily available at your local hardware store, proves to be a practical solution. Not only does this method break down the pine sap at a molecular level, but it also prepares your affected area for further processing. Secondly, we delve into applying the solvent to the affected area. It’s a delicate stage requiring meticulous attention to detail to ensure optimal results. Lastly, we’ll cover the vital step of wiping away the pine sap. This is the decisive moment where we bid farewell to the troublesome pine sap. Being informed about these turns, you’re equipped to handle pine sap with professional-like finesse. Now, let's immerse ourselves in the world of mineral spirits and paint thinners, discovering how these fantastic substances enable a smooth sail through the pine sap removal process.
Using Mineral Spirits or Paint Thinner
Method 1: Solvent-Based Removal relies heavily on using chemicals like mineral spirits or paint thinner to remove stubborn pine sap from your car. These are reliable and effective methods due to the distinct characteristics of these solvents. The active ingredients in these substances are specifically designed to break down and dissolve the sticky, resinous substances in pine sap. When applied correctly, they can seamlessly strip off the sap without damaging the car's paintwork. Mineral spirits, known also as mineral turpentine or white spirits, have a mild, petroleum-like odor and are less potent and volatile compared to the average paint thinner. Yet, they are powerful enough to tackle even the most resistant sap deposits. To make the most of mineral spirits, generously apply it on the sap-stained area and let it sit for a few moments. This allows for the spirit to infiltrate the sap, loosening its bond with the car's surface. Then gently rub off the sap using a soft, clean rag. A few rounds may be required for very sticky sap. Alternatively, paint thinner is another strong solvent that proffers a more abrasive approach to sap removal. Given its potency, it should be used cautiously to avoid harming your vehicle's paint job. As with mineral spirits, apply the paint thinner to the sap area and let it sit to break down the sap. Then, use a clean rag to gently wipe off the loosened sap. When using paint thinner, it is crucial to rinse the treated area promptly with warm soapy water to cleanse away any remaining solvent and minimize any potential damage. Both mineral spirits and paint thinner are undeniably effective, but their strength calls for mindful usage. Always remember to wear protective gloves and ensure good ventilation while working with these solvents. This is not only necessary for safety but also to ensure the chemical odor does not linger on. Don't forget to wash treated areas of your car afterward, to get rid of residual solvents and any potentially damaging agents. While going for this method, you may need a couple of attempts to completely remove stubborn sap. It's a game of patience and caution - be patient for the solvent to take effect and always be cautious to prevent damage to your car. Regardless of your situation, keep in mind that your effort in adhering to this routine can result in a sap-free, shiny vehicle exterior that’s worth boasting about.
Applying the Solvent to the Affected Area
In the process of removing pine sap from your car, the initial step in the solvent-based removal method involves applying the solvent to the region that has been affected. A critical aspect to bear in mind during this process is to always choose a solvent that is not harmful or too harsh for the car's paint; otherwise, this can lead to an abrasive effect and possible paint damage. You can consider using substances such as rubbing alcohol (also known as isopropyl alcohol), WD-40, hand sanitizer, or even a dedicated sap remover. Upon selecting your preferred solvent, apply it generously to a clean, soft cloth or microfiber towel; never apply it directly to the car's surface. After application, gently blot the sap-stained area, allowing the solvent to penetrate and work. Do not scrub vigorously at this point, as this can potentially spread the sap, making the problem even bigger. Both time and the solvent need to break down the sap's sticky composition. Note that applying the solvent to the affected area does not guarantee immediate results. Patience is key to achieving optimal results while preventing unwanted damage. Depending on the amount and age of the sap, it may take several applications and a considerable amount of time to fully eradicate the sticky substance from your car's surface. After the application and waiting for a few minutes, use a plastic scraper or an old credit card for gently scraping off the sap. Be careful not to use metal objects to avoid scratching your car's paintwork. After scraping, wipe off any residue with a clean, damp cloth. To finish off, it is always recommendable to wash the car after any sap removal process. Not only will this eliminate any leftovers, but it also helps to neutralize the solvent, which can continue to break down the sap even after it's no longer beneficial. Furthermore, washing your car can reveal areas that you may have initially overlooked. Subsequent to washing the car, dry it and apply wax to restore the shiny surface and ensure the car's paint is protected from future sap encounters. In essence, applying the solvent to the affected area is the first line of attack against the sap. Its choice and application must be done wisely to maintain the car's aesthetic appeal.
Wiping Away the Pine Sap
Wiping away the pine sap can be a daunting yet integral part of maintaining your car's aesthetics. The solvent-based removal method, though labor-intensive, is highly effective. This method employs the use of specific chemicals or solutions that are commonly used in the removal of stubborn stains or glues. Solvents such as alcohol, hand sanitizer, or even a dedicated sap remover work by breaking down the sap at a molecular level, making it easier to wipe off. This method, however, requires you to act with precision. Start by ensuring that the car is clean, mainly focusing on the area with the sap. Rinappershing dirt or grime can hamper effective sap removal or even scratch the paint. Then, apply your chosen solvent sparingly to a soft, clean cloth. Avoid applying it directly to avoid potential damage to the paintwork. Carefully, rub the cloth in a circular motion over the sapped area. The sap should start to dissolve slowly, but do not rush the process, as hasty cleaning can harm the car's surface. While employing this method, it's essential to remember never to use a high concentration of solvent, as it could potentially peel off the car's paint. Always stick to a mild or diluted solvent. After wiping the dissolving sap with the solvent-soaked cloth, follow up by cleaning the area with a wet cloth. This step ensures that there's no residual solvent left as it can damage your car's paint if left to stay. Solvent-based removal should be done under cool conditions, preferably in a shade. Too much sun exposure can dry up the solvent before it does its job increasing the chances of paint damage. After completing the solvent-based removal process, always buff out the area using a car wax. Buffing the surface not only restores the car's shine but also protects the paintwork from the harsh elements and potential staining in the future. Always wear protective gloves and eye protection while working with solvents. They're typically flammable and can cause serious skin irritations or even resin poisoning. Remember, the goal isn't only to clean the pine sap but also to leave your paintwork as it was - spotless and shiny! To achieve this, work methodically and patiently. Do routine checks on your car, especially if you often park under pine trees, because the earlier you catch the sap, the easier it will be to remove.
Method 2: Non-Solvent-Based Removal
In this high-quality, informative, and engaging article, we're exploring Method 2: Non-Solvent-Based Removal, a completely safe and environment-friendly technique to deal with stubborn substances that stick to surfaces. This method has the upper hand in being non-hazardous and devoid of chemical usage, making it an ideal choice for those conscious about their health and the environment. Our discussion will subsequently delve into three essential stages of this method, namely, 'Using Dish Soap and Warm Water', 'Applying the Soap Solution to the Affected Area', and 'Rinsing and Drying the Area'. We will begin by explaining how mixing everyday dish soap with warm water can effectively break down the problematic substance before moving on to the application process. Lastly, the importance of proper rinsing and drying to ensure a pristine and spotless surface will be emphasized. So, let's get our hands dirty (only to make them clean again) and deep-dive into the first phase of this cleaning process - Using Dish Soap and Warm Water.
Using Dish Soap and Warm Water
Using a solution consisting of dish soap and warm water is a simple, safe, and cost-effective method for removing pine sap from a car. This non-abrasive solution is an ideal choice for those who want to avoid the potential paint damage that can result from solvent-based removal methods. The process begins by mixing a few drops of liquid dish soap into a bucket of warm water. It is recommended to use a soap that is gentle on the hands as they are often formulated to be gentle on surfaces too, reducing the risk of causing unwanted abrasions to your car's paintwork. Once the soap has been thoroughly mixed into the water, grab a soft, clean cloth, and submerge it in the mixture. Wring out the excess water from the cloth to avoid an over-saturated, dripping mess. Next, begin to gently rub the cloth over the areas of the car affected by the pine sap. Apply minimal pressure to avoid scratching the paint, and attempt to lift the sap by using a slight circular motion. The soap in the solution is especially effective at breaking down the sticky, viscous nature of pine sap, making it easier to remove it from the surface of your car. As you work the soapy solution into the sap, refresh your cleaning cloth frequently, rinsing it out in the mixture, as it will pick up some of the sap each time you apply it to the car's surface. Neglecting to do this can result in smearing the sap across a wider area. Once all the sap has been removed, rinse the soapy areas thoroughly with clean warm water, ensuring not to leave any soap residue behind, as this can attract dirt and dust. After you have achieved the desired cleanliness, dry the surface with a clean, dry, soft cloth to prevent water spots from forming, always remembering to move the cloth in a circular motion. Considering the effectiveness and safety of the dish soap and warm water method, it can be utilized regularly to maintain a pine sap-free car. Whether you live in an area prone to sap drippings or have parked under the wrong tree, having a go-to method that is easy, safe, and cost-effective will certainly come in handy. This method is not only suitable for maintaining the aesthetics of your car but also crucial in preventing potential damage from prolonged exposure to sticky, hardened pine sap. In conclusion, the straightforwardness and inexpensiveness of using dish soap and warm water make it a viable and smart solution for those seeking safe and efficient removal of pine sap from their car's surface. By investing a little time and effort and following this user-friendly method, you can easily maintain the look and health of your car's paintwork.
Applying the Soap Solution to the Affected Area
Method 2: Non-Solvent-Based Removal also offers an effective way of removing pine sap, particularly if you prefer not to use chemicals on your car. The second step in this process is the application of a soap solution to the affected area. This is an advantageous solution as it is relatively inexpensive, simple to create, and kind to the environment. To begin this phase of removal, it's important to confirm the sap's fully dried, so it won't smear and lead to a wider affected area. Once confirmed, create a soap solution by simply combining warm water and a mild, pH-balanced soap, such as a dish or car wash soap. These are preferable as they're specifically formulated not to damage car paint or finish. Apply the soapy water solution directly to the sap, soaking it thoroughly. Use a soft cloth or non-abrasive sponge to softly agitate the area. The pH balanced soap will start working to break down the tough, sticky composition of the sap and it will begin to loosen it from the surface of your car. Patience is key during this process; you may have to soak and gently scrub several times before the sap begins to lift. It is crucial not to resort to hard scrubbing, as it could inadvertently scratch the car paint. Periodically rinse the area with clean water to prevent the soap solution from drying out and to track your progress in removing the sap. The application of soapy water is a gentler alternative to solvent-based removals, making it suitable for all colors and car finishes. It may require more time and persistence but it's a safer approach, especially if you're concerned about potential damage to your vehicle's paint due to harsher solvents. Do not forget to thoroughly rinse and dry the area once the sap has been removed to prevent any soap residue from causing damage or stains. While applying soap solution to the affected area may seem laborious, it can be a very effective method when dealing with pesky pine sap. With careful application and the correct approach, this non-solvent based removal technique can restore your car to its pristine state, saving you not only a trip to the carwash but also maintaining the longevity of your car's exterior finish.
Rinsing and Drying the Area
After yielding satisfactory results with non-solvent-based removal, you should proceed to the secondary step, which involves rinsing and drying the formerly sapped region of your car. Initially, you'll require a large pitcher of clean, lukewarm water. Why lukewarm water? This temperature is ideal because it can effectively eliminate any remaining fragments of sap, dirt or residue without causing any further damage to the vehicle's surface - a feature that you wouldn't necessarily get with boiling or icy cold water. Once you've amassed the proper water temperature, you're ready to initiate the rinsing process. Commence by generously pouring the lukewarm water over the treated area, making sure to cover both within and surrounding the previously sap-afflicted location. Note that this isn't a rushed affair where you haphazardly splash water; rather, it should be a considered, deliberate action. Ideally, you'll want to repeat the rinsing procedure multiple times. The purpose here is not merely removal but also ensuring that any embedded remnants are wholly eradicated, leaving your car spotless and gleaming. As you rinse, use a soft sponge or cloth to lightly scrub the area. But be cautious not to rub too hard as it could harm your car's paint or clear coat. Throughout this step, keep a mindful approach to recognize if there might still be sap residue left. If there are some stubborn specks, you might want to repeat the non-solvent method before going on. After you've thoroughly rinsed the area, it's time to dry it. This stage is equally as essential as the others, mainly because improper drying can result in water blots, calcium deposit and other undesirable imperfections on your car's external surface. Using a clean, soft cloth or a microfiber towel, gently pat down the wet areas until all the moisture is absorbed. One might be tempted to expediently wipe or rub, thinking it's quicker, but this behaviour might inadvertently introduce micro-scratches or blemishes. Moreover, try to make sure that you wipe in one direction; this will prevent swirl marks from appearing on the surface. A straight-line pattern is preferable for maintaining the glossy shine of your car's surface. After you've dried off the area, take a step back and assess the site. At this point, your car should be free from any pine sap and maintain its original and radiant appeal. In conclusion, rinsing and drying the area are crucial phases within the process of non-solvent based pine sap removal from your car. They serve as an assurance that your vehicle regains its clean and polished state. These steps, though quite simple, require patience and attentiveness to detail to avoid causing damage to your vehicle's paintwork. Implementing these correctly will help you manage unanticipated sap incidents, ensuring that your car always stays in pristine condition.