How To Switch Apple Id On Iphone
Here is the introduction paragraph: Switching your Apple ID on your iPhone can be a daunting task, especially if you're not sure where to start. However, with the right guidance, you can seamlessly transition to a new Apple ID and enjoy uninterrupted access to your favorite Apple services. To ensure a smooth transition, it's essential to prepare beforehand, switch your Apple ID correctly, and complete post-switching tasks. In this article, we'll walk you through the process, starting with the crucial preparation steps you need to take before making the switch. By understanding what to expect and how to prepare, you'll be able to switch your Apple ID with confidence and avoid any potential issues. So, let's dive into the first step: Preparation Before Switching Apple ID on iPhone.
Preparation Before Switching Apple ID on iPhone
Before switching Apple ID on your iPhone, it's essential to take a few crucial steps to ensure a smooth transition and prevent any potential data loss or account issues. To start, you'll need to backup your iPhone data to prevent losing any important information. Additionally, you'll need to sign out of iCloud and iTunes to avoid any conflicts with your new Apple ID. Lastly, removing payment methods and subscriptions associated with your old Apple ID is also necessary to avoid any unwanted charges or account complications. By taking these steps, you can ensure a seamless transition to your new Apple ID. Let's start with the first step: backing up your iPhone data.
Backup Your iPhone Data
Before switching Apple ID on your iPhone, it's essential to backup your iPhone data to prevent any potential loss. Backing up your iPhone data ensures that all your important information, such as contacts, photos, messages, and apps, are safely stored and can be easily restored to your new Apple ID. You can backup your iPhone data using iCloud or iTunes. To backup using iCloud, go to Settings, tap on your name, and select iCloud. Then, tap on iCloud Backup and turn it on. Make sure you have enough iCloud storage space to complete the backup process. Alternatively, you can backup your iPhone data using iTunes by connecting your iPhone to your computer, opening iTunes, and selecting your iPhone. Then, click on Summary and select Back Up Now. It's recommended to backup your iPhone data regularly to prevent any data loss in case your iPhone is lost, stolen, or damaged. Additionally, you can also use third-party backup apps, such as Google Drive or Dropbox, to backup your iPhone data. By backing up your iPhone data, you can ensure a smooth transition to your new Apple ID and avoid any potential data loss.
Sign Out of iCloud and iTunes
When switching Apple IDs on your iPhone, it's essential to sign out of iCloud and iTunes to avoid any potential conflicts or data loss. To do this, go to the Settings app, tap on your name at the top, and select "Sign Out" from the menu. You will be prompted to enter your Apple ID password to confirm the action. Once you've signed out, you'll be logged out of iCloud, iTunes, and the App Store. This step is crucial in ensuring a smooth transition to your new Apple ID, as it will prevent any data from being synced to the wrong account. Additionally, signing out of iCloud and iTunes will also remove any associated devices from your old Apple ID, which is necessary when switching to a new account. By taking this step, you'll be able to start fresh with your new Apple ID and avoid any potential issues with data syncing or account conflicts.
Remove Payment Methods and Subscriptions
Before switching Apple ID on your iPhone, it's essential to remove any existing payment methods and subscriptions associated with your current Apple ID. This step is crucial to avoid any potential issues or complications during the transition process. To remove payment methods, go to the Settings app, tap on your name, and select "Payment & Shipping." From there, you can view and edit your payment methods, including credit cards, debit cards, and other payment options. Tap on the "Edit" button next to each payment method and select "Remove" to delete it. Additionally, you may need to cancel any recurring subscriptions, such as Apple Music or Apple TV+, to prevent any unexpected charges. To do this, go to the Settings app, tap on your name, and select "Subscriptions." Find the subscription you want to cancel and tap on it, then select "Cancel Subscription" to confirm. By removing payment methods and subscriptions, you'll ensure a smooth transition to your new Apple ID and avoid any potential issues with billing or account access.
Switching Apple ID on iPhone
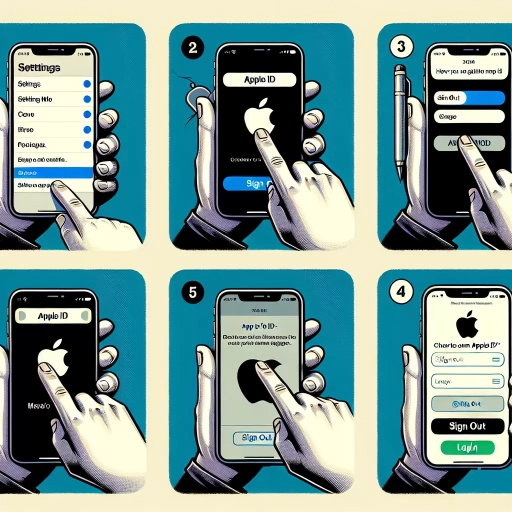
Switching your Apple ID on your iPhone can be a straightforward process if you know the right steps to follow. If you're looking to change your Apple ID, whether it's due to a change in email address, a desire to separate personal and work accounts, or any other reason, you'll need to follow a few simple steps. First, you'll need to go to your iPhone's settings and tap on your name to access your Apple ID settings. From there, you'll need to sign out of your current Apple ID, which will disconnect your device from the old account. Finally, you'll need to sign in with your new Apple ID, which will update your device's settings and connect it to the new account. By following these steps, you can easily switch your Apple ID on your iPhone and start using your new account. To get started, go to Settings and tap on your name.
Go to Settings and Tap on Your Name
To switch your Apple ID on an iPhone, start by going to the Settings app. Once you're in the Settings app, tap on your name at the top of the screen. This will take you to the Apple ID settings page, where you can manage your account information and make changes to your Apple ID. From here, you can tap on "Sign Out" to sign out of your current Apple ID, and then sign in with a different Apple ID. Alternatively, you can tap on "Name, Phone Numbers, Email" to edit your account information, or tap on "Password & Security" to change your password or set up two-factor authentication. By accessing your Apple ID settings through the Settings app, you can easily switch to a different Apple ID or make changes to your existing account.
Sign Out of Your Current Apple ID
To switch Apple ID on your iPhone, you first need to sign out of your current Apple ID. This is a crucial step to ensure a smooth transition to your new Apple ID. To sign out, go to the Settings app on your iPhone, then tap on your name at the top of the screen. This will take you to your Apple ID account page. Scroll down to the bottom of the page and tap on "Sign Out." You will be prompted to enter your Apple ID password to confirm that you want to sign out. Enter your password and tap on "Turn Off" to disable Find My iPhone, which is required to sign out of your Apple ID. Once you've done this, tap on "Sign Out" again to complete the process. You will then be signed out of your current Apple ID on your iPhone. Note that signing out of your Apple ID will remove all content and data associated with that ID from your iPhone, including iCloud data, iMessage history, and FaceTime history. Therefore, make sure to back up your data before signing out. Additionally, if you have two-factor authentication (2FA) enabled on your Apple ID, you may need to enter a verification code sent to one of your trusted devices to complete the sign-out process.
Sign In with Your New Apple ID
To sign in with your new Apple ID on your iPhone, start by going to the Settings app. Tap on your name at the top of the screen, then select "Sign Out" at the bottom. You will be prompted to enter your Apple ID password to confirm that you want to sign out. Once you've signed out, you'll be taken back to the sign-in screen. Tap on "Sign in to your iPhone" and enter your new Apple ID and password. If you have two-factor authentication (2FA) enabled on your new Apple ID, you'll receive a verification code on one of your other Apple devices. Enter this code to complete the sign-in process. If you don't have 2FA enabled, you'll be asked to create a new passcode for your iPhone. Once you've signed in with your new Apple ID, you'll be prompted to set up iCloud and other services. Follow the on-screen instructions to complete the setup process. Note that signing in with a new Apple ID will remove all content and settings associated with your old Apple ID, so make sure to back up your data before making the switch.
Post-Switching Tasks and Considerations
Here is the introduction paragraph: Switching to a new device can be an exciting experience, but it also requires some post-switching tasks to ensure a seamless transition. After setting up your new device, there are several considerations to keep in mind to ensure that everything runs smoothly. In this article, we will discuss three essential post-switching tasks and considerations that you should be aware of. First, you need to update your Apple ID on other devices to ensure that you can access all your content and services across all your devices. Additionally, you may need to re-download purchased content, such as music, movies, or apps, to access them on your new device. Finally, it's essential to check for any app or service disruptions that may occur during the switching process. By following these steps, you can ensure a smooth transition to your new device. Let's start with the first task: updating your Apple ID on other devices.
Update Your Apple ID on Other Devices
When you switch to a new Apple ID on your iPhone, it's essential to update your Apple ID on other devices to ensure seamless integration and synchronization across all your Apple devices. This includes your iPad, iPod touch, Apple Watch, Mac, and Apple TV. To update your Apple ID on other devices, follow these steps: On your iPad or iPod touch, go to Settings > [your name] > Sign Out, then sign in with your new Apple ID. On your Apple Watch, open the Watch app on your iPhone, tap General > Apple ID, and sign in with your new Apple ID. On your Mac, go to System Preferences > Apple ID, click Overview, and sign in with your new Apple ID. On your Apple TV, go to Settings > Accounts > iCloud, and sign in with your new Apple ID. Additionally, if you use Apple services like iCloud, iMessage, or FaceTime on other devices, you may need to sign out and sign back in with your new Apple ID to continue using these services. By updating your Apple ID on all your devices, you'll be able to access your content, use Apple services, and enjoy a consistent experience across all your Apple devices.
Re-Download Purchased Content
When switching to a new Apple ID on your iPhone, it's essential to re-download purchased content to ensure you have access to your music, movies, TV shows, apps, and books. To do this, go to the App Store, iTunes Store, or Apple Books, and sign in with your new Apple ID. Then, tap on the "Purchased" tab, where you'll see a list of all the content you've bought with your old Apple ID. Tap on the "Not on This iPhone" tab to view the content that's not currently downloaded on your device. From here, you can re-download individual items or select "Download All" to restore all your purchased content. Additionally, if you have an Apple Music subscription, you'll need to re-authorize your new Apple ID to access your music library. To do this, go to the Music app, tap on "For You," and then tap on "Sign In" to enter your new Apple ID and password. Once you've re-downloaded your purchased content, you'll be able to access it across all your devices connected to your new Apple ID.
Check for Any App or Service Disruptions
After switching to a new Apple ID on your iPhone, it's essential to check for any app or service disruptions. Some apps may not function properly or may require you to sign in again with your new Apple ID. Start by checking your most frequently used apps, such as social media, email, and music streaming services. You may need to update your login credentials or re-authorize certain permissions. Additionally, if you use services like iCloud, iMessage, or FaceTime, ensure that they are working correctly with your new Apple ID. You may also need to update your Apple ID in other Apple devices, such as your Mac or iPad, to maintain seamless integration across all your devices. Furthermore, if you have any subscriptions or purchases tied to your old Apple ID, you may need to transfer them to your new account to avoid any disruptions. By checking for any app or service disruptions, you can ensure a smooth transition to your new Apple ID and avoid any potential issues.