How To Paint Leather
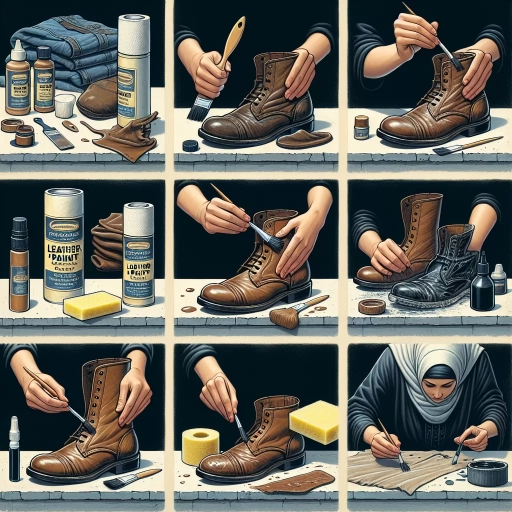
Painting leather can be a fun and creative way to give new life to old or worn-out leather items, such as shoes, handbags, or furniture. However, it requires some skill and knowledge to achieve a professional-looking finish. To ensure a successful outcome, it's essential to understand the preparation, techniques, and protection involved in painting leather. Preparation is key to a successful paint job, as it involves cleaning, conditioning, and preparing the leather surface for painting. With the right preparation, you can achieve a smooth, even finish that will make your painted leather look like new. In this article, we will explore the essential steps and techniques for painting leather, including preparation, painting techniques for a professional finish, and sealing and protecting your painted leather. By following these steps, you can create beautiful, long-lasting, and professional-looking painted leather items. So, let's start with the first step: Preparation is Key.
Preparation is Key
When it comes to painting leather, preparation is key to achieving a professional-looking finish. A well-prepared surface ensures that the paint adheres evenly and lasts longer. To start, it's essential to choose the right leather type for your project, as different types of leather have unique characteristics that affect the painting process. Next, preparing the leather surface is crucial, as it involves cleaning and conditioning the leather to create a smooth canvas for painting. Finally, selecting the appropriate paint is vital, as it determines the color, finish, and durability of the final product. By following these steps, you can ensure a successful painting experience. With the right leather type, you'll be off to a great start, so let's dive into the first step: choosing the right leather type.
Choose the Right Leather Type
When it comes to painting leather, choosing the right type of leather is crucial for a successful outcome. Not all leathers are created equal, and some types are more suitable for painting than others. Aniline leathers, for example, are ideal for painting because they have a natural, porous surface that allows the paint to penetrate evenly. Semi-aniline leathers, on the other hand, have a slightly more protected surface, but still offer a good base for painting. Pigmented leathers, however, are not recommended for painting as they have a thick, opaque coating that prevents the paint from adhering properly. Suede and nubuck leathers are also not suitable for painting as they have a delicate, velvety surface that can be easily damaged. Patent leathers, with their glossy, shellacked finish, are also not a good choice for painting. By choosing the right type of leather, you can ensure that your paint job turns out smooth, even, and long-lasting.
Prepare the Leather Surface
When preparing the leather surface for painting, it's essential to start with a clean slate. Begin by gently wiping the leather with a soft, dry cloth to remove any dirt, dust, or debris that may be present. This will prevent any imperfections or contaminants from interfering with the paint's adhesion. Next, use a leather cleaner or a mild soap solution to thoroughly clean the leather, paying particular attention to any areas with stubborn stains or discoloration. Be sure to test a small, inconspicuous area first to ensure the cleaner doesn't damage the leather. Once the leather is clean, use a clean, damp cloth to wipe away any soap residue and allow the leather to air dry completely. This step is crucial, as any remaining moisture can affect the paint's ability to adhere properly. If the leather has a glossy finish, you may need to use a deglazer or a leather prep solution to remove the existing finish and create a surface that's receptive to paint. Finally, use a leather primer or a specialized paint primer to create a strong bond between the leather and the paint, ensuring a smooth, even finish. By following these steps, you'll be able to create a clean, prepared surface that's ready for painting, setting the stage for a successful and long-lasting finish.
Select the Appropriate Paint
When it comes to painting leather, selecting the right paint is crucial for achieving a professional-looking finish. Not all paints are created equal, and using the wrong type can lead to a dull, flaky, or uneven finish. To ensure a successful paint job, it's essential to choose a paint specifically designed for leather. These paints are usually formulated with special additives that help them adhere to the leather surface and withstand wear and tear. Look for paints labeled as "leather paint" or "leather dye," and make sure to read the instructions carefully to ensure you're using the right product for your specific leather type. Some popular types of leather paint include acrylic, polyurethane, and wax-based paints, each with its own unique characteristics and benefits. Acrylic paints are water-based and easy to clean up, while polyurethane paints offer a high-gloss finish and excellent durability. Wax-based paints, on the other hand, provide a soft, subtle sheen and are often used for antique or distressed finishes. By selecting the right paint for your leather project, you'll be able to achieve a beautiful, long-lasting finish that enhances the natural beauty of the leather.
Painting Techniques for a Professional Finish
Achieving a professional finish in painting requires a combination of skill, patience, and attention to detail. To ensure a smooth and even finish, it's essential to employ the right techniques. Three key techniques to focus on are applying a base coat for even coverage, using thin coats to avoid pooling, and allowing each coat to dry completely. By mastering these techniques, you'll be able to achieve a high-quality finish that looks like it was done by a professional. In this article, we'll dive deeper into each of these techniques, starting with the importance of applying a base coat for even coverage.
Apply a Base Coat for Even Coverage
Applying a base coat is a crucial step in achieving even coverage when painting leather. A base coat serves as a primer, creating a uniform surface for the topcoat to adhere to, ensuring a smooth and even finish. To apply a base coat, start by selecting a high-quality leather paint specifically designed for your type of leather. Make sure to read the instructions and follow any recommended preparation steps, such as cleaning and conditioning the leather. Next, apply a thin, even layer of base coat to the leather using a soft-bristled brush or a foam applicator. Work in small sections, about 4-6 square inches at a time, to maintain even coverage. Use gentle, smooth strokes to spread the base coat, feathering it out towards the edges to prevent pooling. Allow the base coat to dry completely according to the manufacturer's instructions, usually between 15-30 minutes, before applying additional coats or the topcoat. It's essential to note that some leathers, such as suede or nubuck, may require a specialized base coat or additional preparation steps. Always test a small, inconspicuous area first to ensure the base coat adheres well and doesn't affect the leather's texture or color. By applying a base coat, you'll be able to achieve a professional-looking finish with even coverage, making your painted leather project look its best.
Use Thin Coats to Avoid Pooling
When painting leather, it's essential to use thin coats to avoid pooling. Pooling occurs when the paint accumulates in certain areas, creating an uneven finish. This can happen when the paint is applied too heavily or when the leather is not properly prepared. To avoid pooling, apply thin, even coats of paint, allowing each coat to dry completely before applying the next. This will help prevent the paint from accumulating in certain areas and ensure a smooth, even finish. Additionally, use a soft brush or foam applicator to apply the paint, as these tools will help to distribute the paint evenly and prevent pooling. By using thin coats and the right application tools, you can achieve a professional-looking finish on your leather project.
Allow Each Coat to Dry Completely
When painting leather, it's essential to allow each coat to dry completely before applying the next one. This is crucial for achieving a professional finish and ensuring the paint adheres evenly to the leather surface. If you don't let each coat dry, the paint may pool or run, resulting in an uneven finish. Additionally, if the paint is not fully dry, it may not bond properly with the subsequent coat, leading to peeling or flaking. To ensure each coat dries completely, follow the instructions on the paint can for the recommended drying time, which can range from 15 minutes to several hours, depending on the type of paint and environmental conditions. It's also important to work in a well-ventilated area, away from direct sunlight and heat sources, to prevent the paint from drying too quickly or unevenly. By allowing each coat to dry completely, you'll be able to achieve a smooth, even finish that will make your leather project look professional and long-lasting.
Sealing and Protecting Your Painted Leather
Painted leather is a beautiful and unique material that can add a touch of elegance to any item, from shoes to handbags. However, it requires special care to maintain its appearance and longevity. To keep your painted leather looking its best, it's essential to seal and protect it from the elements. One way to do this is by applying a topcoat, which provides a barrier against scratches and fading. Additionally, using a leather conditioner can help maintain the flexibility and suppleness of the leather, preventing it from becoming stiff and brittle. It's also crucial to avoid exposing your painted leather to harsh chemicals, which can damage the paint and the leather itself. By taking these steps, you can ensure that your painted leather remains vibrant and durable for years to come. In this article, we'll explore the importance of applying a topcoat for durability, and how it can help protect your painted leather from the elements.
Apply a Topcoat for Durability
Applying a topcoat to your painted leather is a crucial step in ensuring the durability and longevity of the finish. A topcoat serves as a protective barrier against wear and tear, spills, and scratches, helping to maintain the appearance and integrity of the leather. When selecting a topcoat, consider a water-based or solvent-based option that is specifically designed for use on leather. Water-based topcoats are generally easier to apply and dry quickly, while solvent-based topcoats provide a harder, more durable finish. Before applying the topcoat, make sure the paint is completely dry and free of dust and debris. Apply the topcoat in thin, even layers, allowing each layer to dry before applying the next. This will help prevent pooling and ensure a smooth, even finish. It's also important to follow the manufacturer's instructions for application and drying times to ensure the best results. By applying a topcoat, you can enjoy a beautiful, long-lasting finish that will withstand the test of time.
Use a Leather Conditioner for Flexibility
Using a leather conditioner for flexibility is an essential step in maintaining the health and longevity of your painted leather. After painting, the leather may become stiff and inflexible due to the paint's drying properties. A leather conditioner helps to restore the natural moisture and suppleness of the leather, making it more pliable and resistant to cracking. When choosing a leather conditioner, look for a product that is specifically designed for use on painted leather. These conditioners are usually formulated to work in harmony with the paint, rather than compromising its adhesion or color. Apply the conditioner evenly to the painted surface, using a soft cloth to work it into the leather. Allow the conditioner to absorb fully before handling the leather, and repeat the process as needed to maintain the desired level of flexibility. By incorporating a leather conditioner into your leather care routine, you can enjoy a beautifully painted finish that remains soft, supple, and crack-free for years to come.
Avoid Exposure to Harsh Chemicals
Avoiding exposure to harsh chemicals is crucial to maintaining the quality and longevity of your painted leather. Chemicals such as bleach, ammonia, and other strong cleaning agents can damage the paint and the leather itself, causing it to crack, fade, or discolor. When cleaning your painted leather, it's essential to use mild soap and water or a leather-specific cleaner that is free from harsh chemicals. Avoid using abrasive materials or scrubbers, as they can scratch the paint and damage the leather. Instead, gently wipe the surface with a soft cloth, paying attention to any areas with stubborn stains or dirt buildup. Regular cleaning and maintenance can help prevent the buildup of dirt and grime, reducing the need for harsh chemicals. Additionally, consider applying a leather protector or sealant to create a barrier between the paint and the environment, further protecting your painted leather from damage. By taking these precautions, you can help ensure your painted leather remains vibrant and intact for years to come.