How To Melt Chocolate Chips In Microwave
Melting chocolate chips in the microwave is a convenient and efficient way to achieve a smooth, velvety texture for various recipes. However, it can be a bit tricky to get it just right. To ensure success, it's essential to follow a step-by-step guide, be aware of tips for achieving the perfect melt, and avoid common mistakes that can lead to a grainy or burnt texture. In this article, we'll explore the best practices for melting chocolate chips in the microwave, starting with a simple and straightforward step-by-step guide. By following these guidelines, you'll be able to melt chocolate chips like a pro and take your baking and cooking to the next level. So, let's dive into the process and start with the basics: Microwaving Chocolate Chips: A Step-by-Step Guide.
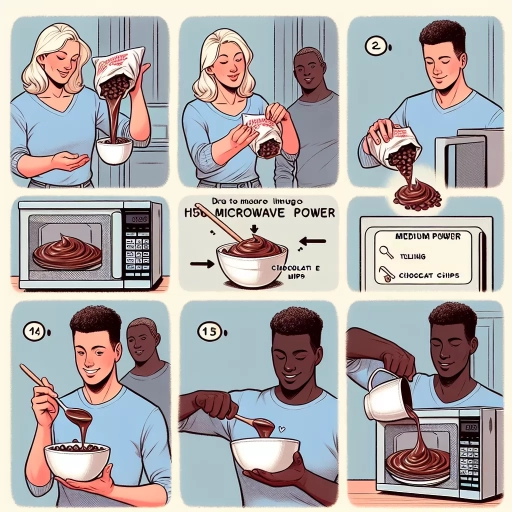
Microwaving Chocolate Chips: A Step-by-Step Guide
Microwaving chocolate chips can be a convenient and efficient way to melt them for various recipes, but it requires attention to detail to achieve the perfect texture. To ensure a smooth and even melt, it's essential to understand the importance of power levels, choose the right microwave-safe container, and measure the ideal chocolate chip quantity. By mastering these three key factors, you can unlock the full potential of microwaving chocolate chips and take your baking to the next level. In this article, we'll delve into the world of microwaving chocolate chips, starting with the crucial aspect of power levels. Understanding the importance of power levels is vital, as it directly affects the melting process and the final texture of the chocolate. By grasping this concept, you'll be able to adjust your microwave's power level to achieve the perfect melt, setting the stage for a successful chocolate-melting experience.
Understanding the Importance of Power Levels
Here is the paragraphy: Understanding the importance of power levels is crucial when microwaving chocolate chips. The power level of your microwave can significantly impact the melting process, and using the right level can make all the difference. A lower power level, typically around 30-40% of the microwave's total power, is usually recommended for melting chocolate chips. This lower power level helps to melt the chocolate slowly and evenly, reducing the risk of overheating and burning. If you're using a higher power level, you may end up with burnt or seized chocolate, which can be difficult to work with. On the other hand, using too low of a power level can result in chocolate that doesn't melt properly, leaving you with a grainy or chunky texture. By understanding the importance of power levels and adjusting accordingly, you can achieve perfectly melted chocolate chips every time.
Choosing the Right Microwave-Safe Container
When it comes to melting chocolate chips in the microwave, using the right container is crucial to avoid any accidents or messes. Not all containers are created equal, and some can even cause harm when heated in the microwave. To ensure safe and efficient melting, it's essential to choose a microwave-safe container. Here are some tips to help you make the right choice: * Look for containers made from glass, ceramic, or microwave-safe plastic. These materials are designed to withstand high temperatures and won't melt or warp when heated. * Avoid using metal containers, as they can cause sparks or even start a fire when heated in the microwave. * Check the container's label for the "microwave-safe" symbol or wording. This ensures that the manufacturer has tested the container for safe use in the microwave. * Opt for a container with a wide mouth to allow for easy stirring and to prevent the chocolate from splashing over. * Consider using a microwave-safe measuring cup or a dedicated chocolate melting bowl. These containers are specifically designed for melting chocolate and often come with features like non-stick surfaces and easy-pour spouts. By choosing the right microwave-safe container, you can ensure a safe and successful chocolate-melting experience. Always prioritize caution when working with heat and follow the manufacturer's guidelines for the specific container you're using. With the right tools and a little practice, you'll be melting chocolate like a pro in no time.
Measuring the Ideal Chocolate Chip Quantity
Measuring the ideal chocolate chip quantity is crucial to achieve the perfect melt. Too little chocolate can result in a weak flavor, while too much can lead to a burnt or grainy texture. To measure the ideal quantity, start by considering the recipe's requirements. If you're melting chocolate for a specific recipe, follow the recommended amount. If you're melting chocolate for a general purpose, such as dipping fruit or making chocolate-covered pretzels, a good rule of thumb is to use 1-2 ounces (28-57 grams) of chocolate chips per serving. For a standard microwave-safe bowl, 1/2 cup to 1 cup (60-120 grams) of chocolate chips is a good starting point. When measuring, make sure to level off the chocolate chips in the spoon or measuring cup to ensure accuracy. It's also essential to consider the type of chocolate chips you're using, as different brands and types may have varying densities. For example, semi-sweet chocolate chips tend to be denser than milk chocolate chips. By measuring the ideal quantity, you'll be able to achieve a smooth, creamy, and deliciously melted chocolate every time.
Tips for Achieving the Perfect Melt
Achieving the perfect melt is a crucial step in various chocolate-making processes, from creating smooth and creamy chocolate sauces to crafting intricate chocolate decorations. To master the art of melting chocolate, it's essential to understand the key techniques involved. Three critical factors to consider are heating in short intervals for optimal control, stirring and checking the chocolate consistency, and avoiding overheating and seizing. By following these guidelines, you'll be able to melt chocolate with precision and accuracy. One of the most effective ways to achieve this is by heating in short intervals, allowing you to maintain optimal control over the melting process. This approach enables you to monitor the chocolate's temperature and texture closely, ensuring a smooth and even melt. By heating in short intervals, you'll be able to achieve the perfect melt every time, and it's this technique that we'll explore in more detail first.
Heating in Short Intervals for Optimal Control
Here is the paragraphy. Heating in short intervals is crucial for achieving optimal control when melting chocolate chips in the microwave. This technique allows you to monitor the chocolate's temperature and texture closely, preventing overheating and ensuring a smooth, creamy melt. Start by heating the chocolate in 10-15 second increments, checking on it after each interval. If the chocolate is not melted to your liking, continue to heat in short intervals until it reaches the desired consistency. This approach enables you to adjust the heating time as needed, taking into account the type of chocolate, its quantity, and your personal preference for meltiness. By heating in short intervals, you can avoid the risk of overheating, which can cause the chocolate to seize up or develop an unpleasant grainy texture. Instead, you'll be rewarded with a perfectly melted chocolate that's ideal for dipping, drizzling, or using in your favorite recipes.
Stirring and Checking the Chocolate Consistency
Here is the paragraphy: Stirring and checking the chocolate consistency is a crucial step in melting chocolate chips in the microwave. After heating the chocolate for the recommended time, remove it from the microwave and stir it gently with a spatula. This helps to distribute the heat evenly and ensures that the chocolate melts uniformly. Check the consistency of the chocolate by lifting some of it with the spatula. If it's still lumpy or grainy, return it to the microwave for a few more seconds and stir again. Repeat this process until the chocolate reaches your desired consistency. It's essential to be patient and not overheat the chocolate, as this can cause it to seize up and become unusable. By stirring and checking the chocolate consistency regularly, you can achieve a smooth and creamy melt that's perfect for dipping, drizzling, or using in recipes.
Avoiding Overheating and Seizing
When melting chocolate chips in the microwave, it's essential to avoid overheating and seizing, which can result in a grainy, separated, or even burnt mess. To prevent this, start by using high-quality chocolate chips that contain a high cocoa butter content, as these are less likely to seize. Next, heat the chocolate in short, 10-15 second increments, stirring between each interval, until the chocolate is smooth and melted. Be cautious not to overheat, as this can cause the chocolate to seize. If you notice the chocolate starting to seize, remove it from the microwave immediately and stir in a small amount of shortening, such as vegetable oil or coconut oil, to help restore the chocolate's texture. Additionally, avoid using a microwave with a high power level, as this can cause the chocolate to heat too quickly and seize. Instead, use a lower power level, such as 30-40% of the microwave's total power, to melt the chocolate slowly and evenly. By following these tips, you can avoid overheating and seizing, and achieve a smooth, creamy, and deliciously melted chocolate.
Common Mistakes to Avoid When Melting Chocolate Chips in the Microwave
Melting chocolate chips in the microwave can be a convenient and efficient way to get the job done, but it requires attention to detail and caution. If you're not careful, you can end up with a burnt, grainy, or separated mess. In this article, we'll explore the common mistakes to avoid when melting chocolate chips in the microwave, including using the wrong type of chocolate chips, not monitoring the melting process closely, and overmixing the melted chocolate. By understanding these pitfalls, you can achieve smooth, creamy, and delicious melted chocolate every time. So, let's start by examining the first mistake: using the wrong type of chocolate chips.
Using the Wrong Type of Chocolate Chips
Using the wrong type of chocolate chips can significantly impact the melting process and the final result. Milk chocolate chips, for example, contain a higher percentage of sugar and milk solids than dark or semi-sweet chocolate chips, which can cause them to melt more quickly and potentially seize up or become grainy. On the other hand, dark chocolate chips with a high cocoa content may require a slightly longer melting time due to their lower sugar content. Additionally, some chocolate chips may contain additives or preservatives that can affect their melting properties. It's essential to choose the right type of chocolate chips for your specific recipe and melting method to ensure the best results. If you're unsure, it's always best to consult the packaging or manufacturer's instructions for guidance. By selecting the correct type of chocolate chips, you can avoid common melting mistakes and achieve a smooth, creamy, and deliciously melted chocolate.
Not Monitoring the Melting Process Closely
Not monitoring the melting process closely is a common mistake that can lead to burnt or overcooked chocolate. When melting chocolate chips in the microwave, it's essential to keep a close eye on the process to avoid overheating. Chocolate can quickly go from perfectly melted to burnt and grainy, which can ruin the texture and flavor of your final product. To avoid this, it's recommended to heat the chocolate in short intervals, such as 10-15 seconds, and check on it after each interval. This will allow you to catch any signs of overheating and adjust the melting time as needed. Additionally, it's crucial to stir the chocolate between each interval to ensure even heating and prevent hot spots. By monitoring the melting process closely, you can achieve smooth, creamy, and perfectly melted chocolate every time.
Overmixing the Melted Chocolate
Overmixing the melted chocolate is a common mistake that can lead to a grainy, separated, or even burnt chocolate. When you overmix, you are introducing air into the chocolate, which can cause it to seize up and become unworkable. This is especially true when working with dark chocolate, which is more prone to seizing than milk chocolate. To avoid overmixing, it's essential to stop stirring as soon as the chocolate is melted and smooth. If you need to stir, do so gently and briefly, just until the chocolate is well combined. Overmixing can also cause the chocolate to become too hot, leading to a burnt or bitter flavor. To prevent this, it's crucial to melt the chocolate in short intervals, checking on it frequently to avoid overheating. Additionally, using a high-quality chocolate with a high cocoa butter content can help minimize the risk of overmixing, as it will be less prone to seizing. By being mindful of your mixing technique and using the right type of chocolate, you can achieve a smooth, creamy, and deliciously melted chocolate every time.