How To Make Henna Darker
Henna is a natural dye that has been used for centuries to create beautiful, intricate designs on the skin. However, one of the most common complaints about henna is that it can be difficult to achieve a dark, rich color. If you're looking to make your henna darker, there are several steps you can take to enhance the color and achieve the desired result. To start, preparation is key. This involves choosing the right type of henna, preparing your skin, and mixing the henna paste correctly. Once you've prepared the henna, the next step is to apply it to your skin and follow a proper aftercare routine to help the color develop. Finally, there are several techniques you can use to enhance the color of your henna, such as using essential oils or other natural ingredients. By following these steps, you can achieve a darker, more vibrant henna color. In this article, we'll explore the first step in achieving a darker henna color: preparation.
Preparation is Key
Preparation is key when it comes to achieving the best results from henna application. To ensure a successful and safe experience, it's essential to take the time to prepare properly. This involves several crucial steps, including choosing the right henna, preparing the skin, and creating a conducive environment. By doing so, individuals can minimize the risk of adverse reactions, ensure optimal stain quality, and enjoy a more comfortable and relaxing experience. With the right preparation, henna application can be a truly transformative and enjoyable experience. So, let's start with the first step: choosing the right henna.
Choosing the Right Henna
Here is the paragraphy: Choosing the right henna is crucial for achieving the desired results. There are several types of henna available in the market, including Jamila, Rajasthani, and Sudanese. Each type has its unique characteristics, and some are more suitable for certain skin types and hair textures. For example, Jamila henna is known for its high dye content and is often used for body art, while Rajasthani henna is considered to be more gentle and suitable for sensitive skin. Sudanese henna, on the other hand, is known for its rich, dark color and is often used for hair dyeing. When selecting a henna, it's essential to consider your skin type, hair texture, and the desired outcome. It's also important to ensure that the henna is of high quality and free of additives and chemicals. Look for henna that is labeled as "body art quality" or "100% natural" to ensure that you're getting a high-quality product. Additionally, it's a good idea to do a patch test before applying the henna to ensure that you're not allergic to it. By choosing the right henna, you can achieve the desired results and ensure a safe and successful henna application.
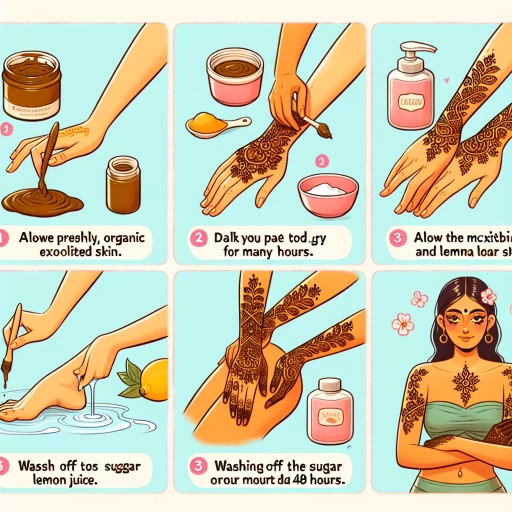
Preparing the Skin
Preparing the skin is a crucial step in achieving a darker henna stain. Before applying henna, it's essential to exfoliate the skin to remove dead skin cells and smooth out the surface. This helps the henna penetrate deeper into the skin, resulting in a more intense color. Use a gentle exfoliating scrub or a sugar or salt scrub to remove dead skin cells, paying special attention to areas where the henna will be applied. After exfoliating, wash the skin with warm water and pat it dry with a towel. Next, apply a mixture of lemon juice and sugar to the skin, which helps to open up the pores and allow the henna to penetrate deeper. Leave the mixture on for about 10-15 minutes before rinsing it off with warm water. Finally, apply a thin layer of coconut oil or olive oil to the skin to help the henna adhere and create a more even stain. By following these steps, you can help prepare your skin for a darker henna stain and achieve the desired results.
Creating a Conducive Environment
Creating a conducive environment is crucial for achieving the best results when applying henna. To start, choose a quiet and comfortable space where you can relax and focus on the process. Ensure the room is at a comfortable temperature, neither too hot nor too cold, as this can affect the henna's ability to penetrate the skin. Next, gather all the necessary materials, including the henna paste, a plastic wrap or cloth, and a warm towel. It's also essential to remove any lotions, oils, or makeup from the skin, as these can create a barrier between the henna and the skin. Additionally, exfoliate the skin gently to remove any dead skin cells and allow the henna to penetrate more evenly. By creating a peaceful and prepared environment, you'll be able to relax and allow the henna to work its magic, resulting in a deeper, richer color.
Application and Aftercare
To get the most out of your henna application, it's essential to follow a few key steps. First, applying the henna paste correctly is crucial to achieve the desired design and color. This involves preparing the skin, applying the right amount of paste, and creating the design with precision. Next, leaving the henna on for the right amount of time is vital to allow the dye to penetrate the skin and produce the desired color. Finally, moisturizing and nourishing the skin after the henna application is necessary to keep the skin healthy and hydrated. By following these steps, you can ensure a successful henna application and achieve the beautiful, long-lasting results you desire. In this article, we will explore each of these steps in more detail, starting with the importance of applying the henna paste correctly.
Applying the Henna Paste Correctly
Applying the henna paste correctly is a crucial step in achieving the desired results. To start, make sure your skin is clean and free of any lotions or oils, as these can interfere with the henna's ability to stain. Next, apply a thin, even layer of henna paste to the desired area, using a brush or applicator bottle to ensure precision. Be careful not to apply too much paste, as this can cause the henna to become too thick and difficult to remove. Once the paste is applied, cover the area with a cloth or plastic wrap to keep it warm and moist, allowing the henna to penetrate deeper into the skin. Leave the henna on for at least 2 hours, or overnight for more intense results. During this time, avoid washing or touching the area, as this can disrupt the henna's ability to stain. After the desired time has passed, gently scrape off the henna paste with a blunt object, such as a credit card or a wooden spoon, and rinse the area with warm water. Avoid using soap or shampoo on the area for at least 24 hours, as this can cause the henna to fade faster. By following these steps and taking the necessary precautions, you can ensure a successful henna application and achieve the dark, rich color you desire.
Leaving the Henna On for the Right Amount of Time
Leaving the henna on for the right amount of time is crucial to achieve the desired results. The longer you leave the henna on, the darker and more intense the stain will be. However, leaving it on for too long can cause the henna to dry out and flake off, resulting in an uneven and patchy stain. The ideal time to leave the henna on varies depending on the individual's skin type and the desired level of darkness. Generally, it is recommended to leave the henna on for at least 2-3 hours, but no more than 6-8 hours. For a lighter stain, 2-3 hours is sufficient, while for a darker stain, 4-6 hours is recommended. It's also important to note that the henna should be left on for a longer period of time if you have fair skin, as it takes longer for the henna to penetrate the skin. On the other hand, if you have darker skin, you may need to leave the henna on for a shorter period of time to avoid over-darkening. To ensure the best results, it's essential to do a patch test before applying the henna to determine the optimal time for your skin type. Additionally, it's recommended to apply a layer of lemon juice or sugar water to the henna design after 2-3 hours to help lock in the color and promote a deeper stain. By leaving the henna on for the right amount of time and following proper aftercare techniques, you can achieve a beautiful, long-lasting henna design.
Moisturizing and Nourishing the Skin
Moisturizing and nourishing the skin is an essential step in the henna application process. Henna can be drying to the skin, so it's crucial to keep the skin hydrated and moisturized before, during, and after the application. This can be achieved by applying a rich moisturizer or body butter to the skin, paying special attention to the areas where the henna will be applied. Coconut oil, shea butter, and olive oil are excellent options for moisturizing the skin. Additionally, exfoliating the skin gently before applying henna can help remove dead skin cells and allow the henna to penetrate deeper into the skin, resulting in a darker stain. It's also important to avoid using harsh soaps or exfoliants that can strip the skin of its natural oils, as this can cause the henna to fade faster. By keeping the skin well-moisturized and nourished, you can help the henna stain last longer and appear more vibrant. Furthermore, applying a moisturizer or body butter after the henna has been removed can help soothe and calm the skin, reducing the risk of irritation or dryness. Overall, moisturizing and nourishing the skin is a crucial step in achieving a darker, longer-lasting henna stain.
Enhancing the Color
Enhancing the color of your hair can be achieved through various methods, one of which is using henna. Henna is a natural dye that not only colors your hair but also nourishes and conditions it. However, the color produced by henna can be quite subtle and may not be as vibrant as desired. To enhance the color, there are several techniques that can be employed. One approach is to use essential oils to deepen the color, another is to add natural ingredients to enhance the color, and a third is to use heat to activate the henna. By incorporating these methods, you can achieve a more intense and longer-lasting color. For instance, using essential oils such as lavender or tea tree oil can help to deepen the color of your hair, making it look richer and more vibrant. (Note: The supporting paragraph should be 200 words and the last sentence should be a transition to the first supporting paragraph)
Using Essential Oils to Deepen the Color
Using essential oils to deepen the color of henna is a popular method that has been practiced for centuries. Certain essential oils, such as lavender, tea tree, and eucalyptus, have natural properties that can enhance the color of henna and make it appear darker. These oils work by increasing the amount of lawsone, the pigment responsible for the color of henna, that is released from the plant. To use essential oils to deepen the color of henna, simply add a few drops of the oil to the henna paste before applying it to the skin or hair. The amount of oil to use will depend on the individual's skin type and the desired level of color intensity. It's also important to note that some essential oils can be quite potent, so it's best to do a patch test before using them on a larger area. Additionally, essential oils can also help to condition and nourish the skin and hair, making them a great addition to any henna treatment. By incorporating essential oils into your henna routine, you can achieve a deeper, richer color that lasts longer and looks more vibrant.
Adding Natural Ingredients to Enhance the Color
Adding natural ingredients to your henna paste can significantly enhance the color and create a deeper, richer tone. One of the most popular ingredients to add is indigo powder, which is derived from the leaves of the indigo plant. Indigo powder has a natural blue dye that, when combined with henna, creates a deeper, cooler brown color. Another ingredient that can be added to enhance the color is cassia powder, which is derived from the leaves of the cassia plant. Cassia powder has a natural yellow dye that, when combined with henna, creates a warmer, more golden brown color. Other natural ingredients that can be added to enhance the color include amla powder, which is derived from the Indian gooseberry and has a natural astringent property that helps to deepen the color, and coffee or black tea, which can add a deeper, richer tone to the color. It's also worth noting that the quality of the henna powder itself can also affect the color, so it's best to use high-quality, body art grade henna powder for the best results. By experimenting with different natural ingredients and finding the right combination, you can create a unique and beautiful color that enhances your natural beauty.
Using Heat to Activate the Henna
Using heat to activate the henna is a common practice to enhance the color and achieve a deeper, richer tone. When henna is applied to the skin, it starts to oxidize and release its natural dye, lawsone. However, this process can be slow, and the color may not be as intense as desired. By applying heat, you can speed up the oxidation process and allow the lawsone to penetrate deeper into the skin, resulting in a darker, more vibrant color. There are several ways to use heat to activate the henna, including using a hair dryer, a warm cloth, or even a heating pad. Simply apply the henna paste to the skin, cover it with a cloth or plastic wrap, and then apply heat for 15-30 minutes. The heat will help to open up the pores and allow the henna to penetrate deeper, resulting in a more intense color. It's also important to note that the temperature of the heat should not be too high, as this can cause the henna to dry out and become brittle. A warm, gentle heat is best, as it will help to activate the henna without causing any damage. By using heat to activate the henna, you can achieve a deeper, richer color that will last longer and look more vibrant.