How To Craft Smooth Stone
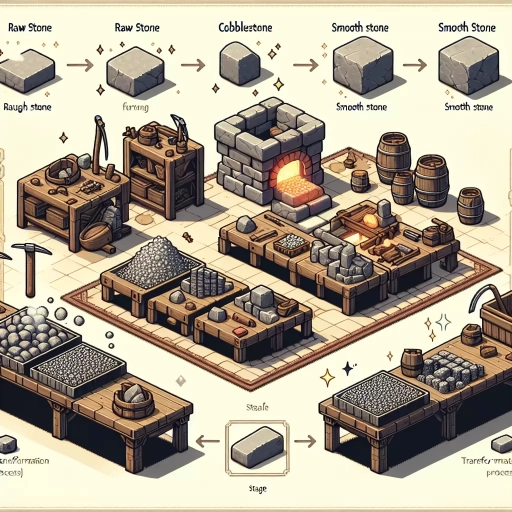
Crafting smooth stone is a rewarding and meditative process that requires patience, attention to detail, and the right techniques. With the right approach, you can transform rough, unassuming stones into beautiful, polished pieces that showcase their natural beauty. To get started, it's essential to understand the three key stages involved in crafting smooth stone: gathering the necessary materials and tools, preparing the stone for crafting, and shaping and polishing the stone to achieve the desired finish. In this article, we'll delve into each of these stages, providing you with the knowledge and skills you need to create stunning smooth stone pieces. First, let's begin with the foundation of the process: gathering the materials and tools you'll need to get started.
Gathering Materials and Tools
Gathering materials and tools is a crucial step in any project, and it's essential to do it efficiently to ensure the success of the project. When it comes to gathering materials and tools, there are several key considerations to keep in mind. First, it's necessary to collect the right materials, such as smooth stone sources, which can be used for a variety of purposes. Additionally, preparing essential tools and equipment is vital to ensure that the project is completed safely and effectively. Furthermore, ensuring safety precautions is also a critical aspect of gathering materials and tools, as it helps to prevent accidents and injuries. By considering these factors, individuals can gather the necessary materials and tools to complete their project successfully. In this article, we will explore these key considerations in more detail, starting with the importance of collecting smooth stone sources.
Collecting Smooth Stone Sources
Collecting smooth stone sources is a crucial step in crafting smooth stone. Smooth stone can be obtained from various sources, including stone blocks, stone bricks, and stone slabs. Stone blocks can be found in caves, ravines, and underground tunnels, while stone bricks and slabs can be obtained by mining stone with a pickaxe. Additionally, smooth stone can also be obtained by smelting stone in a furnace. It's essential to collect a sufficient amount of smooth stone sources to ensure a steady supply for crafting. When collecting smooth stone sources, it's recommended to explore caves and ravines, as they often contain an abundance of stone blocks. Mining stone with a pickaxe can also be an effective way to collect smooth stone sources, especially if you're looking for specific types of stone. Furthermore, smelting stone in a furnace can be a convenient way to obtain smooth stone, especially if you have a large quantity of stone to process. Overall, collecting smooth stone sources requires patience, persistence, and a willingness to explore and mine for the necessary materials.
Preparing Essential Tools and Equipment
When it comes to preparing essential tools and equipment for crafting smooth stone, having the right gear is crucial for achieving professional-looking results. A diamond blade saw or a wet saw is necessary for cutting the stone into the desired shape and size. A grinder or a sanding machine is also required for smoothing out the stone's surface, removing any imperfections or rough edges. Additionally, a polishing compound and a felt wheel or a polishing pad are needed to bring out the stone's natural shine and color. A dust mask, safety glasses, and gloves are also essential for protecting yourself from the dust and debris generated during the crafting process. Furthermore, a work surface or a table saw is necessary for supporting the stone while you work on it, and a bucket or a container is needed for mixing and applying the polishing compound. By having all these tools and equipment ready, you can ensure a smooth and efficient crafting process, and achieve the desired results for your smooth stone project.
Ensuring Safety Precautions
When it comes to crafting smooth stone, ensuring safety precautions is crucial to avoid accidents and injuries. Before starting the project, it's essential to wear protective gear, including safety glasses, gloves, and a dust mask. This will protect your eyes, hands, and lungs from debris and dust generated during the process. Additionally, make sure the workspace is well-ventilated and free from any flammable materials. It's also important to keep loose clothing and long hair tied back to avoid any entanglements with the tools. Furthermore, ensure that the tools and equipment are in good working condition and properly maintained to prevent any malfunctions. By taking these safety precautions, you can minimize the risk of accidents and ensure a successful and enjoyable crafting experience.
Preparing the Stone for Crafting
Preparing the stone for crafting is a crucial step that requires attention to detail and a thorough understanding of the material. Before starting any project, it's essential to ensure the stone is properly prepared to achieve the desired outcome. This involves several key steps, including cleaning and deburring the stone to remove any dirt, grime, or rough edges, assessing and marking the stone's grain pattern to determine the best way to work with it, and removing any imperfections or flaws that could affect the final product. By taking the time to properly prepare the stone, crafters can ensure a smooth and successful project. The first step in preparing the stone is to clean and deburr it, which involves removing any dirt, grime, or rough edges that may be present.
Cleaning and Deburring the Stone
Cleaning and deburring the stone is a crucial step in preparing it for crafting. This process involves removing any dirt, debris, or imperfections from the stone's surface, as well as smoothing out any rough edges or burrs. To start, use a soft-bristled brush or a cloth to gently sweep away any loose dirt or debris from the stone's surface. Next, mix a solution of mild soap and warm water, and use a soft-bristled brush to scrub the stone, working in a circular motion to remove any stubborn dirt or grime. Rinse the stone thoroughly with clean water to remove any soap residue. For more stubborn imperfections, such as scratches or pits, use a fine-grit sandpaper to gently sand the area, working in a circular motion to avoid scratching the stone further. Once the stone is clean and free of imperfections, use a deburring tool or a fine-grit sanding block to smooth out any rough edges or burrs, feathering the edges out to create a smooth, rounded finish. By taking the time to properly clean and deburr the stone, you'll be able to achieve a smooth, even surface that's perfect for crafting.
Assessing and Marking the Stone's Grain Pattern
Assessing and marking the stone's grain pattern is a crucial step in preparing the stone for crafting. The grain pattern refers to the natural lines or striations that run through the stone, which can affect the final appearance and durability of the crafted piece. To assess the grain pattern, hold the stone up to a light source and examine it carefully, looking for any visible lines, striations, or imperfections. Mark the direction of the grain pattern on the stone using a pencil or marker, taking note of any areas where the grain pattern changes direction or becomes more prominent. This will help you to identify the best way to cut and shape the stone to minimize waste and maximize its natural beauty. Additionally, assessing the grain pattern can also help you to identify any potential weaknesses or flaws in the stone, such as cracks or inclusions, which can affect its durability and stability. By carefully assessing and marking the grain pattern, you can ensure that your crafted piece is not only visually appealing but also strong and long-lasting.
Removing Imperfections and Flaws
Removing imperfections and flaws is a crucial step in preparing the stone for crafting. This process involves carefully examining the stone for any visible imperfections, such as cracks, chips, or inclusions, and then using various techniques to remove or minimize them. One common method is to use a lapidary saw or a diamond blade saw to cut out the imperfections, taking care not to damage the surrounding stone. Another technique is to use a grinding wheel or a sanding drum to smooth out the surface, gradually working through progressively finer grits to achieve a high polish. In some cases, imperfections may be filled with a resin or epoxy, which is then sanded and polished to blend seamlessly with the surrounding stone. By removing imperfections and flaws, crafters can create a smooth, even surface that is ideal for crafting, and can help to bring out the natural beauty of the stone.
Shaping and Polishing the Stone
Shaping and polishing stone is a meticulous process that requires patience, skill, and the right techniques. To achieve a high-quality finish, it's essential to understand the different stages involved in transforming a rough stone into a beautiful, polished piece. The process begins with using abrasive techniques for initial shaping, where the stone is roughed out to its desired form. This is followed by applying polishing compounds to achieve a high-gloss finish, which brings out the stone's natural colors and patterns. Finally, the stone's shape and edges are finalized, ensuring a precise and smooth finish. By mastering these three stages, craftsmen can create stunning stone pieces that showcase their skill and attention to detail. With the right techniques and tools, anyone can learn to shape and polish stone like a pro, starting with the initial shaping process. Note: The answer should be 200 words.
Using Abrasive Techniques for Initial Shaping
Using abrasive techniques is a crucial step in the initial shaping of a stone, allowing craftsmen to remove imperfections, refine the shape, and create a smooth surface. The process begins with coarse-grit abrasives, such as 80-100 grit sandpaper or a diamond-coated saw blade, which are used to remove large imperfections and rough out the stone's shape. As the stone begins to take form, progressively finer grits are employed, typically in the range of 120-220 grit, to refine the shape and remove smaller imperfections. The use of water or a lubricant is essential during this process, as it helps to prevent overheating and reduces the risk of damage to the stone. With each successive grit, the stone becomes increasingly smooth, allowing for more precise control over the shaping process. By carefully selecting the right abrasive techniques and grits, craftsmen can efficiently and effectively shape the stone, laying the foundation for the polishing process that follows.
Applying Polishing Compounds for a High-Gloss Finish
Applying polishing compounds is a crucial step in achieving a high-gloss finish on your stone surface. To begin, select a polishing compound that is specifically designed for your type of stone, as different stones require different levels of abrasion and chemical composition. Next, apply a small amount of compound to a clean, soft cloth, and work in a circular motion to cover the entire surface. Be sure to apply even pressure and maintain a consistent speed to avoid creating scratches or swirl marks. As you polish, inspect the surface regularly to monitor progress and adjust your technique as needed. For optimal results, use a series of progressively finer compounds, starting with a coarse grit and gradually moving to finer grits. This will help to remove imperfections and scratches, while also building a high-gloss finish. Additionally, consider using a polishing pad or wheel to help distribute the compound evenly and increase efficiency. With patience and practice, applying polishing compounds can help you achieve a stunning, high-gloss finish that showcases the natural beauty of your stone.
Finalizing the Stone's Shape and Edges
Finalizing the stone's shape and edges is a crucial step in crafting smooth stone. To achieve a precise shape, use a combination of techniques such as carving, grinding, and sanding. Start by carving the stone to remove any excess material and create the desired shape. Use a chisel or a carving tool to carefully remove small amounts of stone, working your way around the edges to create a smooth, even surface. Next, use a grinder or a sanding block to refine the shape and remove any rough edges or bumps. Apply gentle to moderate pressure, depending on the type of stone and the desired level of smoothness. As you work, regularly inspect the stone to ensure that it is taking the desired shape and make any necessary adjustments. To add a high-gloss finish, use progressively finer grits of sandpaper, starting with coarse grits and working your way up to fine grits. This will help to remove any remaining imperfections and create a smooth, polished surface. Finally, use a polishing compound or a stone sealant to protect the stone and enhance its appearance. By following these steps, you can create a beautifully crafted smooth stone with a precise shape and smooth edges.