How To Switch X And Y Axis In Excel
Here is the introduction paragraph: When working with data in Excel, creating charts is an effective way to visualize and communicate insights. However, sometimes the default axis settings may not accurately represent the data, leading to confusion and misinterpretation. In such cases, switching the x and y axes can be a game-changer. But before you can do that, it's essential to understand the basics of Excel charts and how they work. In this article, we'll explore the process of switching x and y axes in Excel charts, troubleshoot common issues that may arise, and provide you with the knowledge to create effective and informative charts. By the end of this article, you'll be able to confidently switch axes and take your data visualization to the next level. To get started, let's first understand the basics of Excel charts.
Understanding the Basics of Excel Charts
Excel charts are a powerful tool for data visualization, allowing users to present complex information in a clear and concise manner. With the ability to create a wide range of chart types, from simple column charts to complex 3D charts, Excel provides users with the flexibility to choose the best chart to suit their needs. In this article, we will explore the basics of Excel charts, including what a chart is, the different types of charts available, and how to create a chart in Excel. By understanding these fundamental concepts, users can unlock the full potential of Excel charts and take their data analysis to the next level. So, let's start by exploring the basics of what a chart is in Excel.
What is a Chart in Excel?
A chart in Excel is a visual representation of data that helps to illustrate trends, patterns, and relationships between different data points. It is a powerful tool used to communicate complex data insights in a clear and concise manner. Excel offers a wide range of chart types, including column, line, pie, bar, and scatter charts, among others. Each chart type is suited for a specific type of data and can be customized to meet the user's needs. Charts can be created from a table or range of cells, and can be easily inserted into a worksheet or presentation. They can also be used to track changes in data over time, making them a valuable tool for data analysis and decision-making. By using charts in Excel, users can quickly and easily identify trends, patterns, and correlations in their data, and make informed decisions based on that information.
Types of Charts in Excel
There are several types of charts in Excel, each designed to effectively communicate specific data insights. The most commonly used charts include Column Charts, which compare categorical data across different groups; Line Charts, which show trends over time or across categories; Pie Charts, which display how different categories contribute to a whole; Bar Charts, which compare categorical data across different groups, similar to column charts but with a horizontal orientation; Area Charts, which show cumulative totals over time or across categories; and Scatter Charts, which display the relationship between two variables. Additionally, Excel offers more specialized charts, such as Stock Charts, which are used to display stock prices and volumes; Surface Charts, which show relationships between large datasets; and Radar Charts, which compare multiple categories across different groups. Each chart type has its unique strengths and is suited for specific data analysis and presentation needs. By selecting the appropriate chart type, users can effectively convey complex data insights and facilitate better decision-making.
How to Create a Chart in Excel
To create a chart in Excel, start by selecting the data range you want to visualize, including headers and any relevant data labels. Next, go to the "Insert" tab in the ribbon and click on the "Chart" button in the "Illustrations" group. This will open the "Chart" dialog box, where you can choose from a variety of chart types, such as column, line, pie, or bar charts. Select the chart type that best suits your data and click "OK." Excel will then create a chart based on your selected data range. You can customize the chart by adding a title, labels, and legends, as well as adjusting the colors, fonts, and layout. To do this, click on the chart to activate the "Chart Tools" tab, which provides a range of options for customizing the chart's appearance and behavior. You can also use the "Design" and "Format" tabs to make further adjustments, such as changing the chart's layout, adding data labels, or modifying the axis settings. Additionally, you can use the "Analyze" tab to add trendlines, moving averages, or other analytical elements to your chart. By following these steps, you can create a clear and effective chart in Excel that helps to communicate your data insights.
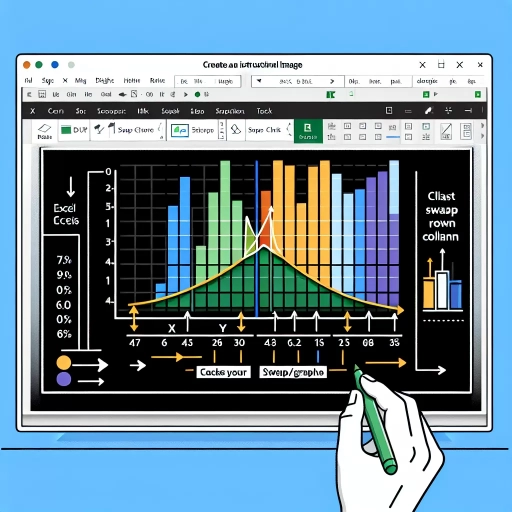
Switching X and Y Axes in Excel Charts
When working with Excel charts, it's not uncommon to need to switch the X and Y axes to better represent your data. This can be particularly useful when you want to change the orientation of your chart or when you need to swap the data series. Fortunately, Excel provides several ways to achieve this, including using the Chart Tools tab, the Select Data Source option, and the Switch Row/Column option. In this article, we'll explore each of these methods in detail, starting with the Chart Tools tab, which offers a quick and easy way to switch the X and Y axes with just a few clicks. By using the Chart Tools tab, you can easily swap the axes and customize your chart to better suit your needs.
Using the Chart Tools Tab
When working with charts in Excel, the Chart Tools tab is a powerful feature that provides a wide range of options for customizing and enhancing your charts. Located in the ribbon at the top of the Excel window, the Chart Tools tab is divided into three main sections: Design, Layout, and Format. The Design section allows you to change the chart type, add or remove chart elements, and adjust the chart layout. The Layout section provides options for customizing the chart's appearance, such as adding titles, labels, and legends. The Format section offers advanced formatting options, including the ability to change the fill color, border, and effects of chart elements. By using the Chart Tools tab, you can easily switch the x and y axes of your chart, as well as make other changes to the chart's design and layout. For example, you can use the "Switch Row/Column" button in the Design section to quickly swap the x and y axes, or use the "Select Data" button to change the data range used in the chart. Additionally, the Chart Tools tab provides options for adding trendlines, error bars, and other chart elements to help you analyze and visualize your data. Overall, the Chart Tools tab is an essential tool for anyone working with charts in Excel, and can help you to create high-quality, informative, and engaging charts that effectively communicate your data insights.
Using the Select Data Source Option
When working with Excel charts, you may need to switch the x and y axes to better represent your data. One way to do this is by using the Select Data Source option. To access this option, click on your chart and then click on the "Chart Design" tab in the ribbon. From there, click on the "Select Data" button in the "Data" group. This will open the "Select Data Source" dialog box, where you can modify the data range and switch the x and y axes. In the dialog box, you'll see two columns: "Series" and "Category (X) Axis Labels." To switch the x and y axes, simply click on the "Switch Row/Column" button. This will swap the data in the two columns, effectively switching the x and y axes. You can also use this dialog box to add or remove data series, edit the data range, and change the axis labels. Once you've made your changes, click "OK" to apply them to your chart. By using the Select Data Source option, you can easily switch the x and y axes in your Excel chart and create a more effective visualization of your data.
Using the Switch Row/Column Option
When working with Excel charts, there may be instances where you want to switch the x and y axes to better represent your data or to create a more meaningful visualization. One way to achieve this is by using the Switch Row/Column option. This feature allows you to swap the data series plotted on the x-axis with those on the y-axis, effectively flipping the chart's orientation. To access this option, select your chart and navigate to the Chart Design tab in the ribbon. Click on the 'Switch Row/Column' button, which is usually located in the Data group. Alternatively, you can also right-click on the chart and select 'Switch Row/Column' from the context menu. Once you've applied the switch, your chart will be updated to reflect the new axis configuration. This can be particularly useful when working with data that has a large number of categories or when you want to emphasize the relationship between two variables. By switching the x and y axes, you can create a more intuitive and informative chart that better communicates your data insights.
Troubleshooting Common Issues with Axis Switching
When working with axis switching in data visualization, it's not uncommon to encounter issues that can hinder the effectiveness of your charts. Inconsistent data ranges, axis label problems, and chart formatting issues are just a few of the common problems that can arise. To ensure that your visualizations are accurate and easy to understand, it's essential to know how to troubleshoot these issues. In this article, we'll explore some common problems with axis switching and provide practical solutions to help you overcome them. We'll start by looking at how to deal with inconsistent data ranges, which can lead to misleading or confusing visualizations. By understanding how to address this issue, you'll be able to create more accurate and reliable charts. Let's dive in and explore how to tackle inconsistent data ranges.
Dealing with Inconsistent Data Ranges
When dealing with inconsistent data ranges, it's essential to identify and address the discrepancies to ensure accurate and reliable results. Inconsistent data ranges can occur due to various reasons such as incorrect data entry, formatting issues, or differences in data sources. To troubleshoot this issue, start by reviewing your data to identify any inconsistencies in the range. Check for missing or duplicate values, incorrect formatting, or inconsistent data types. Once you've identified the inconsistencies, you can use various techniques to address them, such as data cleaning, data normalization, or data transformation. For instance, you can use Excel's built-in functions like TRIM, CLEAN, or TEXT TO COLUMNS to clean and format your data. Additionally, you can use data validation rules to restrict data entry and prevent inconsistencies from occurring in the future. By addressing inconsistent data ranges, you can ensure that your data is accurate, reliable, and consistent, which is crucial for making informed decisions and creating accurate charts and graphs. Furthermore, when switching x and y axes in Excel, inconsistent data ranges can cause issues with axis scaling, labeling, and formatting. By resolving these inconsistencies, you can ensure a smooth and accurate axis switching process, resulting in a more effective and informative visualization of your data.
Resolving Axis Label Issues
When dealing with axis label issues in Excel, there are several common problems that can arise, and resolving them requires a combination of understanding how Excel handles axis labels and using the right techniques to fix the issues. One common issue is overlapping labels, which can occur when there are too many labels or when the labels are too long. To resolve this, you can try rotating the labels by selecting the axis, going to the "Format Axis" pane, and adjusting the "Text Direction" option. You can also try shortening the labels or using a smaller font size. Another issue is when the labels are not aligned properly, which can be fixed by adjusting the "Alignment" option in the "Format Axis" pane. Additionally, if the labels are not displaying correctly, you may need to check the "Number" format of the axis, as this can affect how the labels are displayed. In some cases, you may need to use a custom number format to get the labels to display correctly. By understanding the different options available for formatting axis labels and using the right techniques, you can resolve common axis label issues and create clear and effective charts in Excel.
Fixing Chart Formatting Problems
When dealing with chart formatting problems, it's essential to identify the root cause of the issue. One common problem is inconsistent data formatting, which can lead to incorrect axis scaling or labeling. To fix this, ensure that your data is formatted consistently, using the same number formatting and date formatting throughout the dataset. Another issue is overlapping or misaligned chart elements, such as axis labels or data points. To resolve this, adjust the chart's layout and formatting options, such as the axis label position, font size, and data point spacing. Additionally, check for any hidden or duplicate data points that may be causing formatting issues. If you're experiencing problems with axis switching, ensure that the data is correctly assigned to the x and y axes, and that the axis labels are correctly formatted. You can also try resetting the chart's formatting to its default settings or using the "Reset" button in the Chart Tools menu. If none of these solutions work, try re-creating the chart from scratch or seeking assistance from Excel's built-in help resources or online support forums. By methodically troubleshooting and addressing chart formatting problems, you can ensure that your charts are accurate, visually appealing, and effectively communicate your data insights.