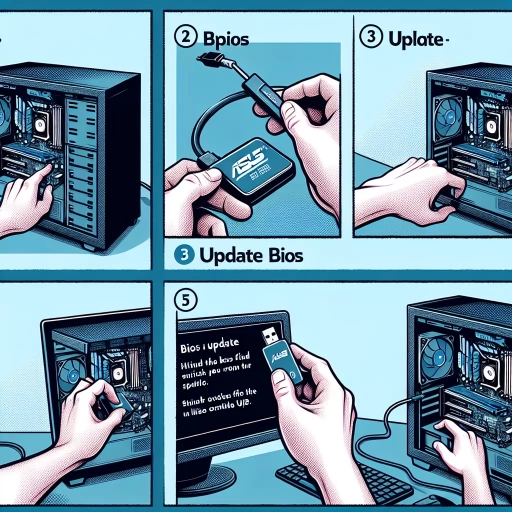
How To Update Asus Bios
Updating the BIOS of your ASUS motherboard is a crucial process that can significantly improve the performance and compatibility of your system. However, it can also be a daunting task, especially for those who are new to the process. In this article, we will guide you through the steps to update your ASUS BIOS, ensuring a smooth and successful process. Before you begin, it's essential to prepare your system for the update, which we will cover in the section "Preparation Before Updating ASUS BIOS". We will also explore the built-in EZ Flash Utility, a convenient tool that simplifies the updating process, in the section "Updating ASUS BIOS Using the Built-in EZ Flash Utility". Additionally, we will address common issues that may arise during the update process and provide troubleshooting tips in the section "Troubleshooting Common Issues During ASUS BIOS Update". By following these steps and guidelines, you'll be able to update your ASUS BIOS with confidence. So, let's start by preparing your system for the update.
Preparation Before Updating ASUS BIOS
Updating the BIOS of your ASUS computer is a delicate process that requires careful preparation to avoid any potential risks or complications. Before you start the update process, it's essential to take a few crucial steps to ensure a smooth and successful upgrade. Firstly, it's vital to backup all your important files and data to prevent any loss in case something goes wrong during the update. Additionally, you need to take measures to prevent static electricity damage by grounding yourself properly. Lastly, you should download the latest BIOS version from the official ASUS website to ensure you have the most up-to-date software. By taking these precautions, you can minimize the risks associated with BIOS updates and ensure your computer continues to run smoothly. Therefore, let's start by discussing the importance of backing up your important files and data before proceeding with the BIOS update.
Backup Important Files and Data
Backing up important files and data is a crucial step before updating your ASUS BIOS. This process ensures that your valuable information is safe and can be restored in case something goes wrong during the update process. Start by identifying the files and data that are essential to you, such as documents, pictures, videos, and music. Next, consider using an external hard drive, USB drive, or cloud storage service to store your backups. External hard drives and USB drives provide a physical copy of your data, while cloud storage services like Google Drive, Dropbox, or OneDrive offer a convenient and accessible way to store and retrieve your files. Additionally, you can also use the built-in backup feature in your operating system, such as Windows Backup or Time Machine on Mac. It's also a good idea to create a system image, which is a complete copy of your computer's hard drive, including the operating system, settings, and applications. This will allow you to restore your computer to its current state in case the BIOS update fails or causes any issues. By taking the time to back up your important files and data, you can ensure a smooth and worry-free BIOS update experience.
Ground Yourself to Prevent Static Electricity Damage
Grounding yourself is a crucial step to prevent static electricity damage when working with electronic components, such as updating the ASUS BIOS. Static electricity can build up in your body and discharge onto sensitive components, causing irreversible damage. To ground yourself, touch a grounded metal object, such as a tap or a door handle, for a few seconds. This allows the static electricity to dissipate from your body to the ground. Alternatively, you can use an anti-static wrist strap or mat, which are specifically designed to ground you and prevent static electricity buildup. These tools are especially useful if you work with electronics frequently. By grounding yourself, you can ensure that you don't accidentally damage your computer's components during the BIOS update process. It's a simple yet effective way to protect your device and prevent costly repairs.
Download the Latest BIOS Version from the Official ASUS Website
To ensure a smooth and successful BIOS update, it is crucial to download the latest BIOS version from the official ASUS website. This step is essential in preparation before updating ASUS BIOS. By visiting the ASUS website, you can find the most recent BIOS version for your specific motherboard model, which is tailored to address any known issues, improve system performance, and add new features. To download the latest BIOS version, start by navigating to the ASUS website and selecting the "Support" or "Downloads" section. From there, enter your motherboard model number or select it from the list of available models. Once you have accessed the download page for your motherboard, look for the "BIOS" or "Firmware" section and click on it. You will then be presented with a list of available BIOS versions, including the latest one. Make sure to download the correct BIOS version for your motherboard, as installing the wrong version can cause system instability or even render your motherboard unusable. Additionally, be sure to read the release notes and instructions provided with the BIOS update to understand the changes and improvements made in the latest version. By downloading the latest BIOS version from the official ASUS website, you can ensure that your motherboard is running with the most up-to-date firmware, which is essential for optimal system performance and stability.
Updating ASUS BIOS Using the Built-in EZ Flash Utility
Updating the BIOS of your ASUS motherboard is a crucial process that can improve the performance, stability, and compatibility of your system. The EZ Flash Utility is a built-in tool that makes this process easy and straightforward. To update your ASUS BIOS using the EZ Flash Utility, you will need to enter the BIOS setup and enable the utility, locate and select the BIOS update file, and follow the on-screen instructions to complete the update process. By following these steps, you can ensure a successful BIOS update and enjoy the benefits of improved system performance. In this article, we will guide you through the process of updating your ASUS BIOS using the EZ Flash Utility, starting with the first step: entering the BIOS setup and enabling the utility.
Enter the BIOS Setup and Enable the EZ Flash Utility
To enter the BIOS setup and enable the EZ Flash utility, start by restarting your computer. As the system boots up, press the key to access the BIOS setup, which is usually F2, F12, or Del, depending on your ASUS motherboard model. You can check your motherboard manual or online documentation to confirm the correct key. Once you're in the BIOS setup, use the arrow keys to navigate to the "Advanced" or "Tool" tab, where you'll find the EZ Flash utility option. Select it using the Enter key, and then choose the "Enable" or "Activate" option to turn it on. Save your changes and exit the BIOS setup by pressing F10 or the designated save and exit key. Your system will now reboot, and you'll be ready to update your ASUS BIOS using the EZ Flash utility. Make sure to have the BIOS update file downloaded and ready to use, as you'll need to select it during the update process.
Locate and Select the BIOS Update File
To locate and select the BIOS update file, start by downloading the latest BIOS version from the ASUS support website. Ensure you select the correct model number and version to avoid any compatibility issues. Once the download is complete, extract the contents of the zip file to a folder on your desktop or a location that's easy to access. The BIOS update file is usually named with a .CAP or .ROM extension, so look for a file with one of these extensions in the extracted folder. Next, navigate to the EZ Flash utility, which can be accessed by pressing the F2 key or the Del key during boot-up, depending on your motherboard model. In the EZ Flash utility, select the "Update BIOS from file" option and then browse to the location where you extracted the BIOS update file. Select the correct file and click "Open" to load it into the utility. The EZ Flash utility will then verify the file and prepare it for updating. Make sure to carefully follow the on-screen instructions to ensure a successful BIOS update.
Follow the On-Screen Instructions to Complete the Update Process
To complete the update process, follow the on-screen instructions carefully. The EZ Flash utility will guide you through the process, and it's essential to follow each step to ensure a successful update. Once you've selected the BIOS file, the utility will begin to update the BIOS. You'll see a progress bar on the screen, indicating the update's progress. Depending on the size of the update, this process may take several minutes to complete. During this time, it's crucial to keep your system powered on and avoid interrupting the update process. If you experience any issues or errors during the update, the utility will notify you, and you may need to restart the process. Once the update is complete, the utility will prompt you to restart your system. Save any open work and click "OK" to restart. Your system will automatically reboot, and the new BIOS will be loaded. After the restart, enter the BIOS setup again to verify that the update was successful. You can check the BIOS version on the main page of the setup utility to confirm that the update was applied correctly.
Troubleshooting Common Issues During ASUS BIOS Update
Updating the BIOS of an ASUS motherboard can be a daunting task, especially for those who are new to the process. While it's essential to keep the BIOS up-to-date to ensure optimal system performance and compatibility with the latest hardware, the update process can sometimes be plagued by issues. In this article, we'll explore some common problems that may arise during an ASUS BIOS update and provide troubleshooting steps to resolve them. We'll cover how to resolve boot loop issues after a BIOS update, fix BIOS update failures due to incorrect file selection, and recover from a failed BIOS update using the ASUS CrashFree BIOS 3 utility. By the end of this article, you'll be equipped with the knowledge to tackle common BIOS update issues and get your system up and running smoothly. If your system is stuck in a boot loop after a BIOS update, don't worry, we've got you covered - let's start by resolving this common issue.
Resolving Boot Loop Issues After BIOS Update
When a BIOS update goes awry, a boot loop can be a frustrating consequence. A boot loop occurs when the system restarts continuously, failing to boot into the operating system. To resolve this issue, start by entering the BIOS settings by pressing the designated key, usually F2, F12, or Del, during boot-up. Once inside, navigate to the "Boot" or "Advanced" tab and look for the "Boot Order" or "Boot Priority" option. Ensure that the correct boot device is selected, such as the SSD or HDD containing the operating system. If the boot order is correct, try resetting the BIOS to its default settings by selecting the "Load Optimized Defaults" or "Reset to Default" option. Save the changes and exit the BIOS settings. If the issue persists, try booting in safe mode by pressing the F8 key during boot-up and selecting "Safe Mode" from the advanced boot options menu. This will allow you to boot into a minimal environment and troubleshoot further. If none of these steps resolve the issue, it may be necessary to perform a BIOS recovery using a USB drive or CD/DVD containing the original BIOS file. This process will restore the BIOS to its previous state, potentially resolving the boot loop issue. In some cases, a boot loop can be caused by a corrupted BIOS file or a hardware issue, so it's essential to verify that the BIOS update was successful and that all hardware components are functioning correctly. By following these steps, you should be able to resolve the boot loop issue and get your system up and running smoothly again.
Fixing BIOS Update Failure Due to Incorrect File Selection
When updating the ASUS BIOS, selecting the correct file is crucial to avoid update failure. If you've encountered a BIOS update failure due to incorrect file selection, don't panic. To fix this issue, start by identifying the correct BIOS file for your ASUS motherboard model. You can find this information on the ASUS support website or in the motherboard manual. Once you have the correct file, restart your computer and enter the BIOS setup by pressing the designated key, usually F2, F12, or Del. Save the current BIOS settings and exit the setup. Then, restart your computer and enter the BIOS setup again. This time, select the "EZ Flash" or "ASUS EZ Flash" option, depending on your motherboard model, and choose the correct BIOS file from the list. Follow the on-screen instructions to complete the update process. If you're still experiencing issues, try resetting the BIOS to its default settings or seeking assistance from ASUS support. Additionally, ensure that the BIOS file is compatible with your motherboard and that you're using the correct update tool. By following these steps, you should be able to successfully update your ASUS BIOS and resolve the update failure issue.
Recovering from a Failed BIOS Update Using the ASUS CrashFree BIOS 3 Utility
Recovering from a failed BIOS update can be a daunting task, but ASUS provides a utility to make the process easier. The ASUS CrashFree BIOS 3 utility is a built-in feature that allows users to recover their system's BIOS in case of a failed update. To use this utility, users need to enter the BIOS setup by pressing the designated key (usually F2 or Del) during boot-up. Once in the BIOS setup, navigate to the "Advanced" tab and select "ASUS CrashFree BIOS 3." From there, follow the on-screen instructions to recover the BIOS. The utility will automatically detect the failed update and restore the BIOS to its previous version. In some cases, users may need to use a USB drive to recover the BIOS. To do this, create a bootable USB drive with the ASUS CrashFree BIOS 3 utility and insert it into the system. Restart the system and enter the BIOS setup. The utility will then guide users through the recovery process. It's essential to note that the ASUS CrashFree BIOS 3 utility only works if the system's BIOS is not completely corrupted. If the BIOS is severely damaged, users may need to contact ASUS support for further assistance. By using the ASUS CrashFree BIOS 3 utility, users can quickly and easily recover from a failed BIOS update and get their system up and running again.