How To Move Valorant To Another Drive
Here is the introduction paragraph: Moving Valorant to another drive can be a daunting task, especially for those who are not tech-savvy. However, with the right guidance, you can successfully relocate your game to a different drive without losing any progress or data. In this article, we will walk you through the process of moving Valorant to another drive, covering essential preparation steps, a step-by-step guide, and troubleshooting common issues that may arise after the move. To ensure a smooth transition, it's crucial to prepare your game and system beforehand. In the next section, we will discuss the necessary preparation steps to take before moving Valorant to another drive.
Preparation Before Moving Valorant to Another Drive
Before moving Valorant to another drive, it's essential to take a few crucial steps to ensure a smooth transition. First, you'll need to backup your game data to prevent any loss of progress or settings. This step is vital, as it will allow you to restore your game to its current state in case anything goes wrong during the transfer process. Additionally, you should check the new drive's compatibility with Valorant to ensure that it meets the game's system requirements. This will prevent any compatibility issues that may arise after the transfer. Finally, it's crucial to close all running Valorant processes to prevent any data corruption or conflicts during the transfer. By taking these steps, you'll be able to move Valorant to another drive with confidence. To start, let's dive into the first step: backing up your game data.
Backup Your Game Data
Before moving Valorant to another drive, it's essential to backup your game data to prevent any potential losses. This step is crucial in ensuring that your progress, settings, and other game-related information are safe and can be easily restored if needed. To backup your game data, start by locating the Valorant game folder, which is usually found in the Riot Games directory. Inside this folder, you'll find various subfolders containing different types of data, such as game saves, settings, and replays. You can copy the entire folder or select specific subfolders to backup, depending on your needs. It's recommended to backup your game data to an external hard drive, cloud storage service, or a separate folder on your computer. This way, you can easily access and restore your data if something goes wrong during the transfer process. Additionally, you can also use the built-in backup feature in Valorant, which allows you to upload your game data to the Riot Games cloud. This feature is convenient and ensures that your data is safe and easily accessible. By taking the time to backup your game data, you can ensure a smooth transition when moving Valorant to another drive and avoid any potential losses or setbacks.
Check the New Drive's Compatibility
Before moving Valorant to another drive, it's essential to check the new drive's compatibility to ensure a smooth transition. First, verify that the new drive has enough free space to accommodate the game's files, which can take up to 20 GB of storage. Next, check the drive's read and write speeds, as Valorant requires a minimum of 5,000 IOPS (Input/Output Operations Per Second) for optimal performance. You can use tools like CrystalDiskMark or HD Tune to test the drive's performance. Additionally, ensure that the new drive is compatible with your computer's operating system and hardware configuration. If you're moving Valorant to an external drive, make sure it's connected via a fast interface like USB 3.0 or Thunderbolt 3. Finally, check the drive's file system, as Valorant requires a drive with a file system that supports large files, such as NTFS or exFAT. By verifying these compatibility factors, you can ensure that your new drive can handle the demands of Valorant and provide a seamless gaming experience.
Close All Running Valorant Processes
To move Valorant to another drive, it's essential to close all running Valorant processes to ensure a smooth and successful transfer. This step is crucial as it prevents any potential conflicts or errors that may arise when moving the game files. To close all running Valorant processes, start by checking the Task Manager. Press the Ctrl + Shift + Esc keys simultaneously to open the Task Manager, or right-click on the taskbar and select "Task Manager" from the context menu. In the Task Manager, navigate to the "Processes" tab and look for any Valorant-related processes, such as "Valorant.exe" or "RiotClientServices.exe". Right-click on each process and select "End task" to terminate them. Additionally, check for any background processes like "RiotClientUx.exe" or "RiotClientUxRender.exe" and end those tasks as well. Once you've closed all running Valorant processes, you can proceed with moving the game files to another drive. It's also a good idea to restart your computer to ensure that all Valorant-related processes are fully terminated before initiating the transfer. By closing all running Valorant processes, you'll be able to move the game files without any issues, ensuring a seamless gaming experience on your new drive.
Step-by-Step Guide to Moving Valorant to Another Drive
Here is the introduction paragraph: Moving Valorant to another drive can be a daunting task, especially for those who are not tech-savvy. However, with the right guidance, you can easily transfer the game to a new drive and free up space on your current one. In this article, we will provide a step-by-step guide on how to move Valorant to another drive. To do this, you will need to locate the Valorant installation folder, copy the Valorant files to the new drive, and update the game's path in the Riot Client. By following these simple steps, you can successfully move Valorant to another drive and enjoy a smoother gaming experience. So, let's get started by locating the Valorant installation folder.
Locate the Valorant Installation Folder
To locate the Valorant installation folder, you can follow these steps. First, open the Run dialog box by pressing the Windows key + R on your keyboard. Then, type "%programdata%" and press Enter. This will open the ProgramData folder, where you can find the Riot Games folder. Inside the Riot Games folder, you'll find the Valorant folder, which contains the game's installation files. Alternatively, you can also find the Valorant installation folder by opening the File Explorer, navigating to the drive where Valorant is installed (usually the C: drive), and looking for the Riot Games folder. Once you've located the Valorant folder, you can verify that it's the correct installation folder by checking for the "Valorant.exe" file inside. If you're still unsure, you can also check the folder's properties to see the installation date and size, which should match the game's installation details. By following these steps, you should be able to locate the Valorant installation folder and proceed with moving the game to another drive.
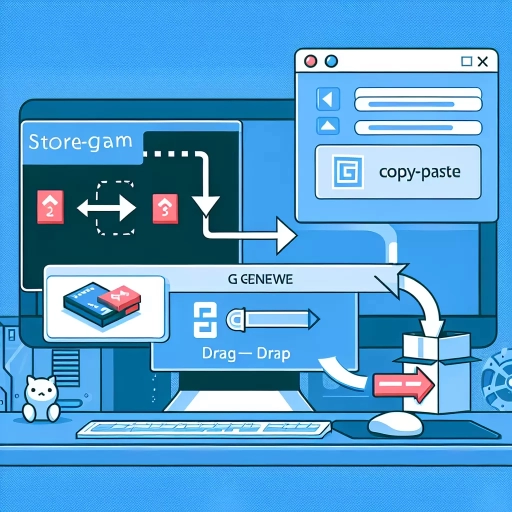
Copy the Valorant Files to the New Drive
To copy the Valorant files to the new drive, navigate to the original installation directory, typically located in the "C:\Riot Games\Valorant" folder. Select all the files and folders within this directory by pressing Ctrl+A, then right-click and choose "Copy" or use the keyboard shortcut Ctrl+C. Next, open the new drive where you want to move Valorant, create a new folder with the same name as the original installation directory, and navigate into it. Right-click inside the new folder and select "Paste" or use the keyboard shortcut Ctrl+V to copy the files. This process may take a few minutes, depending on the size of the game files and the speed of your drives. Once the copying process is complete, you can verify that all the files have been successfully transferred by checking the new folder's contents. Make sure to copy all the files, including the "Valorant.exe" executable, to ensure the game launches correctly from the new location.
Update the Game's Path in the Riot Client
To update the game's path in the Riot Client, navigate to the "Valorant" tab and click on the gear icon next to the "Play" button. This will open the "Game Settings" menu. In the "Game Settings" menu, click on the "Update Game Path" button. A new window will appear, allowing you to select the new installation location for Valorant. Browse to the desired location on your new drive and select the folder where you want to install the game. Once you've selected the new location, click "Update" to save the changes. The Riot Client will then update the game's path to reflect the new installation location. Note that you may need to restart the client for the changes to take effect.
Troubleshooting Common Issues After Moving Valorant
After moving Valorant to a new location on your computer, you may encounter various issues that hinder your gaming experience. These problems can range from path errors in the Riot Client to missing file errors during gameplay, and even require a complete reinstall of the game in some cases. To troubleshoot these common issues, it's essential to understand the possible causes and solutions. In this article, we'll explore three key areas to help you resolve these problems: resolving path errors in the Riot Client, fixing missing file errors during gameplay, and reinstalling Valorant if all else fails. By following these steps, you'll be able to identify and fix the issues that are preventing you from enjoying Valorant. Let's start by examining the first common issue: resolving path errors in the Riot Client.
Resolving Path Errors in the Riot Client
When moving Valorant to another drive, some players may encounter path errors in the Riot Client. To resolve this issue, start by checking the game's installation path in the Riot Client settings. Ensure that the path is correctly pointing to the new location of the game files. If the path is incorrect, update it to reflect the new location. Additionally, try restarting the Riot Client and Valorant to see if the issue persists. If the problem continues, try verifying the game files through the Riot Client. This process will check for any corrupted or missing files and replace them as needed. If none of these steps resolve the issue, try reinstalling the Riot Client and Valorant. This will ensure that all files are properly installed and configured, resolving any path errors. By following these steps, players should be able to resolve path errors in the Riot Client and get back to playing Valorant without any issues.
Fixing Missing File Errors During Gameplay
When encountering missing file errors during gameplay, it's essential to address the issue promptly to avoid further complications. To fix this problem, start by restarting your computer and launching Valorant again to see if the error persists. If the issue remains, try verifying the game files through the Riot Games client. This process will scan for any missing or corrupted files and replace them with the correct ones. If the problem still exists, you may need to reinstall the game or update your graphics drivers to ensure compatibility. Additionally, checking for any conflicts with other programs or background applications can help resolve the issue. In some cases, a simple restart of the game or computer can resolve the problem, so it's always a good idea to try this before attempting more complex troubleshooting steps. By following these steps, you should be able to resolve the missing file errors and get back to playing Valorant without any issues.
Reinstalling Valorant if All Else Fails
If all else fails, reinstalling Valorant might be the most effective solution to resolve any issues that have arisen after moving the game to another drive. Before taking this step, ensure that you have tried all other troubleshooting methods, as reinstalling will erase all your game data, including settings, progress, and any customizations. To begin the reinstallation process, first, uninstall Valorant from the new drive by navigating to the "Control Panel" or "Settings" on your computer, then selecting "Programs and Features" or "Apps & features," and finally, finding and uninstalling Valorant. Next, delete any remaining files or folders related to Valorant from the new drive to ensure a clean slate. After that, download the Valorant installer from the official Riot Games website and follow the installation prompts, selecting the new drive as the installation location. Once the installation is complete, launch Valorant and log in to your account to start playing again. Keep in mind that you may need to reconfigure your game settings and reinstall any customizations, such as crosshairs or keybinds. By reinstalling Valorant, you can start fresh and enjoy a smooth gaming experience on your new drive.