How To Draw Palm Trees
Palm trees are a staple of tropical landscapes, and their unique shape and structure make them a popular subject for artists. Drawing a palm tree can be a fun and rewarding experience, but it requires some understanding of the tree's basic structure and some practice to get it right. To help you get started, this article will guide you through the process of drawing a palm tree, from understanding its basic structure to adding the final details. We'll begin by exploring the basic structure of a palm tree, including its trunk, leaves, and crown. This will provide a solid foundation for your drawing and help you to create a realistic and proportionate palm tree. By the end of this article, you'll be able to draw a beautiful and lifelike palm tree that will transport you to a tropical paradise. So, let's start by understanding the basic structure of a palm tree.
Understanding the Basic Structure of a Palm Tree
Palm trees are one of the most recognizable and iconic plants in the world, with over 2,600 species spread across the globe. Despite their ubiquity, many people are unfamiliar with the basic structure of a palm tree. Understanding the fundamental components of a palm tree is essential for identifying and appreciating these incredible plants. To gain a deeper understanding of palm trees, it's crucial to identify the trunk, leaves, and roots, which form the foundation of the tree's structure. Additionally, recognizing the different types of palm trees and observing their proportions and symmetry can provide valuable insights into their unique characteristics. By examining these key aspects, you'll be well on your way to becoming a palm tree expert. So, let's start by taking a closer look at the trunk, leaves, and roots of a palm tree.
Identifying the Trunk, Leaves, and Roots
The trunk, leaves, and roots are the three main components of a palm tree, each playing a vital role in its growth and survival. The trunk, also known as the stem, is the vertical structure that supports the entire tree, providing a sturdy base for the leaves and roots to grow. It is typically thick and fibrous, with a smooth or rough texture, depending on the species. The trunk can be straight or curved, and its height can vary greatly, from a few feet to over 100 feet. The leaves, also known as fronds, are the green, flat structures that grow from the top of the trunk, providing shade, food, and oxygen for the tree. They are usually long and narrow, with a feathery or fan-shaped appearance, and can be arranged in a variety of patterns, such as a crown or a spiral. The roots, on the other hand, are the underground structures that anchor the tree and absorb water and nutrients from the soil. They can be shallow or deep, depending on the species, and can spread out in all directions, forming a network of fine, branching fibers. By identifying these three components, you can gain a deeper understanding of the palm tree's structure and function, and develop a more accurate and detailed drawing.
Recognizing the Different Types of Palm Trees
Palm trees are incredibly diverse, with over 2,600 species spread across the globe. To accurately draw a palm tree, it's essential to recognize the different types, each with its unique characteristics. The Areca palm, also known as the Dypsis lutescens, is a popular ornamental palm with feathery leaves and a slender trunk. The Coconut palm, or Cocos nucifera, is one of the most recognizable palm species, with its tall, straight trunk and large, flat leaves. The Date palm, or Phoenix dactylifera, is known for its distinctive, feathery leaves and edible fruit. The Palmetto palm, or Sabal palmetto, is a small, shrub-like palm with large, rounded leaves. The Royal palm, or Roystonea regia, is a majestic palm with a tall, straight trunk and large, feathery leaves. By understanding the unique characteristics of each palm species, you can create a more accurate and detailed drawing. Additionally, recognizing the different types of palm trees can help you to better capture their texture, shape, and overall appearance, resulting in a more realistic and engaging drawing.
Observing the Proportions and Symmetry
Observing the proportions and symmetry of a palm tree is crucial in capturing its essence in your drawing. Start by noting the overall shape of the tree, taking into account its height, width, and the proportions of its different parts. A typical palm tree has a tall, slender trunk that tapers slightly as it rises, with a rounded or oval-shaped crown of leaves at the top. The trunk usually makes up about one-third to one-half of the tree's total height, while the crown takes up the remaining portion. Pay attention to the symmetry of the tree, as most palm trees have a symmetrical or near-symmetrical arrangement of leaves and branches. The leaves themselves are usually long and slender, with a feathery or fan-shaped appearance, and are arranged in a spiral pattern along the stem. By carefully observing and rendering these proportions and symmetries, you can create a drawing that accurately captures the unique character of a palm tree.
Sketching the Palm Tree's Trunk and Leaves
Sketching a palm tree can be a fun and rewarding experience, especially when you focus on the intricate details of its trunk and leaves. To create a realistic and visually appealing palm tree, it's essential to pay attention to the proportions, texture, and patterns of the trunk, as well as the arrangement and shape of the leaves. In this article, we'll explore three key techniques for sketching a palm tree's trunk and leaves: using reference images for accurate proportions, creating texture and patterns on the trunk, and sketching the leaves and their arrangement. By mastering these techniques, you'll be able to create a stunning and lifelike palm tree that captures the beauty of this iconic plant. To start, let's take a closer look at the importance of using reference images for accurate proportions.
Using Reference Images for Accurate Proportions
When drawing a palm tree, using reference images is essential for achieving accurate proportions. Reference images provide a visual guide to help you measure and draw the different parts of the palm tree in proportion to each other. Start by collecting reference images of palm trees from various angles and lighting conditions. Observe the overall shape and proportions of the tree, taking note of the relationship between the trunk, leaves, and crown. Measure the proportions of the tree by dividing it into sections, such as the trunk, mid-section, and crown. Use a pencil to lightly draw a series of lines and shapes to help you block in the proportions of the tree. For example, draw a vertical line to indicate the center of the trunk, and then add horizontal lines to mark the top and bottom of the mid-section. Use a ruler or measuring tool to ensure that your lines are straight and accurate. As you draw, continually refer back to your reference images to ensure that your proportions are accurate. Pay particular attention to the shape and size of the leaves, as these can be tricky to draw in proportion. By using reference images and taking the time to measure and draw the different parts of the palm tree, you can create a drawing that is both visually appealing and anatomically correct.
Creating Texture and Patterns on the Trunk
To create texture and patterns on the trunk, start by adding a series of horizontal lines that follow the natural curve of the trunk. These lines should be spaced evenly apart and vary in thickness to give the trunk a sense of depth and dimension. Next, add a series of vertical lines that intersect with the horizontal lines, creating a grid-like pattern. This will help to give the trunk a sense of texture and roughness. You can also add some diagonal lines to suggest the natural fibers of the palm tree's trunk. To add some visual interest, you can also include some knots or other imperfections on the trunk. These can be suggested by adding some small circles or ovals to the trunk, and then adding some lines to indicate the texture and pattern of the knot. Finally, you can add some shading to the trunk to give it a sense of depth and dimension. This can be done by adding some gentle hatching lines that follow the curve of the trunk, and then adding some deeper shading to the crevices and grooves. By following these steps, you can create a realistic and detailed texture and pattern on the trunk of your palm tree.
Sketching the Leaves and Their Arrangement
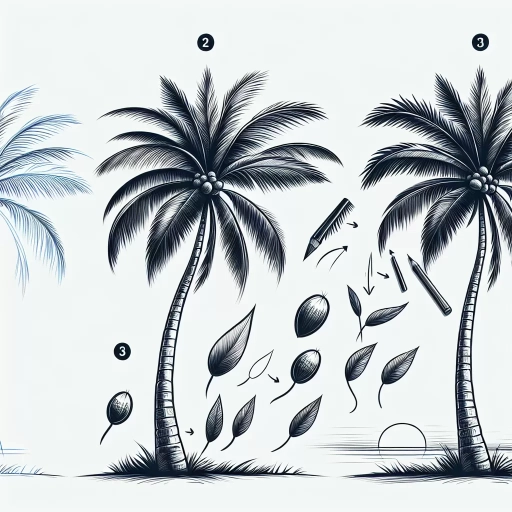
Sketching the leaves and their arrangement is a crucial step in drawing a realistic palm tree. Start by sketching the overall shape of the palm fronds, which are typically long and curved, with a feathery texture. The leaves are usually arranged in a spiral pattern, with the oldest leaves at the bottom and the newest at the top. To capture this arrangement, draw a series of curved lines that radiate from the center of the trunk, each one slightly overlapping the one below it. The leaves should be more densely packed at the top of the tree, with more space between them towards the bottom. Pay attention to the shape and size of the leaves, as they can vary depending on the type of palm tree you are drawing. Some palms have long, slender leaves, while others have shorter, more rounded ones. To add depth and dimension to your drawing, vary the thickness and texture of the leaves, with the older leaves being more worn and frayed. You can also add some movement to your drawing by sketching a few leaves that are bent or curved, as if they are being blown by the wind. By carefully sketching the leaves and their arrangement, you can create a realistic and visually appealing palm tree that captures the beauty and elegance of these iconic trees.
Adding Details and Refining the Drawing
Here is the introduction paragraph: When it comes to creating a realistic and detailed drawing, there are several key elements to consider. One of the most important aspects is adding details and refining the drawing to bring it to life. This can be achieved by adding shading and depth to the trunk and leaves, creating a realistic environment and background, and refining the lines and adding final details. By incorporating these techniques, artists can create a drawing that is not only visually appealing but also highly realistic. In this article, we will explore these techniques in more detail, starting with the importance of adding shading and depth to the trunk and leaves, which can make or break the overall realism of the drawing.
Adding Shading and Depth to the Trunk and Leaves
Adding shading and depth to the trunk and leaves of your palm tree drawing can elevate it from a simple outline to a more realistic and visually appealing piece of art. To start, use a range of pencils, from HB to 6B, to create varying degrees of shading on the trunk. Begin by adding gentle, curved lines to suggest the texture of the bark, gradually increasing the pressure and darkness of the lines as you move towards the base of the trunk. This will create a sense of depth and dimensionality. Next, focus on the leaves, using a combination of hatching and cross-hatching techniques to create a soft, feathery texture. Start by adding light, gentle strokes to the edges of the leaves, gradually building up to darker, more defined lines towards the center. Be sure to leave some areas of the leaves unshaded to create a sense of highlights and depth. To add even more depth and dimension to your palm tree, consider adding some subtle shading to the background, using a soft pencil to create a gentle gradient that suggests the presence of sky or foliage behind the tree. By carefully balancing light and dark, you can create a sense of atmosphere and depth that draws the viewer's eye into the drawing.
Creating a Realistic Environment and Background
Creating a realistic environment and background for your palm tree drawing is crucial in bringing the entire scene to life. To achieve this, start by considering the natural habitat of palm trees, which often thrive in tropical or coastal areas. Think about the colors and textures that are commonly found in these environments, such as the warm beige of sandy beaches, the soft greens of lush foliage, or the deep blues of a clear sky. Use a range of pencils or colored pencils to block in the basic shapes and colors of the background, gradually building up layers of depth and dimension. Consider adding subtle details like the gentle curve of a distant hill, the soft ripples of a lake, or the delicate patterns of a sunset. As you work, pay attention to the way the background interacts with your palm tree, using the negative space around the tree to create a sense of depth and atmosphere. By carefully crafting a realistic environment and background, you can transport your viewer to a tranquil oasis, making your palm tree drawing feel more immersive and engaging.
Refining the Lines and Adding Final Details
Refining the lines and adding final details is a crucial step in creating a realistic and visually appealing palm tree drawing. To refine the lines, start by reviewing your drawing and identifying any areas where the lines may be wobbly or uneven. Use a fine-tip pen or a sharp pencil to carefully re-draw these lines, paying close attention to the subtle curves and contours of the palm fronds and trunk. Next, focus on adding final details such as the texture of the trunk, the veins on the leaves, and the subtle ridges on the palm fronds. Use a range of line weights and hatching techniques to create depth and dimension in your drawing. For example, you can use thicker lines to suggest the rough texture of the trunk, and finer lines to indicate the delicate veins on the leaves. Additionally, consider adding some subtle shading to enhance the overall depth and dimension of your drawing. By refining the lines and adding final details, you can take your palm tree drawing from a simple sketch to a stunning work of art that captures the beauty and elegance of these iconic trees.