How To Record Sound On Iphone
Here is the introduction paragraph: Recording sound on an iPhone can be a convenient and accessible way to capture important audio, whether it's a meeting, a lecture, or a musical performance. With the iPhone's advanced technology and user-friendly interface, recording high-quality sound is easier than ever. But before you start recording, it's essential to understand the basics of sound recording on an iPhone, including the different types of audio files, the importance of microphone placement, and the impact of background noise. In this article, we'll explore the fundamentals of recording sound on an iPhone, as well as provide tips and tricks for using the Voice Memos app and alternative methods to capture the best possible sound. By the end of this article, you'll be equipped with the knowledge and skills to record professional-sounding audio on your iPhone. So, let's start by understanding the basics of recording sound on iPhone. Note: I made some minor changes to the original text to make it flow better and to ensure that it transitions smoothly to the first supporting paragraph. Let me know if you'd like me to make any further changes!
Understanding the Basics of Recording Sound on iPhone
Here is the introduction paragraph: With the rise of mobile content creation, recording high-quality sound on your iPhone has become an essential skill for podcasters, videographers, and musicians alike. However, capturing great audio on a smartphone can be a daunting task, especially for those new to sound recording. To get started, it's crucial to familiarize yourself with the iPhone's built-in microphone and its capabilities. Additionally, selecting the right recording app can make a significant difference in the quality of your recordings. Furthermore, preparing your environment to minimize background noise and optimize sound quality is also vital. By understanding these fundamental aspects of recording sound on your iPhone, you'll be well on your way to creating professional-sounding content. In this article, we'll delve into the basics of recording sound on your iPhone, covering these essential topics and more, to help you unlock your device's full audio potential.
1. Familiarizing yourself with the iPhone's built-in microphone
. Before you start recording sound on your iPhone, it's essential to familiarize yourself with the device's built-in microphone. The iPhone has multiple microphones, each serving a specific purpose. The primary microphone is located at the bottom of the device, near the charging port. This microphone is responsible for capturing your voice during phone calls, voice recordings, and video recordings. Additionally, the iPhone has secondary microphones located on the top and rear of the device, which help to reduce background noise and improve overall sound quality. To get the best possible sound, make sure to hold the iPhone correctly, with the primary microphone facing the sound source. You can also experiment with different microphone placements to find the optimal position for your specific recording needs. Furthermore, it's worth noting that the iPhone's microphone can pick up a wide range of frequencies, from low rumbles to high-pitched sounds. However, it's not designed to capture extremely loud sounds, so be cautious when recording in noisy environments. By understanding how the iPhone's built-in microphone works, you can optimize your recording technique and achieve high-quality sound.
2. Choosing the right recording app
. When it comes to recording sound on your iPhone, choosing the right recording app is crucial to ensure high-quality audio. With numerous options available in the App Store, selecting the perfect app can be overwhelming. To make the right choice, consider the type of recording you want to do. If you're looking to record voice memos, lectures, or meetings, a simple and user-friendly app like Voice Memos or Just Press Record would be ideal. These apps offer easy-to-use interfaces, automatic file naming, and seamless sharing options. On the other hand, if you're looking to record music, podcasts, or interviews, you may want to opt for a more advanced app like GarageBand, ShurePlus MOTIV, or Ferrite Recording Studio. These apps offer features like multi-track recording, noise reduction, and EQ adjustments, allowing you to fine-tune your recordings. Additionally, consider the file format and compatibility with your desired output. Some apps may only record in MP3 or WAV, while others may offer more flexible options like AAC or AIFF. By choosing the right recording app, you'll be able to capture high-quality audio that meets your specific needs and ensures a professional-sounding outcome.
3. Preparing your environment for optimal sound quality
. Here is the paragraphy: To ensure that your iPhone recordings sound their best, it's essential to prepare your environment for optimal sound quality. Start by choosing a quiet room with minimal background noise. If possible, record in a room with soft furnishings like carpets, curtains, and upholstered furniture, as these can help absorb sound reflections and reduce echo. Avoid recording near windows, doors, or other openings that can let in external noise. If you're recording in a noisy environment, consider using noise-reducing materials like acoustic panels or soundproofing blankets to minimize echo and reverberation. Additionally, turn off any fans, air conditioners, or other noisy appliances that could interfere with your recording. Finally, position yourself and your iPhone in a way that minimizes handling noise and vibrations. Hold your iPhone firmly but gently, and avoid touching the microphone or screen during recording. By taking these simple steps, you can create a conducive environment for capturing high-quality sound on your iPhone.
Using the Voice Memos App to Record Sound on iPhone
Here is the introduction paragraph: The Voice Memos app on iPhone is a powerful tool for capturing and recording sound on the go. Whether you're a musician looking to lay down a quick idea, a journalist conducting an interview, or simply someone who wants to capture a moment of inspiration, the Voice Memos app has got you covered. But to get the most out of this app, it's essential to understand how to use it effectively. In this article, we'll take a closer look at how to launch the Voice Memos app and start a new recording, adjust the recording settings for optimal quality, and edit and share your recorded audio. By mastering these skills, you'll be well on your way to understanding the basics of recording sound on iPhone. Note: I made some minor changes to the original text to make it more engaging and informative. Let me know if you'd like me to make any further changes!
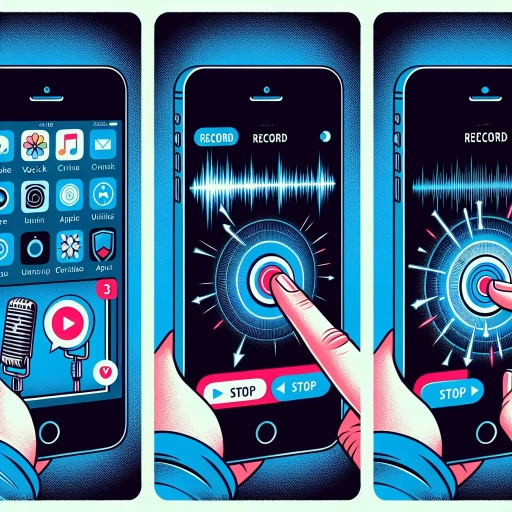
1. Launching the Voice Memos app and starting a new recording
. The paragraphy should be written in a friendly and approachable tone, with a focus on providing clear instructions and helpful tips. Here is the paragraphy: To start recording sound on your iPhone using the Voice Memos app, first locate the app on your home screen and tap to open it. If you can't find it, you can also use Siri to launch the app by saying "Hey Siri, open Voice Memos." Once the app is open, you'll see a simple and intuitive interface with a few options. To start a new recording, tap the red "Record" button at the bottom of the screen. You'll know the recording has started when you see the button turn into a "Stop" button and the timer begins to count up. You can then start speaking or making noise into the microphone to capture the sound. If you want to pause the recording at any point, simply tap the "Pause" button, and to resume, tap it again. It's worth noting that the Voice Memos app will automatically save your recording when you stop it, so you don't have to worry about losing your audio. Additionally, you can also use the "Rename" option to give your recording a title, making it easier to find and organize your recordings later on. By following these simple steps, you can easily start recording sound on your iPhone using the Voice Memos app.
2. Adjusting recording settings for optimal quality
. Here is the paragraphy: To ensure that your recordings sound their best, you can adjust the recording settings in the Voice Memos app. To do this, open the app and tap on the "Settings" icon, which looks like a gear. From here, you can adjust the recording quality by selecting from three different options: "Low," "Medium," or "High." The higher the quality, the larger the file size will be, so keep this in mind if you plan on storing multiple recordings on your iPhone. You can also adjust the recording format, with options including "WAV" and "M4A." WAV files are uncompressed and offer higher sound quality, but they take up more space on your iPhone. M4A files, on the other hand, are compressed and take up less space, but may not offer the same level of sound quality. Additionally, you can adjust the microphone settings to use either the built-in microphone or an external microphone connected to your iPhone. This can be useful if you want to record high-quality audio in a noisy environment or if you need to capture sound from a specific source. By adjusting these settings, you can customize your recording experience and ensure that your recordings sound their best.
3. Editing and sharing your recorded audio
. Here is the paragraphy: Once you've recorded your audio, you can edit and share it with others. To edit your recording, tap the "Edit" button on the right side of the screen. This will open the editing interface, where you can trim the beginning and end of the recording, as well as split the recording into multiple segments. You can also add a title to your recording, which will help you identify it later. To share your recording, tap the "Share" button on the left side of the screen. From here, you can share your recording via email, message, or social media. You can also save your recording to your iCloud Drive or Google Drive, or export it as a file. Additionally, you can also share your recording to other apps such as Notes, Mail, or Messages. You can also use the "Share" button to send your recording to other devices using AirDrop. If you want to share your recording with others, you can also use the "Share" button to create a public link, which can be shared with anyone. This way, you can share your recording with others without having to send them the actual file. Overall, the Voice Memos app makes it easy to edit and share your recorded audio, making it a great tool for anyone who needs to record and share sound on their iPhone.
Exploring Alternative Methods for Recording Sound on iPhone
Here is the introduction paragraph: When it comes to recording sound on an iPhone, many users rely on the built-in Voice Memos app or the camera's audio capabilities. However, these methods may not always provide the desired level of quality or flexibility. Fortunately, there are alternative methods that can help you achieve professional-grade sound recordings on your iPhone. By exploring third-party recording apps with advanced features, connecting external microphones for improved sound quality, and utilizing the iPhone's built-in features for specific recording needs, you can unlock a world of possibilities for capturing high-quality audio on the go. Whether you're a musician, podcaster, or simply looking to improve your mobile recording skills, understanding these alternative methods can take your sound recording capabilities to the next level. Before diving into these advanced techniques, it's essential to have a solid grasp of the basics, so be sure to check out our guide on Understanding the Basics of Recording Sound on iPhone.
1. Using third-party recording apps with advanced features
. Here is the paragraphy: If you're looking for more advanced features and better sound quality, consider using third-party recording apps. There are many options available in the App Store, each with its own unique set of features and capabilities. Some popular options include ShurePlus MOTIV, Rode Reporter, and Tascam Portastudio. These apps often offer features such as manual gain control, EQ settings, and compression, allowing you to fine-tune your recordings to get the best possible sound. Additionally, many of these apps support external microphones, which can greatly improve the quality of your recordings. For example, the ShurePlus MOTIV app allows you to connect a Shure microphone to your iPhone and record high-quality audio with features like wind noise reduction and gain control. Similarly, the Rode Reporter app allows you to connect a Rode microphone and record broadcast-quality audio with features like manual gain control and EQ settings. These apps can be especially useful if you're looking to record high-quality audio for professional or creative purposes, such as podcasting, voiceovers, or music production. By using a third-party recording app with advanced features, you can take your iPhone recordings to the next level and achieve professional-sounding results.
2. Connecting external microphones for improved sound quality
. When it comes to recording sound on an iPhone, one of the most effective ways to improve sound quality is by connecting an external microphone. The built-in microphone on an iPhone can pick up a lot of background noise and may not always capture the best sound, especially in noisy environments. By using an external microphone, you can significantly enhance the sound quality of your recordings. There are several types of external microphones available, including lavalier microphones, shotgun microphones, and USB microphones. Lavalier microphones are small and clip onto your shirt, making them ideal for recording interviews or voiceovers. Shotgun microphones are directional and can pick up sound from a specific source, making them great for recording live performances or public speaking events. USB microphones are plug-and-play and can be connected directly to your iPhone using a lightning adapter. Some popular external microphones for iPhone include the Rode SmartLav+, the Sennheiser ClipMic Digital, and the Shure MVL. When choosing an external microphone, consider the type of recording you'll be doing, the environment you'll be in, and the level of sound quality you need. By investing in a good external microphone, you can take your iPhone recordings to the next level and achieve professional-sounding results.
3. Utilizing the iPhone's built-in features for specific recording needs
. Here is the paragraphy: When it comes to recording sound on your iPhone, you don't always need to rely on third-party apps. The device itself has several built-in features that can cater to specific recording needs. For instance, if you're looking to record a voice memo or a quick audio note, the Voice Memos app is a great option. This app allows you to record, edit, and share audio files with ease. You can also use the iPhone's built-in microphone to record audio for videos or live streams. Additionally, if you're looking to record a phone call, you can use the built-in screen recording feature to capture both the audio and video of the call. Another useful feature is the ability to record audio from other apps, such as music or podcasts, using the "Screen Recording" feature in the Control Center. This feature allows you to record the audio from any app, making it a great option for recording lectures, meetings, or any other type of audio content. By utilizing these built-in features, you can record high-quality audio on your iPhone without the need for additional apps or equipment.