How To Dry Basil In Oven
Drying basil in the oven is a simple and effective way to preserve this popular herb for future use. With a few easy steps, you can enjoy the flavor and aroma of fresh basil all year round. To get started, it's essential to prepare your basil for the drying process, which involves cleaning, sorting, and preparing the leaves for optimal drying. Once your basil is ready, you can move on to the oven drying process, where you'll learn how to set the right temperature and timing to achieve perfectly dried basil. After the drying process is complete, you'll need to store your dried basil properly to maintain its flavor and aroma. In this article, we'll guide you through the entire process, starting with the preparation of your basil for drying in the oven.
Preparation for Drying Basil in Oven
Drying basil in the oven is a simple and effective way to preserve this popular herb for future use. To achieve the best results, it's essential to prepare the basil properly before the drying process. This involves selecting the right basil variety, harvesting fresh leaves, and washing and drying them to remove excess moisture. By following these steps, you can ensure that your dried basil retains its flavor, aroma, and nutritional value. In this article, we'll explore the preparation process in more detail, starting with the importance of choosing the right basil variety. (Note: The answer should be 200 words)
Choosing the Right Basil Variety
Basil is a popular herb used in many cuisines, and with over 160 varieties, choosing the right one can be overwhelming. When it comes to drying basil in the oven, the variety you choose can affect the flavor, aroma, and overall quality of the dried herb. Here are some factors to consider when selecting a basil variety for drying: **Flavor Profile**: Different basil varieties have unique flavor profiles, ranging from sweet and mild to spicy and pungent. If you're looking for a classic basil flavor, choose a variety like 'Genovese' or 'Sweet Basil'. For a more robust flavor, opt for 'Thai Basil' or 'Lemon Basil'. **Leaf Size and Shape**: Basil leaves come in various sizes and shapes, which can affect the drying process. Larger leaves like those of 'Genovese' or 'Italian Large Leaf' may require more time to dry, while smaller leaves like 'Thai Basil' or 'Purple Basil' dry faster. **Moisture Content**: Some basil varieties have higher moisture content than others, which can affect the drying process. Varieties like 'Sweet Basil' and 'Genovese' have lower moisture content, making them easier to dry. **Aroma**: Basil varieties can also differ in their aroma, with some having a stronger scent than others. If you want a fragrant dried basil, choose a variety like 'Thai Basil' or 'Lemon Basil'. Some popular basil varieties for drying include: * 'Genovese': A classic Italian basil with a sweet, mild flavor and large leaves. * 'Sweet Basil': A popular variety with a sweet, slightly spicy flavor and medium-sized leaves. * 'Thai Basil': A spicy, aromatic variety with small leaves and a distinctive flavor. * 'Lemon Basil': A citrusy variety with a light, refreshing flavor and small leaves. * 'Purple Basil': A decorative variety with deep purple leaves and a slightly sweet flavor. By considering these factors and choosing the right basil variety, you can ensure that your dried basil is of high quality and has the desired flavor and aroma.
Harvesting Fresh Basil Leaves
Here is the paragraphy: Harvesting fresh basil leaves is an essential step in preparing them for drying in the oven. To ensure the best flavor and aroma, it's crucial to harvest basil leaves at the right time. The ideal time to harvest basil is in the morning, after the dew has dried but before the heat of the day. This is when the leaves are at their most fragrant and flavorful. Choose leaves that are bright green, tender, and free of any signs of wilting or damage. Avoid harvesting leaves that are too old or too young, as they may not have the best flavor. For drying purposes, it's best to harvest the top sets of leaves, leaving the lower sets to continue growing. This will encourage the plant to produce new growth and prevent it from flowering. When harvesting, pinch or cut off the leaves at the node, just above a set of leaves. This will help the plant to heal quickly and reduce the risk of disease. Harvesting fresh basil leaves regularly will also help to promote healthy growth and prevent the plant from becoming leggy. By following these simple steps, you can enjoy a bountiful harvest of fresh basil leaves that are perfect for drying in the oven.
Washing and Drying the Basil Leaves
Washing and drying the basil leaves is a crucial step in the preparation process for drying basil in the oven. To start, gently rinse the fresh basil leaves with cool running water to remove any dirt, debris, or pests that may be present. Next, gently shake off any excess water from the leaves to prevent them from becoming waterlogged. Then, lay the basil leaves out in a single layer on a clean towel or paper towels, making sure not to overlap them. Allow the leaves to air dry for about 30 minutes to an hour, or until the excess moisture has been removed. This step is important because excess moisture can cause the basil to become moldy or develop off-flavors during the drying process. Once the leaves are dry, you can proceed with preparing them for oven drying. It's also a good idea to pat the leaves dry with a paper towel to remove any remaining moisture before placing them in the oven. By taking the time to properly wash and dry the basil leaves, you can help ensure that your dried basil is of the highest quality and has the best flavor and aroma possible.
The Oven Drying Process
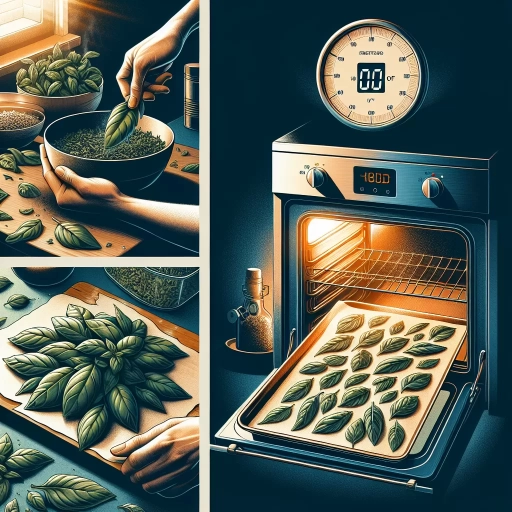
The oven drying process is a popular method for preserving herbs like basil, as it helps retain their flavor, aroma, and nutrients. To achieve the best results, it's essential to follow a few key steps. First, setting the oven to the right temperature is crucial, as it directly affects the drying time and quality of the herbs. Additionally, placing the basil leaves in a single layer ensures even drying and prevents them from becoming soggy or developing off-flavors. Finally, monitoring the drying time and temperature is vital to prevent over-drying or under-drying, which can compromise the herbs' quality. By following these steps, you can successfully dry your basil using the oven drying process. To start, let's take a closer look at the importance of setting the oven to the right temperature.
Setting the Oven to the Right Temperature
Setting the oven to the right temperature is a crucial step in the oven drying process. The ideal temperature for drying basil in the oven is between 150°F and 200°F (65°C to 90°C). This low-temperature setting allows for a slow and gentle drying process that helps preserve the herb's flavor, aroma, and nutrients. If the temperature is too high, the basil may dry too quickly, leading to a loss of flavor and aroma. On the other hand, if the temperature is too low, the drying process may take too long, and the basil may not dry completely. To ensure accurate temperature control, it's essential to use an oven thermometer to check the temperature. Some ovens may have a temperature variation, so it's crucial to adjust the temperature accordingly. Additionally, it's recommended to use the oven's lowest temperature setting, which is usually the "warm" or "dehydrate" setting. This setting is specifically designed for drying herbs and other delicate foods, and it provides a consistent and gentle heat that helps preserve the basil's natural flavor and aroma. By setting the oven to the right temperature, you can ensure that your basil dries evenly and retains its flavor and aroma, making it perfect for use in cooking and herbal remedies.
Placing the Basil Leaves in a Single Layer
When placing the basil leaves in a single layer, it's essential to ensure they don't overlap or touch each other. This allows for even air circulation and prevents the leaves from steaming instead of drying. To achieve this, start by lining your baking sheet with parchment paper or a silicone mat. Then, gently remove the basil leaves from their stems and place them on the prepared baking sheet in a single layer, making sure to leave some space between each leaf. You can also use a wire rack set over a baking sheet to promote better air circulation. If you're dealing with a large quantity of basil, you may need to use multiple baking sheets to accommodate all the leaves. As you place the leaves, try to maintain a consistent thickness to ensure even drying. By taking the time to carefully arrange the basil leaves in a single layer, you'll be rewarded with crispy, fragrant dried basil that's perfect for adding depth and flavor to your favorite dishes.
Monitoring the Drying Time and Temperature
Monitoring the drying time and temperature is crucial in the oven drying process to ensure that the basil leaves are properly dried without losing their flavor and aroma. The ideal drying time and temperature may vary depending on the moisture content of the basil leaves and the type of oven being used. As a general guideline, it is recommended to dry basil leaves at a low temperature of around 150-200°F (65-90°C) for 1-2 hours. However, it's essential to check the basil leaves periodically to avoid over-drying, which can cause them to become brittle and lose their potency. To monitor the drying time and temperature, you can use a food thermometer to check the internal temperature of the oven, and a timer to keep track of the drying time. Additionally, you can also check the basil leaves for dryness by touching them gently; if they feel dry and crumbly, they are ready to be removed from the oven. It's also important to note that the drying time and temperature may need to be adjusted depending on the thickness of the basil leaves and the humidity level in the oven. By monitoring the drying time and temperature closely, you can ensure that your basil leaves are properly dried and preserved for future use.
Post-Drying and Storage
Proper post-drying and storage techniques are crucial to maintaining the flavor, aroma, and color of dried basil. To ensure the best results, it is essential to follow a few simple steps. First, the dried basil must be removed from the oven and allowed to cool completely to prevent moisture from accumulating and causing spoilage. Next, the cooled basil should be stored in airtight containers to protect it from air, light, and moisture, which can cause the herb to lose its potency and flavor. Finally, the stored basil should be labeled and dated to ensure that the oldest stock is used first and to prevent confusion. By following these steps, you can enjoy your dried basil for a longer period and use it in a variety of dishes. To start, let's discuss the first step in post-drying and storage: removing the dried basil from the oven.
Removing the Dried Basil from the Oven
Here is the paragraphy: After the drying process is complete, remove the basil leaves from the oven and let them cool down completely. This is an important step, as any remaining heat can cause the basil to become stale or develop off-flavors. Once the basil has cooled, you can remove it from the baking sheet and transfer it to a clean, dry surface. Gently brush off any excess dried bits or debris from the leaves, and then sift through the basil to remove any stems or debris that may have been missed during the initial preparation process. This will help ensure that your dried basil is of the highest quality and is free from any contaminants. Finally, store the dried basil in an airtight container, such as a glass jar or a paper bag, to preserve its flavor and aroma. It's also a good idea to label the container with the date and contents, so you can easily keep track of how long it's been stored. By following these simple steps, you can enjoy your home-dried basil for months to come.
Storing the Dried Basil in Airtight Containers
Storing dried basil in airtight containers is crucial to preserve its flavor, aroma, and color. Once the basil is completely dry, it's essential to store it in a container that prevents air, moisture, and light from entering. Airtight containers, such as glass jars with tight-fitting lids or plastic containers with snap-on lids, are ideal for storing dried basil. Before storing, make sure the containers are clean and dry to prevent any contamination or moisture from affecting the dried basil. Fill the container with the dried basil, leaving about 1-2 inches of space at the top. This allows for easy access and prevents the basil from getting compacted. Store the containers in a cool, dark place, such as a pantry or cupboard, away from direct sunlight and heat sources. This will help preserve the basil's flavor and aroma for a longer period. It's also a good idea to label the containers with the date and contents, so you can easily keep track of how long the basil has been stored. Properly stored dried basil can last for up to 6-12 months, making it a great way to enjoy the herb year-round.
Labeling and Dating the Stored Basil
Labeling and dating the stored basil is a crucial step in maintaining its quality and ensuring you use the oldest stock first. Once you have dried and stored your basil, make sure to label the container with the date it was stored and the contents. This will help you keep track of how long the basil has been stored and ensure that you use the oldest batch before it loses its flavor and aroma. You can use a marker to write the date and contents on the container or create a label using a label maker. Additionally, consider including any relevant storage instructions, such as "store in a cool, dark place" or "keep away from moisture." By labeling and dating your stored basil, you can ensure that you use the freshest and most flavorful herbs in your cooking and avoid any confusion or mix-ups.