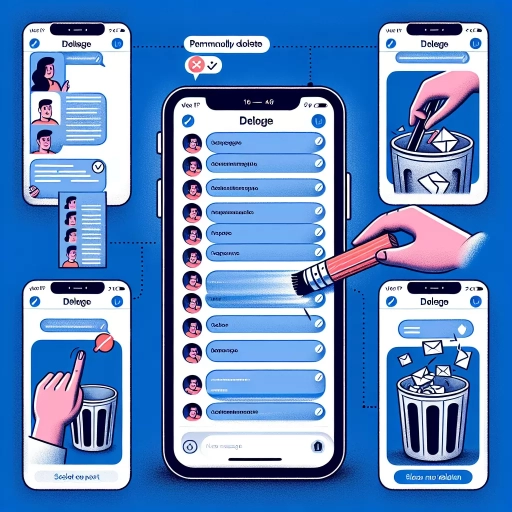
How To Permanently Delete Facebook Messages From Both Sides
Here is the introduction paragraph: Deleting Facebook messages can be a daunting task, especially when you want to remove them permanently from both sides of the conversation. Whether you're looking to declutter your inbox, protect your privacy, or simply get rid of embarrassing conversations, permanently deleting Facebook messages can be a challenge. In this article, we'll explore the intricacies of Facebook's message deletion policy, discuss methods to permanently delete Facebook messages, and provide tips on how to prevent future messages from being stored. But before we dive into the solutions, it's essential to understand how Facebook's message deletion policy works, including what happens to your messages when you delete them and what you can expect from the process. Understanding Facebook's Message Deletion Policy is crucial in taking control of your online conversations and ensuring that your messages are truly gone for good.
Understanding Facebook's Message Deletion Policy
Here is the introduction paragraph: Understanding Facebook's message deletion policy can be a bit tricky, but it's essential to know how the platform handles your conversations. When you delete a message on Facebook, do you know what happens to it? Is it completely erased from the system, or does it linger somewhere in the digital realm? To answer these questions, we'll delve into the nuances of Facebook's message deletion policy, exploring the differences between "delete" and "remove," how the platform stores deleted messages, and the implications of its data retention policy. By grasping these concepts, you'll gain a deeper understanding of how Facebook manages your online interactions. Let's start by examining Facebook's data retention policy, which sets the stage for understanding how deleted messages are handled.
Facebook's Data Retention Policy
Facebook's Data Retention Policy is a set of guidelines that outlines how the platform collects, stores, and manages user data. According to the policy, Facebook retains data for as long as it is necessary to provide its services, comply with legal obligations, and protect its users. This means that even after you delete a message, it may still be stored on Facebook's servers for a certain period. The retention period varies depending on the type of data, with some data being retained for 30 days, while others may be kept for up to 90 days or even longer. For example, Facebook may retain data related to account security and integrity, such as login history and account access attempts, for up to 90 days. On the other hand, data related to advertising and analytics, such as ad clicks and website interactions, may be retained for up to 2 years. It's worth noting that Facebook's Data Retention Policy is subject to change, and users should regularly review the policy to understand how their data is being handled. Additionally, Facebook provides users with tools to manage their data, such as the ability to download a copy of their data and delete their account. However, it's essential to understand that even after deleting an account, some data may still be retained by Facebook for a certain period.
Difference Between "Delete" and "Remove" on Facebook
When it comes to managing messages on Facebook, users often get confused between the "Delete" and "Remove" options. While both actions seem similar, they have distinct implications. The primary difference lies in the scope of deletion. When you "Delete" a message, it removes the message from your inbox and the recipient's inbox, but it does not delete the message from Facebook's servers. This means that Facebook can still access the message, and it may be recoverable through certain means. On the other hand, when you "Remove" a message, it not only deletes the message from your inbox and the recipient's inbox but also removes it from Facebook's servers. This action is more permanent and ensures that the message is completely erased from the platform. Another key difference is that "Remove" is only available for messages that you have sent, whereas "Delete" can be applied to both sent and received messages. Furthermore, when you "Remove" a message, it will also remove any associated attachments, such as images or videos, whereas "Delete" may not necessarily remove these attachments. In summary, if you want to completely erase a message from Facebook, including its attachments, and ensure it is no longer accessible to anyone, including Facebook, you should use the "Remove" option. However, if you only want to remove the message from your inbox and the recipient's inbox, but don't mind if Facebook still has access to it, then "Delete" is sufficient.
How Facebook Stores Deleted Messages
When you delete a message on Facebook, it doesn't necessarily mean it's gone forever. Facebook stores deleted messages in a separate folder called "Message Requests" or "Filtered Messages" for a certain period. This is done to prevent spam and harassment, as well as to allow users to recover deleted messages if needed. When you delete a message, it is moved to this folder, where it remains for a period of 30 days. During this time, you can still recover the message if you need to. However, after 30 days, the message is permanently deleted from Facebook's servers. It's worth noting that even if you delete a message, the recipient may still have a copy of it in their inbox, and it's also possible that Facebook may retain certain metadata about the message, such as the sender and recipient's names, for a longer period. Additionally, if you're using Facebook's "Secret Conversations" feature, which offers end-to-end encryption, deleted messages are not stored on Facebook's servers and are instead deleted from both the sender's and recipient's devices.
Methods to Permanently Delete Facebook Messages
Here is the introduction paragraph: Are you tired of cluttered Facebook inboxes and want to permanently delete Facebook messages? With the constant influx of messages, it can be overwhelming to keep track of conversations. Fortunately, there are several methods to permanently delete Facebook messages, ensuring your online conversations remain private and organized. This article will explore three effective methods to delete Facebook messages, including using Facebook's built-in "delete" feature, deleting messages from the Facebook Messenger app, and utilizing third-party browser extensions. By the end of this article, you'll be able to efficiently manage your Facebook messages and maintain a clutter-free inbox. Let's start by exploring the simplest method: using Facebook's built-in "delete" feature.
Using Facebook's Built-in "Delete" Feature
Here is the paragraphy: Using Facebook's built-in "delete" feature is a straightforward method to remove messages from your inbox. To do this, open the conversation containing the message you want to delete and click on the three dots at the top right corner of the message. From the dropdown menu, select "Delete" or "Remove." This will remove the message from your inbox, but it's essential to note that it will not delete the message from the recipient's inbox. If you want to delete the message from both your and the recipient's inbox, you'll need to use the "Remove for Everyone" feature, which is only available for a limited time after sending the message. To use this feature, follow the same steps as before, but select "Remove for Everyone" instead of "Delete." This will permanently delete the message from both inboxes, but it's crucial to act quickly, as this feature is only available for a short period.
Deleting Messages from the Facebook Messenger App
To delete messages from the Facebook Messenger app, follow these steps. Open the Facebook Messenger app on your device and navigate to the conversation containing the message you want to delete. Long press on the message you want to delete until a menu appears. Tap "Remove" from the menu, then select "Remove for Everyone" to delete the message from both your and the recipient's inbox. Alternatively, you can also select "Remove for You" to delete the message only from your inbox. If you want to delete an entire conversation, tap and hold on the conversation, then select "Delete Conversation" from the menu. Note that deleting a conversation will remove all messages in the conversation, so use this option with caution. Additionally, keep in mind that deleted messages may still be visible to the recipient if they have already seen them or if they have taken a screenshot of the message.
Using Third-Party Browser Extensions to Delete Messages
Using third-party browser extensions is another method to permanently delete Facebook messages. These extensions can be installed on your web browser and provide additional features to manage your Facebook messages. Some popular extensions, such as Facebook Message Cleaner and Delete All Messages, allow you to select and delete multiple messages at once, making the process more efficient. These extensions can also provide options to delete messages based on specific criteria, such as sender, recipient, or date. However, it's essential to be cautious when using third-party extensions, as they may have access to your Facebook account and personal data. Before installing any extension, make sure to read reviews and check the developer's ratings to ensure it's safe and trustworthy. Additionally, be aware that using third-party extensions may violate Facebook's terms of service, and you may risk having your account suspended or terminated. Therefore, use these extensions at your own risk and always prioritize your account's security.
Preventing Future Messages from Being Stored
Preventing future messages from being stored requires a combination of strategies that prioritize user privacy and security. One approach is to utilize secret conversations on Facebook Messenger, which provides end-to-end encryption and allows users to control the duration of message storage. Another method is to enable end-to-end encryption for all Facebook messages, ensuring that only the sender and recipient can access the content. Additionally, setting up a Facebook account with enhanced privacy settings can also help minimize data storage. By implementing these measures, users can significantly reduce the risk of their messages being stored and accessed without their consent. To start, let's explore the first approach: using secret conversations on Facebook Messenger.
Using Secret Conversations on Facebook Messenger
To maintain your privacy on Facebook Messenger, consider using Secret Conversations, a feature that allows you to have end-to-end encrypted chats. This means that only you and the person you're communicating with can read the messages, not even Facebook. To start a Secret Conversation, open a chat with the person you want to converse with, then tap on their name at the top of the screen. From the menu that appears, select "Go to Secret Conversation." You'll know you're in a Secret Conversation when you see a padlock icon in the chat window. Keep in mind that Secret Conversations are device-specific, so if you start a Secret Conversation on your phone, you won't be able to access it on your computer. Additionally, Secret Conversations don't support some features like sending videos, making voice or video calls, or sending GIFs. To prevent future messages from being stored, make sure to delete the conversation when you're done, as Secret Conversations are stored on your device until you delete them. By using Secret Conversations, you can add an extra layer of security and privacy to your Facebook Messenger chats.
Enabling End-to-End Encryption for Facebook Messages
When considering the security and confidentiality of online communications, end-to-end encryption (E2EE) plays a crucial role in safeguarding user privacy. Facebook offers the option to enable E2EE for messages, providing users with an additional layer of security. To do so, users can initiate a "secret conversation" within the Messenger app. This feature ensures that only the communicating parties can read the messages, as the encryption is applied from the sender's device to the recipient's device. No intermediaries, including Facebook itself, can access the content of these encrypted messages. However, it's essential to note that enabling E2EE does not automatically delete previously sent messages, but rather secures future conversations. Furthermore, E2EE only works if both parties have opted-in to use the "secret conversation" feature. Therefore, users seeking to permanently delete Facebook messages from both sides must still take additional steps, such as using the "delete for everyone" feature, which removes the message from all parties' inboxes. Enabling E2EE can be seen as a preventive measure, ensuring that future messages are protected from potential interception or unauthorized access. By combining E2EE with proper message deletion practices, users can maintain greater control over their online communications and minimize the risk of data breaches or message misuse.
Setting Up a Facebook Account with Enhanced Privacy Settings
Setting up a Facebook account with enhanced privacy settings is a crucial step in maintaining control over your online presence. To begin, navigate to the Facebook homepage and click on "Create New Account." Fill in the required information, including your name, email address, and password. Once you've completed the registration process, click on the "Settings" icon, represented by a small gear, and select "Account Settings." From this menu, click on "Privacy" and adjust the settings to control who can see your posts, profile information, and online activity. You can choose to limit visibility to friends only, friends of friends, or the public. Additionally, consider enabling two-factor authentication to add an extra layer of security to your account. This feature requires a verification code sent to your phone or email in addition to your password, making it more difficult for unauthorized users to access your account. Furthermore, review and customize your "Friends" list to ensure that you're only connected with people you trust. You can also use Facebook's built-in features, such as "Friend Lists" and "Restricted," to categorize and limit access to certain groups of people. By taking these steps, you can significantly enhance your Facebook account's privacy settings and reduce the risk of unwanted messages and interactions.