How To Cut Tile
 The process of successful tile cutting lies in the intricate marriage of preparation, technique, and genuine troubleshooting knowledge. Whether you are an experienced tile setter or a DIY enthusiast keen on giving your home a make-over, understanding how to cut tile is a crucial step towards achieving that stellar finish you desire. This article offers step-by-step guidance on the art and science of cutting tile perfectly, every time - transforming your projects from restrictive to architectural masterpieces. We will commence by walking you through the essential tools and materials required in 'Preparation is Key: Essential Tools and Materials for Cutting Tile.' Then, we shall navigate the unique methods to become a savant in 'Mastering the Techniques: Different Methods for Cutting Tile.' Lastly, we will fortify your skills with 'Troubleshooting and Tips: Overcoming Common Challenges and Achieving Professional Results,' arming you with insights to overcome hiccups encountered in this worthy task. As we delve into this informative journey, let us begin by understanding the vital preliminaries involved.
Preparation is Key: Essential Tools and Materials for Cutting Tile
of every successful tile cutting project lies in meticulous preparation. This encompasses selecting the right tile cutter or saw, choosing the proper blade or bit, while prioritizing safety through the use of protective gear and equipment. Not only do these elements ensure a successful outcome, they also guarantee a smooth, efficient, and safe operation, resulting in a finely finished product. The first key piece of the puzzle is choosing the right tile cutter or saw. This critically important tool will play a significant role in the quality of your cuts. It's monumental to align your selection with the type of tile and the scope of the project. Various attributes such as size, power, precision, and the ability to perform straight, diagonal or specialty cuts need to be considered. A proper tile cutter or saw will allow a professional finish, whether you're working on a small DIY project or an extensive commercial job. As we delve deeper into the subject, our first focus will be on how to choose the right tool, ultimately helping you achieve an expert-level finish with every cut.
1. Choosing the Right Tile Cutter or Saw
Choosing the right tile cutter or saw is a crucial element in ensuring a successful tile cutting project. There are numerous types of tile cutting tools that can be found in the market, each with a distinct purpose and function. Two of the most commonly used are tile cutters and tile saws. Tile cutters, perfect for making straight cuts, are easy to use; pressing on the handle makes the hardened wheel score a line on the tile surface, and then apply pressure again to snap the tile along the scored line. The real appeal is portability, with no water, electricity or complicated machinery required, making it ideal for small jobs. However, if you have a large project or need to make circular or irregular cuts, consider using a tile saw, known as a wet saw. This tool utilizes a diamond-encrusted blade cooled by water to make cuts, thereby preventing the blade from overheating and ensuring accurate, smooth cuts. It's ideal for larger tiles and harder materials. Electric tile cutters, on the other hand, offer versatility, boasting both usability and perfect precision. If you are dealing with ceramic tiles, using a manual tile cutter can produce aesthetically pleasing, clean-cut edges. But for more resistant materials such as porcelain or natural stone, an electric cutter is definitely the go-to tool. All in all, the correct choice of tile cutter or saw largely depends on the type and size of tiles you'll be working with, the complexity and size of the job, as well as personal comfort and preference. Therefore, careful pre-assessment of these parameters is highly recommended before the purchase. By choosing the right tile cutter or saw, you can ensure your work is accurate, efficient, and high-quality. You will also minimize the risk of damage or inaccuracies, ultimately saving you both time and money. Remember, a well-prepared craftsman wastes less material and achieves a better finish. So, take the time to choose wisely when considering your tile cutter or saw, as this important decision will significantly impact the rest of your tile cutting project.
2. Selecting the Appropriate Blade or Bit
Selecting the appropriate blade or bit is a key step when preparing to cut tile. The right blade or bit will significantly improve both the quality of the cut and the ease of use, making your job much more comfortable and efficient. The blade of your tile cutter, for instance, needs to be suitable for the type of tile you will be working on. Ceramic tiles generally require a blade that is made with diamond-tipped edges to ensure a smooth and clean cut. On the other hand, tougher materials, such as porcelain or marble tiles, often necessitate a different kind of blade – one that is specially designed for these harder substances. The size of your blade or bit also matters. You should consider the size and layout of your tilework. Larger blades can make long and straight cuts much more easily, while smaller blades are more appropriate for intricate designs or tight corners. Oscillating tool blades, for example, are perfect for making small cutouts or openings in tile. Moreover, bit selection also requires careful attention. Traditional twist drill bits are typically unsuitable for tile work because they can easily crack or break the tile. Instead, you should opt for specialized bits such as diamond-tipped drill bits or carbide-tipped masonry bits that can bore through tile without damaging it. Small-diameter bits (1/4" or smaller) are best for drilling small holes, like those needed for plumbing pipes, while larger bits are ideal for bigger projects like cutting out sections for electrical outlets. For wet cutting applications, you might want to consider using a continuous rim blade which results in a much smoother cut. Ultimately, selecting the right blade or bit isn't just about getting the job done, but also about ensuring the longevity and performance of your tools and the success of your tilework project. In essence, the selection of blade or bit impacts not only the precision of your cuts, but the finish of your tilework as well. Therefore, this step should not be taken lightly. An inappropriate blade can cause chips or jagged edges, thus ruining the aesthetic of your tile design. Conversely, using the appropriate blade or bit enables a cleaner, more accurate cut, and contributes to a more successful project. Take the time to carefully assess and choose your blades or bits before starting a tile cutting project. It would be a waste of effort and resources to begin cutting and realize midway that a different blade would have been optimal. Review your project requirements, the materials you're working with, and the tools you have on hand, and only then decide on the most suitable blades or bits to use.
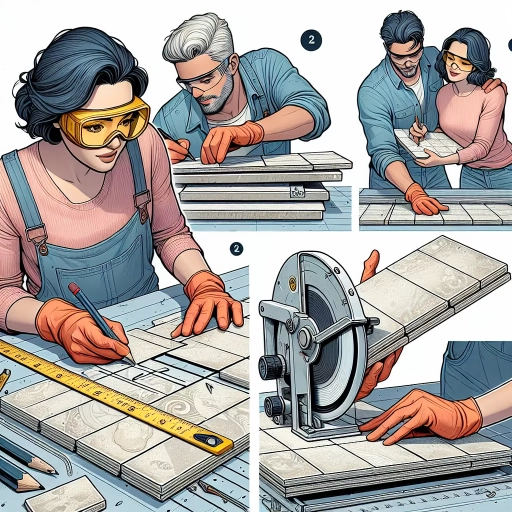
3. Gathering Safety Equipment and Protective Gear
Gathering safety equipment and protective gear is an absolute necessity before starting any cutting task, particularly when working with tile. It might be a seemingly simple job, but it has potential hazards that need effective control. First, you'll need a pair of safety goggles. They are crucial because they protect your eyes from tile fragments that might be flung up during the cutting process. During tile cutting, it's always possible for shards of tile to go flying, and when they do, they can pose a serious threat to your eyes. Therefore, always ensure the goggles are a good fit and, if possible, select those with anti-fog properties for better visibility. Additionally, wearing gloves can save your hands from the occasional slip of sharp tile edges. Always remember to wear thick, well-fitting gloves to protect your fingers and hands during this hectic process. Similarly, make sure to have a pair of heavy-duty boots to protect your feet from falling tile pieces. Your feet, like your hands, may require a strong set of boots with steel toe caps for added safety. Furthermore, consider wearing a dust mask or a respirator. Cutting tiles, particularly the ceramic ones, can create clouds of dust which may cause problems when breathed in. Not protecting your lungs from these particles is a common oversight that can have serious long-term consequences. Hence, a high-quality respirator or a dust mask could protect your lungs from this harmful dust. Another important piece of protective gear to keep nearby is a first aid kit. Accidents can happen despite precautions and, in such cases, quick action might be needed to address a minor injury before it grows into a major one. Lastly, invest in noise-canceling headphones or earplugs. Cutting tiles can get excessively loud, and prolonged exposure to such noise might harm your hearing. Preparation is key in every DIY project, and ensuring your safety is not an exception. Each piece of safety equipment and protective gear has a crucial role to play in preventing potential injuries. Thus, it would be best if you always made the extra effort to arm yourself with the necessary safety gear before commencing on cutting tiles. Keep in mind that the cutting process and the tools used can be versatile, but the importance of safety remains the same. And, perhaps more importantly, always endeavor to use all tools and equipment appropriately. A well-maintained and aptly handled tool is just as important in fostering a safe work environment as the safety equipment is, ensuring that you can finish the task healthily and harm-free.
Mastering the Techniques: Different Methods for Cutting Tile
Mastering the art of cutting tiles is a task necessary for most home improvement projects that require detailed precision and profound knowledge of various techniques. Neglecting this fundamental skill can produce less than perfect outcomes such as inaccurate sizes, ragged edges, and wasted tiles. Fortunately, this article equips the reader with tried and true methods, professional insights, and expert techniques for cutting tiles with ultimate precision. We will be extensively covering three detailed approaches: employing a wet saw for straight cuts and large tiles, using a tile nipper for curved cuts and small tiles, and lastly, utilizing a diamond blade for precise cuts and intricate designs. Our first focus will be on using a wet saw—an incredibly beneficial tool for dealing with straight cuts and large tiles. The wet saw, with its water-cooled diamond blade, reduces friction and cools the tile surface resulting in a perfect and clean straight cut every time. Keep reading as we delve into this technique, providing you the know-how to confidently tackle any tile cutting project.
1. Using a Wet Saw for Straight Cuts and Large Tiles
Using a wet saw for straight cuts and large tiles is an essential skill to master when dealing with tile projects. The wet saw, also known as a tile saw, is one of the most professional and precise tools for cutting tile. It can handle almost all types of tiles, including large format and denser materials like marble, granite, porcelain, and ceramic. This tool has a high-speed diamond blade cooled by water, which helps mitigate dust production and prolong blade life through heat reduction. Wet saws are particularly ideal for larger tiles. Larger tiles can prove to be a problem with some other cutting methods, either due to their size or the risk of uneven breaking. However, the wet saw simplifies the task and ensures a clean, straight cut. It is important to note that while using a wet saw, you should feed the tile into the saw blade straight and maintain a consistent pressure to avoid chipping or cracking the tile. Be sure to align the edge of the tile with the cutting guide or the blade before making the cut. Also, allow the blade to reach full speed before pushing the tile through. Cutting large tiles and producing straight cuts entails more than just skill—it requires the right tools. Mastering the use of a wet saw requires practice but, once achieved, it can significantly elevate the quality of your tile work. Remember, safety is paramount while using a wet saw. Always wear safety glasses, a dust mask, and work gloves to protect yourself from tile shards and dust. Thus, when it comes to straight cuts and large tiles, a wet saw is an unbeatable associate.
2. Employing a Tile Nipper for Curved Cuts and Small Tiles
The art of cutting tiles can be learnt to perfection once you master various techniques; among these, using a tile nipper for curved cuts and small tiles holds great significance. A tile nipper, also known as a tile snip, is an extremely handy tool, perfect for creating curved cuts and trimming small tiles. Unlike larger cutting tools, the tile nipper offers excellent precision and control, making it ideal for jobs that require attention to minute details. To use the tile nipper, you start by making a rough cut with a broader tool and then use the nipper to create the shape you desire. In the case of curved cuts, you make an incision or a series of straight cuts using a tile scribe or cutter, and then you gradually tip off the unwanted sections using the tile nipper. It is helpful to mark your target shape beforehand to ensure that your nibbling does not go overboard. It is also vital to wear safety goggles while doing this, as small fragments of the tile could fly off in the process. For smaller tiles that standard cutters find hard to handle, nippers are particularly useful. They give you the freedom to manually control the size and shape of the cut, which isn't always possible with larger, more mechanized tools. While using the nipper, apply pressure gently and gradually increase it until the tile breaks, instead of applying extreme pressure all at once. This step helps to prevent the tile from breaking into shapes other than your target shape. Moreover, nippers are diverse and come in different types for different applications. For instance, the parrot nipper, with its long nose, is perfect for making intricate, slender cuts, while the compound nipper, with its powerful jaws, is suitable for making thicker cuts. In the world of home renovation and decor, where the requirement for different tile shapes and sizes is always evolving, having mastery over the effective use of a tile nipper is integral. Overall, employing a tile nipper is a technique that requires a fine balance of strength and precision. The ability to create custom cuts and shape tiles to fit even the most convoluted spaces with a tile nipper makes it an essential tool in tile cutting. However, it’s important to remember that practicing using the tile nipper will directly determine the refinement of your tile cutting work. Hence, if you wish to master the different methods of tile cutting, continue practicing with the tile nipper and create works of art out of simple tiles. So gear up and create your masterpiece using an essential companion, the tile nipper!
3. Utilizing a Diamond Blade for Precise Cuts and Intricate Designs
Utilizing a diamond blade for precise cuts and intricate designs is an art in itself, one that demands practice, precision, and patience. As a cutting method, this approach offers significant benefits to workers looking to shape tiles into intricate patterns or produce clean, detailed cuts. Diamond blades, known for their supreme cutting edge, are tipped with small, diamond-coated metal particles. This characteristic gives them an upper hand in slicing, sculping, and carving hard substances like tiles, ceramics, marble, granite, and more. For tile cutting, diamond blades can be used on various tools like a tile saw, angle grinder, a hand saw, or a circular saw. These blades work exceptionally well in handling more delicate tiles, ensuring smooth edges and minimizing potential breakage. When it comes to creating detailed tile designs, it is the diamond blade's precision that makes it a popular choice among professionals and DIY enthusiasts. Their ability to meticulously follow a pre-marked cut line, combined with the operator's steady hand, can transform ordinary tiles into spectacular design elements. However, it's imperative to remember that accuracy and safety are paramount when working with diamond blades. A firm understanding of your tools, gloves, safety glasses, and attention to detail is non-negotiable. Skipping necessary safety measures or rushing the process could lead to unsatisfactory results or, worse, accidents. To achieve the best outcome, it's recommended to practice cutting on spare tiles before embarking on your main project. Mastering the appropriate pressure, angle, and speed at which to use your diamond blade can make the difference between a job well done and a botch-up. Regular maintenance of the diamond blade also plays a crucial part in its performance. With constant use, the diamond tips might get dull, affecting their cutting ability. To sharpen the blade, make a few cuts on an abrasive material – a trick known as "dressing the blade." It helps expose fresh diamond edges, ensuring consistent high-quality cuts. Finally, whether you're performing intricate tile work for a bathroom, kitchen backsplash, or floor, remember that pairing your skills with a diamond blade can lead to stunning results. This cutting technique allows you to show off your craftsmanship, adding a personalized touch to any space. The diamond blade, in the right hands, isn't just a tool; it's a catalyst for creative expression and precision, integral in the art of tile cutting.
Troubleshooting and Tips: Overcoming Common Challenges and Achieving Professional Results
Navigating the ins and outs of professional tiling can be complex and full of numerous challenges. Overcoming them requires expert knowledge in key areas to assure professional results. This article accentuates essential troubleshooting tips that will help you manage common issues effectively and achieve professional results. These foundational tips include how to handle chipped or broken tiles through preventive measures and repair techniques; achieve smooth edges while reducing dust and debris throughout the process; and master the art of cutting tile for specific applications like in backsplash, flooring, and beyond. Starting with chipped or broken tiles, the bane of any tiling project, it is well understood that prevention is always better than cure. However, when damage does occur, knowing how to repair effectively is crucial to maintaining overall aesthetics. Diving deeper, this guide demystifies strategies to prevent and repair tile damage. With these insights, you can secure the longevity and appearance of your tiling projects and overcome potential complications professionally.
1. Dealing with Chipped or Broken Tiles: Prevention and Repair
Even the most experienced tile layer may encounter the challenge of a chipped or broken tile. When this happens, it can mar the beauty of your tile work and become a dangerous hazard if left unattended. Thus, understanding how to deal with this problem is crucial. Prevention is always better than cure, so being cautious while handling and installing tiles is the first step to prevent damages. During tile cutting, avoid dealing roughly with the tiles, especially ceramic ones. The use of proper tools helps too; a quality diamond blade on a wet saw will ensure a clean, smooth cut on a tile every time. However, if you are already faced with a chipped or broken tile, there is no need to panic. This situation is salvageable. Begin by carefully removing the damaged piece without impacting the surrounding tiles. An oscillating tool with a grout removal blade proves handy in this process. Once the broken tile is out, clean and prepare the area for the replacement tile. Apply adhesive on the back of the new tile, press it gently into the cavity left by the damaged tile, and ensure it's level with the neighboring tiles. Then, apply the grout around the tile and allow it to dry. Moreover, it's practical to purchase a few extra tiles during the initial installation to cater to scenarios like this. With these steps, the noticeable blemish of a broken tile can be tastefully repaired, restoring the aesthetic of your tile work. In sum, dealing with chipped or broken tiles boils down to two simple principles: meticulous handling during installation and an efficient repair process. By doing so, you can not only lower the chances of incurring damage but also effectively overcome this common challenge when it arises, resulting in professional, stunning results. Therefore, this tip is a valuable one in the journey of mastering how to cut and lay tiles properly.
2. Achieving Smooth Edges and Reducing Dust and Debris
2. Achieving Smooth Edges and Reducing Dust and Debris
Obtaining perfectly smooth edges and minimizing dust and debris while cutting tiles is vital to maintain precision and cleanliness during the task. Often, jagged edges, dust, and debris generated during tile cutting operations can lead to various challenges. Therefore, achieving smooth edges and reducing the dust and debris significantly determine the final product's aesthetics and quality. To achieve smooth cuts, one should ensure that the cutting blade is sharp, precise, and well-suited to the tile material you are working with. An adequate blade reduces the risk of tile chipping and promotes speed and precision. In most cases, the use of a diamond-tipped blade is recommended, as it can effortlessly cut through various tile types. Also, monitoring the speed at which you cut is equally important. A steady, moderate pace, instead of haste, often results in neater cuts. It's equally essential to maintain the right amount of pressure on the tile; too much pressure might result in the tile cracking, while insufficient pressure might lead to an uneven cut. Concerning dust and debris minimization, a few methods are designed to achieve a more clean and safe working condition. Primarily, adopting wet-saw cutting helps to cool the blade, prevents dust and debris, and provides cleaner cuts. It works by pumping water onto the blade and tile surface to keep them cool and remove the dust. It also helps in extending the blade's lifespan. Alternatively, using a dust collection attachment or extractor that connects directly to the saw can be very efficient in capturing the dust and debris at the source. Using a vacuum or another dust collection system also significantly reduces airborne dust particles. Personal protective equipment, including goggles, masks, and gloves, should be worn to prevent dust and debris from causing harm. Lastly, regular cleaning of the work area using a broom or vacuum cleaner aids in maintaining the workspace's cleanliness and ensuring a smooth workflow, contributing significantly to professional-looking results. In conclusion, achieving smooth edges and reducing dust and debris when cutting tile into various shapes require careful planning and execution. From selecting the right cutting blade to maintaining the appropriate speed and pressure and implementing dust and debris control measures, each stage contributes to the overall product quality. These professional tips and solutions help to avoid common troubles and challenges encountered in tile cutting, leading to efficient, clean, and precise results.3. Cutting Tile for Specific Applications: Backsplash, Flooring, and More
Cutting tile for specific applications such as backsplashes, flooring and more requires unique attention to detail to ensure that the tile fits perfectly in its designated spot and creates the desired aesthetic effect while maintaining material stability. It's essential to understand the different ways of cutting tiles based on their application to avoid common challenges and achieve professional-level results. For a backsplash installation, the cuts may need to be precise around outlets, windows, and cabinets. This demands a high level of accuracy and a good grasp of making different types of cuts such as U-shaped cuts or notched cuts. It's usually best to start from the bottom and work your way up during the backsplash installation. Make sure to measure the distance between the counter and the upper cabinets to get the correct tile size. Use a diamond blade wet saw for the best results as it produces cleaner cuts and reduces tile waste. When it comes to floor tiles, the pieces at the edges of the room typically need to be cut down to fit. Measure the room's dimensions accurately and plan your layout well to minimize the cuts and create a more professional appearance. For larger rooms, a straight cut using a snap cutter or wet saw is recommended. Remember, though, keeping the surface free of debris is crucial to prevent the tiles from chipping during the cutting process. When cutting tiles for specific applications such as countertops, a range of cuts like L-cuts or rectangle cuts may be needed depending on the shape and size of the countertop. You'll also need to cut openings for the sink or cooktop, which involves making curved cuts or irregular shapes. Here again, a wet saw is your best option for clean and precise cuts. It's also important to mention when dealing with various tile types like ceramic, porcelain, or fragile glass tiles, the cutting method might vary. So, understanding the specific characteristics of each type is key to achieving the best results. Ceramic tiles, for example, are easy to cut as they're more brittle, while cutting glass tiles requires a careful and slow technique to prevent shattering or chipping. In contrast, porcelain tiles are harder and denser, hence, they require a wet saw with a special porcelain diamond blade to cut through smoothly. In conclusion, cutting tile for specific applications demands a combination of accurate measurements, careful planning, appropriate tile cutting tools, and an understanding of the particular tile material. With these, you can gradually master the art of cutting tile for any application, overcome common challenges, and give your tile work a professional edge.